What’s one thing that can make a great pair of pants into an awesome pair? Pockets!! Pockets make everything better, right?
Today I’ve got a free pocket pattern and tutorial for adding inseam pockets to the new Freestyle Harem Pants, Capris & Shorts (which are currently available in the Girl’s Bundle UP sale and will be in the EYMM shop after Feb. 16).

Even better? This free multi-size inseam pocket piece works well with many other patterns, including the California Dress, Sasha’s and Natasha’s Dresses, the Women’s Off the Shoulder Dress, Zander’s Hoodie, the His & Hers Asymmetrical Hoodie, and the simple skirt version of Kenzie’s Party Dress. The method to add them will be the same, but pocket placement will vary with different patterns.
Okay, let’s get started on adding pockets to the Freestyle Harem Pants.
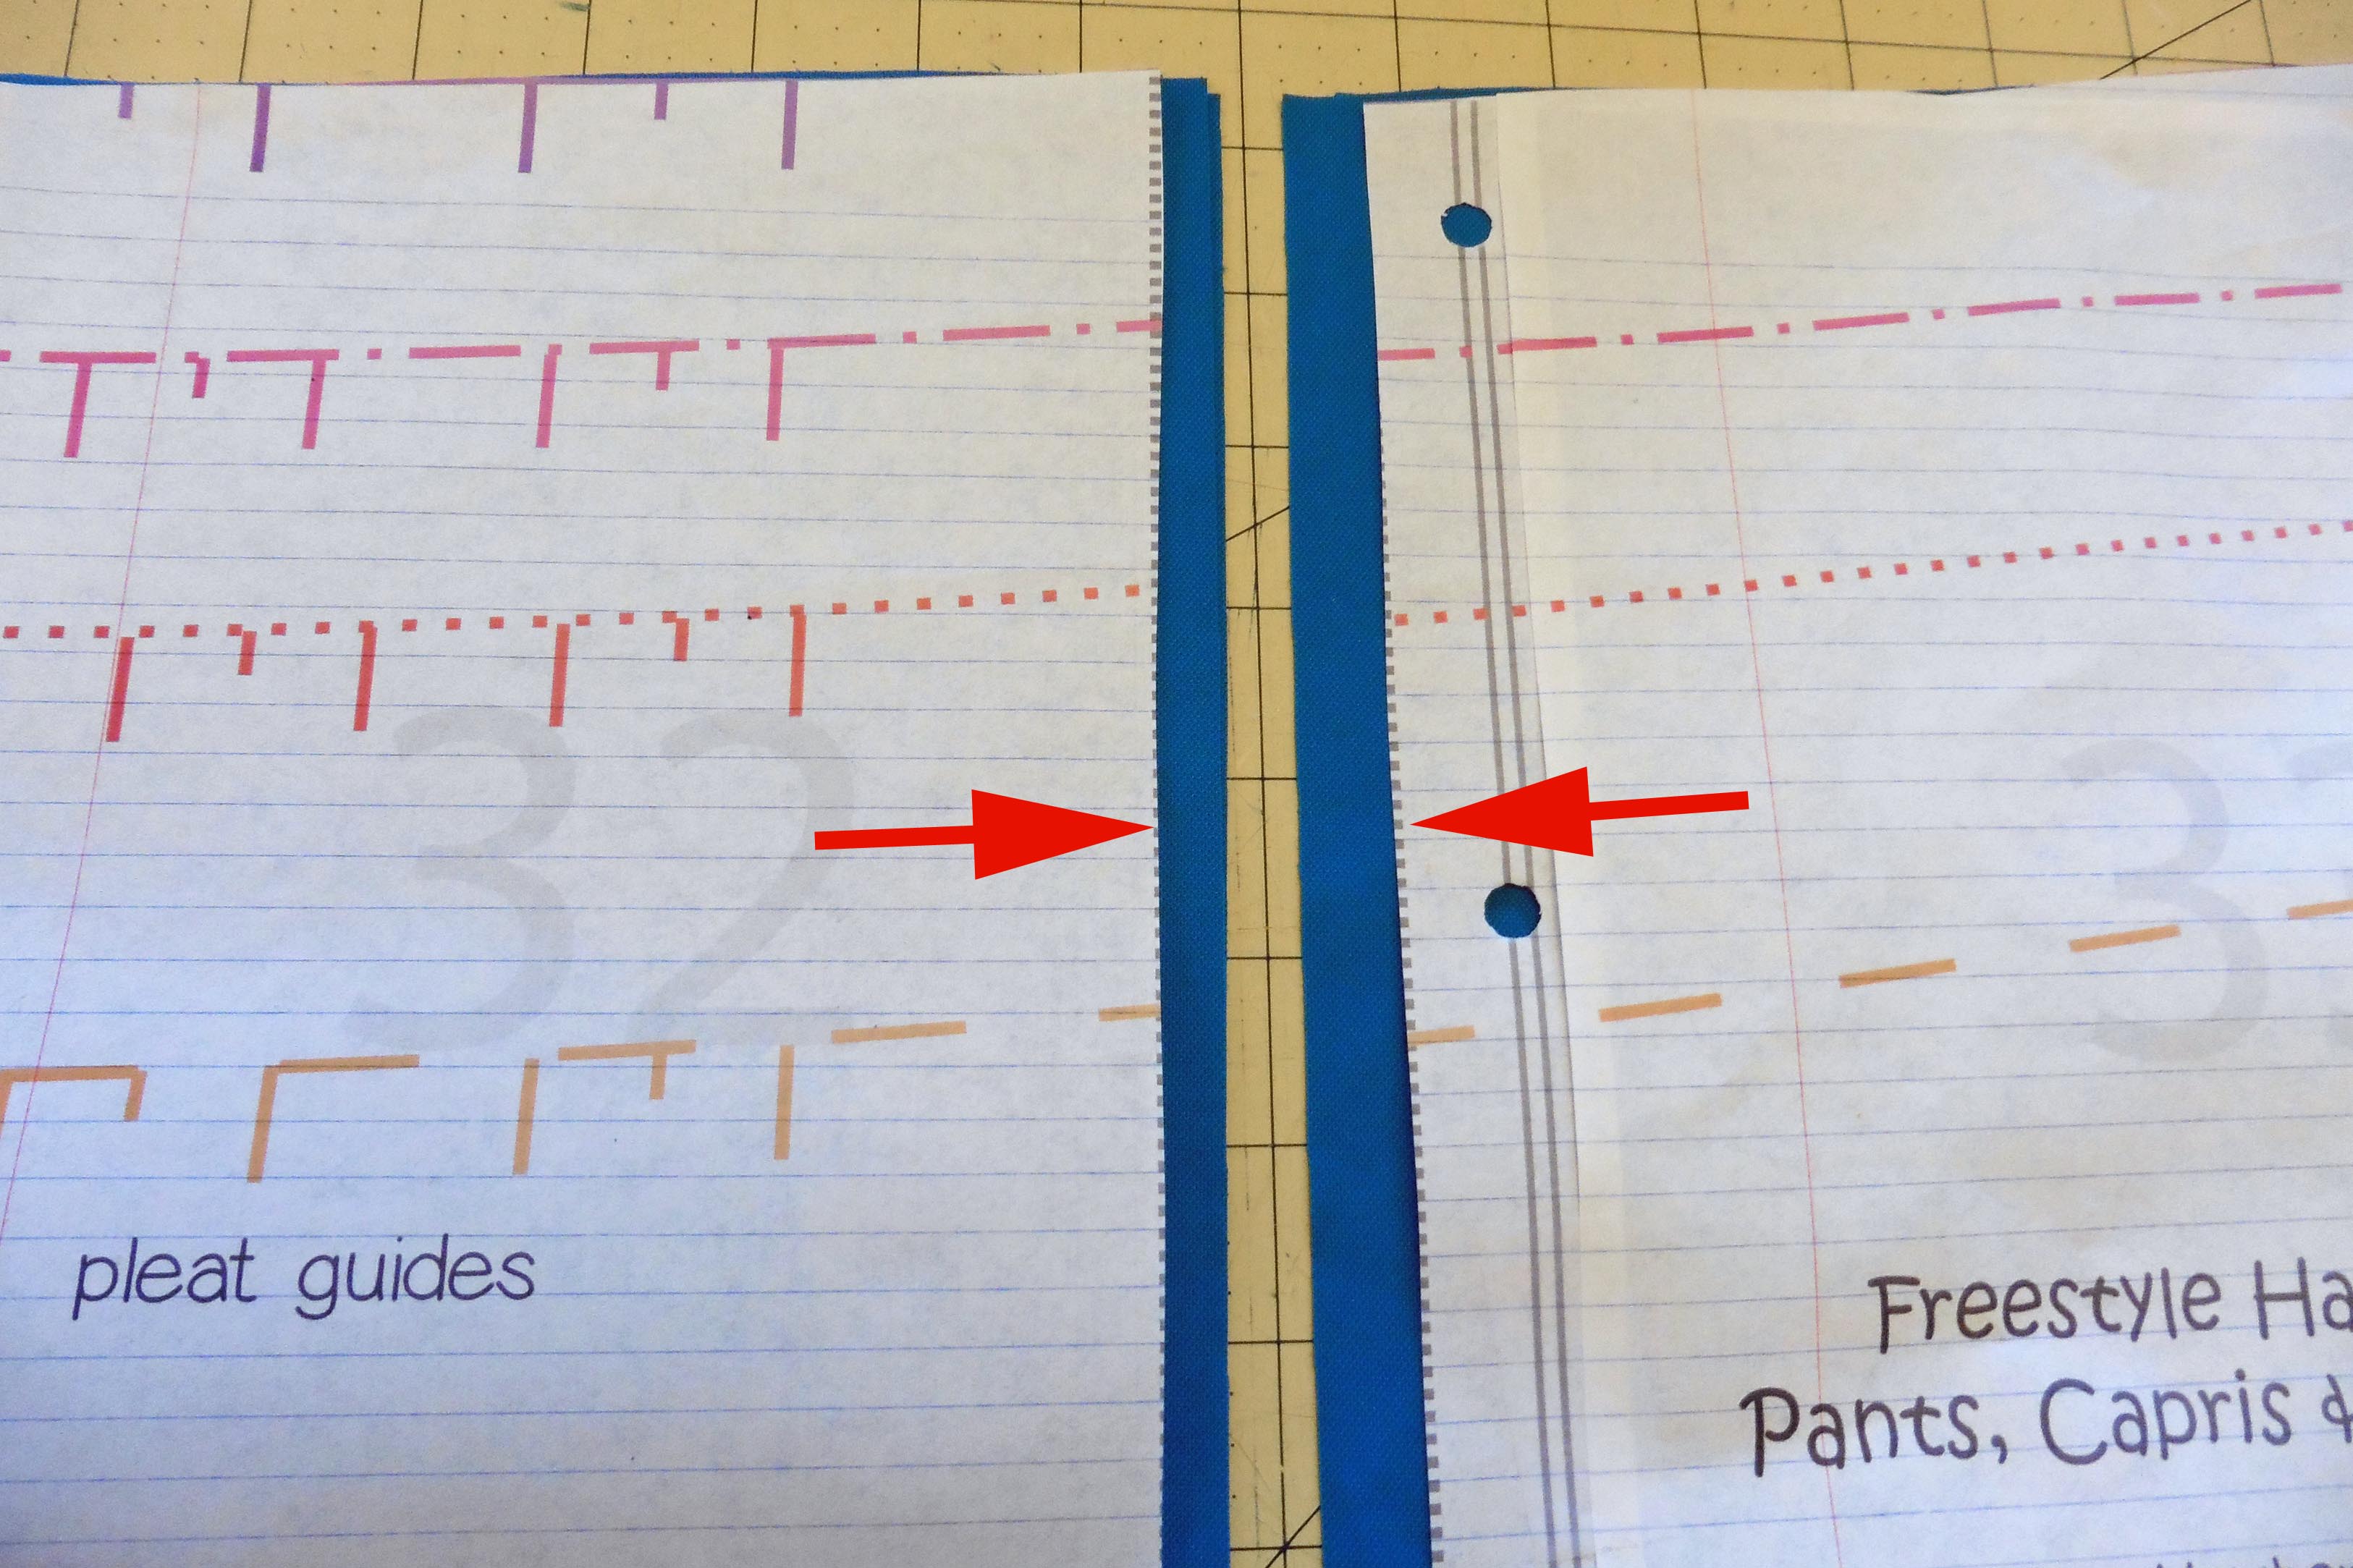
First, you need to print, assemble, and cut out your paper pattern pieces. Next, you need to create a side seam. Take the leg pattern piece and cut it in two vertically along the grey dotted line (pointed to by the red arrows on the picture below). This will leave you with a front (below on left) and a back (below on right) leg pattern.
** Ahem, don’t mind my pattern-printed-on-looseleaf-paper … desperate times = desperate measures. 😉
You will need to add 3/8″ to that edge for side seam allowance when you cut your fabric. You will need two fronts and two backs, one right and one left of each. Cut the waistband pieces and optional cuffs as per the pattern.
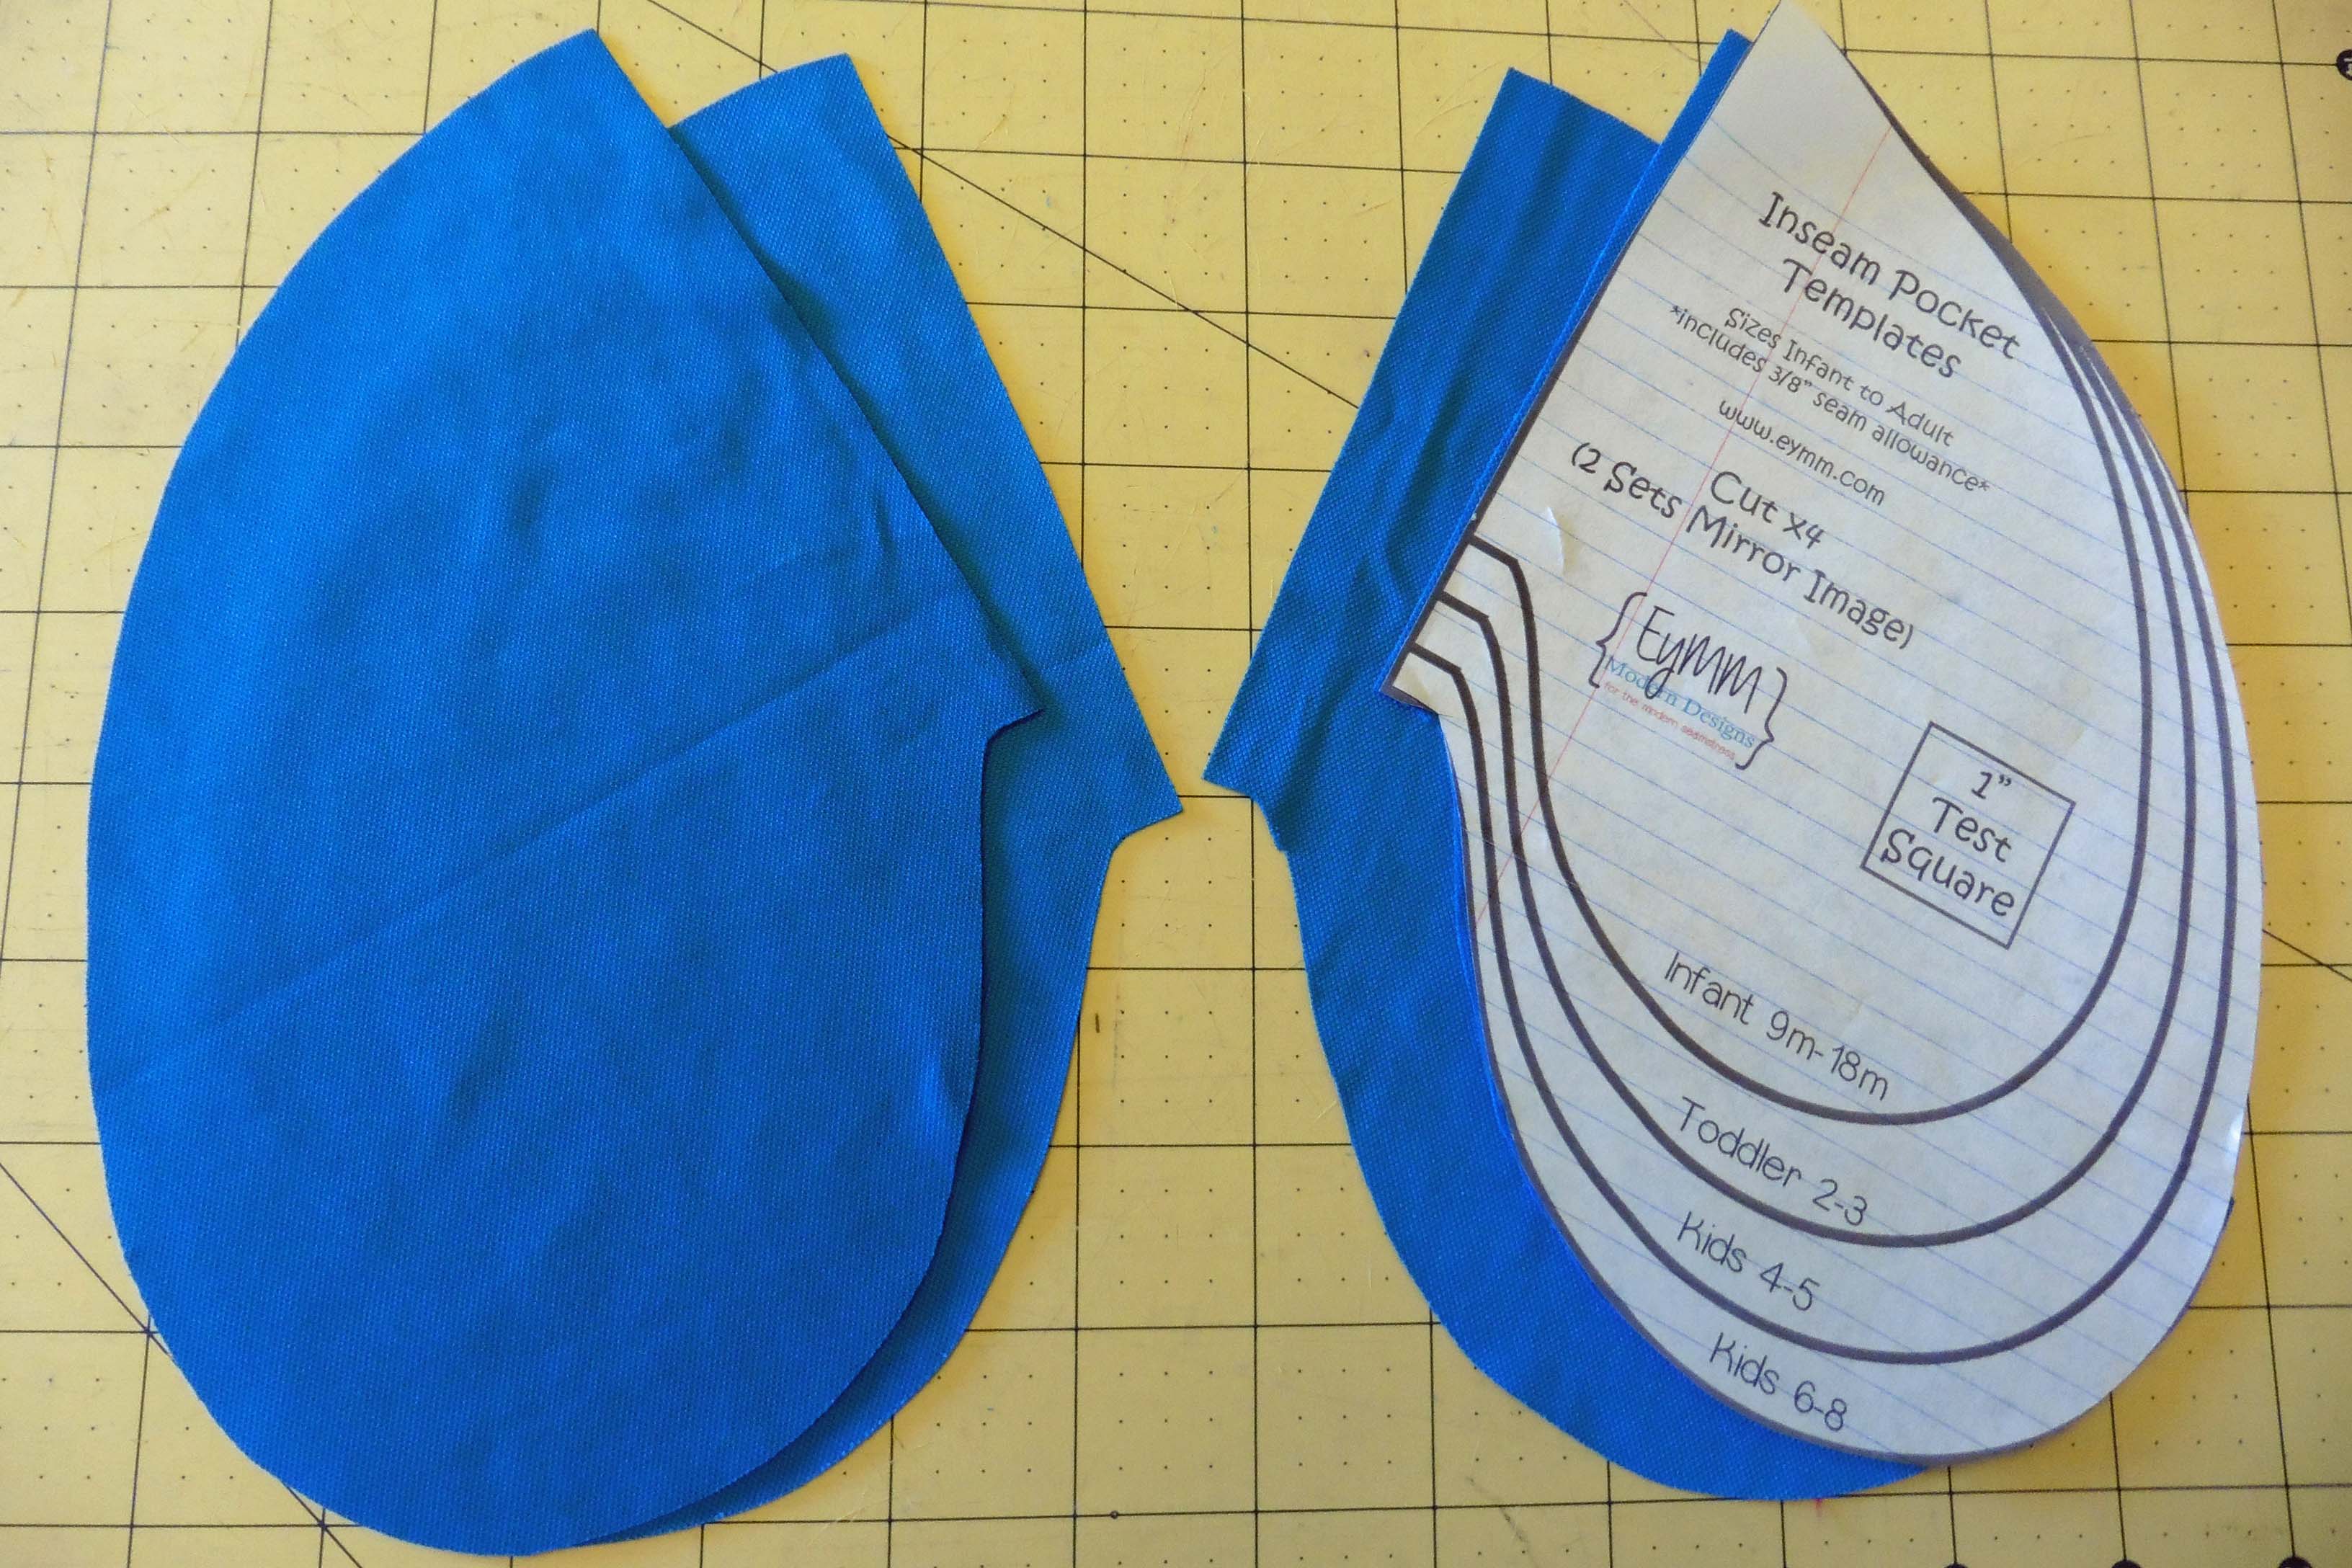
You will also cut 4 pocket pieces (two left and two right), using the free pocket pattern found HERE in the corresponding size for the pants you’re making.
Finish the raw edge of your pants side seam and around the perimeter of your 4 pocket pieces with your serger or by using a zigzag stitch (this can be skipped if you’re using knit, but it adds to a more professionally finished look).
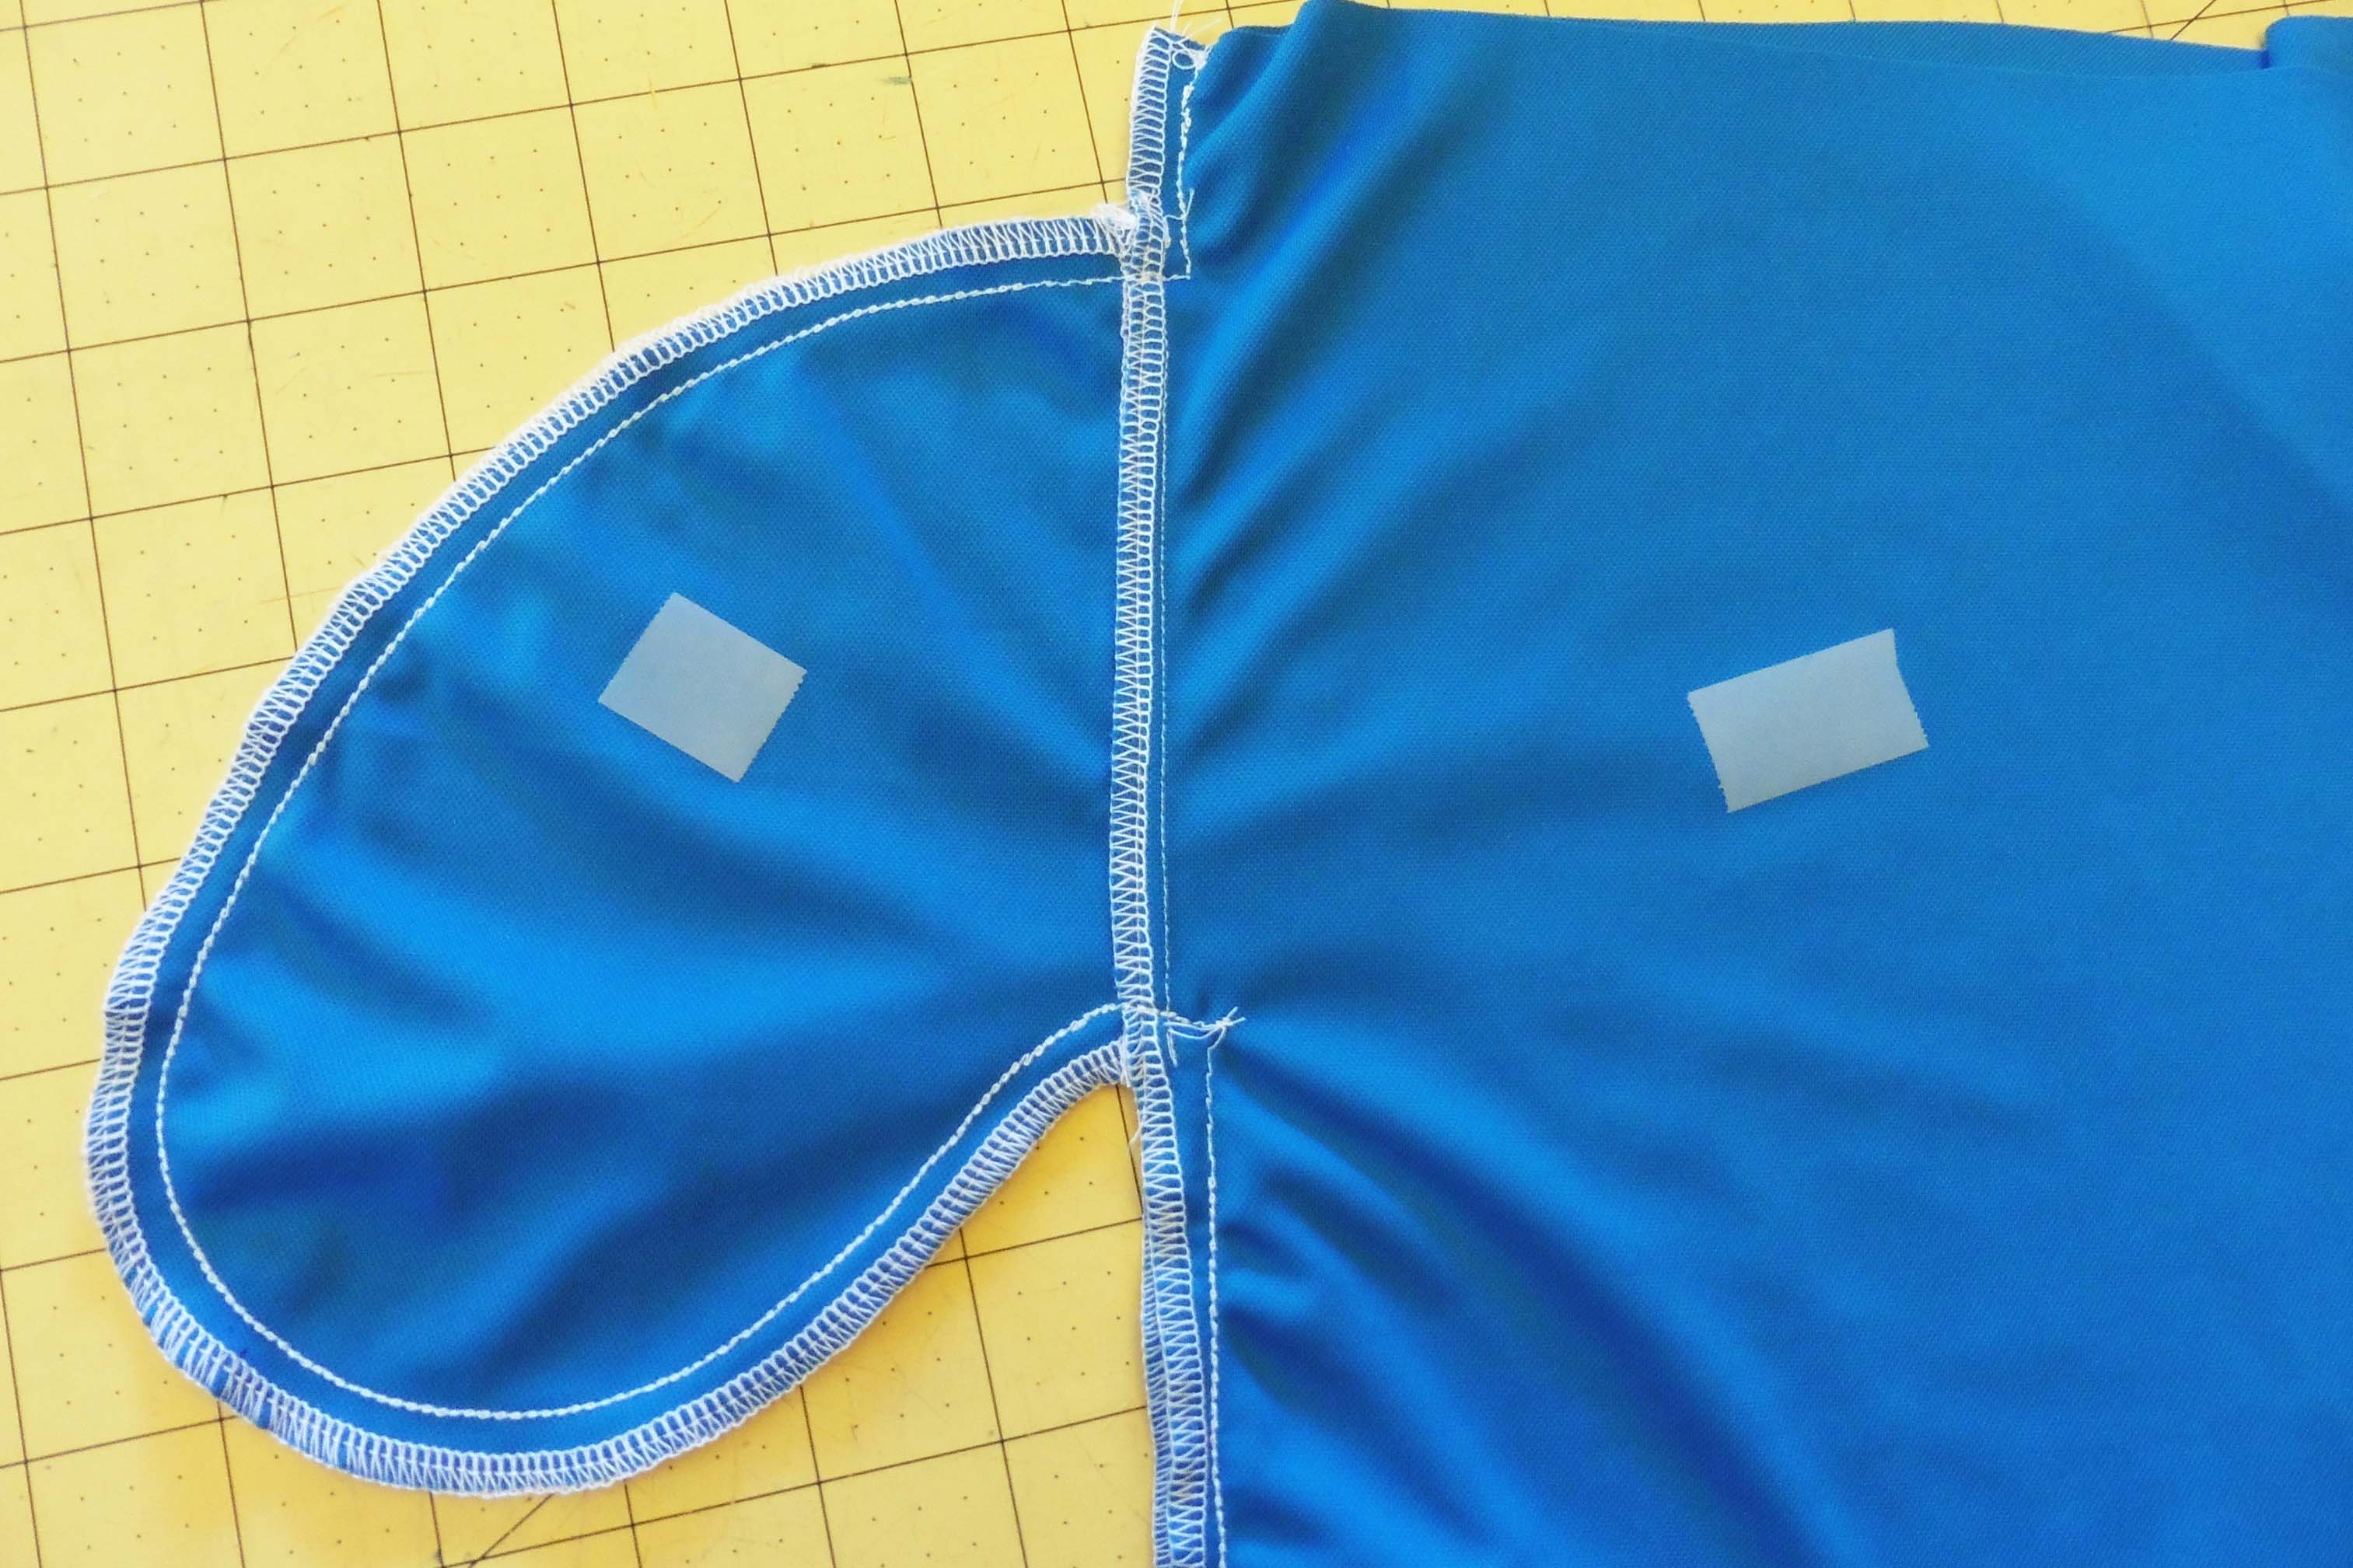
** Tip: If your fabric does not have an obvious “right” and “wrong” side, you can use pieces of tape on the wrong sides to tell the difference easily.
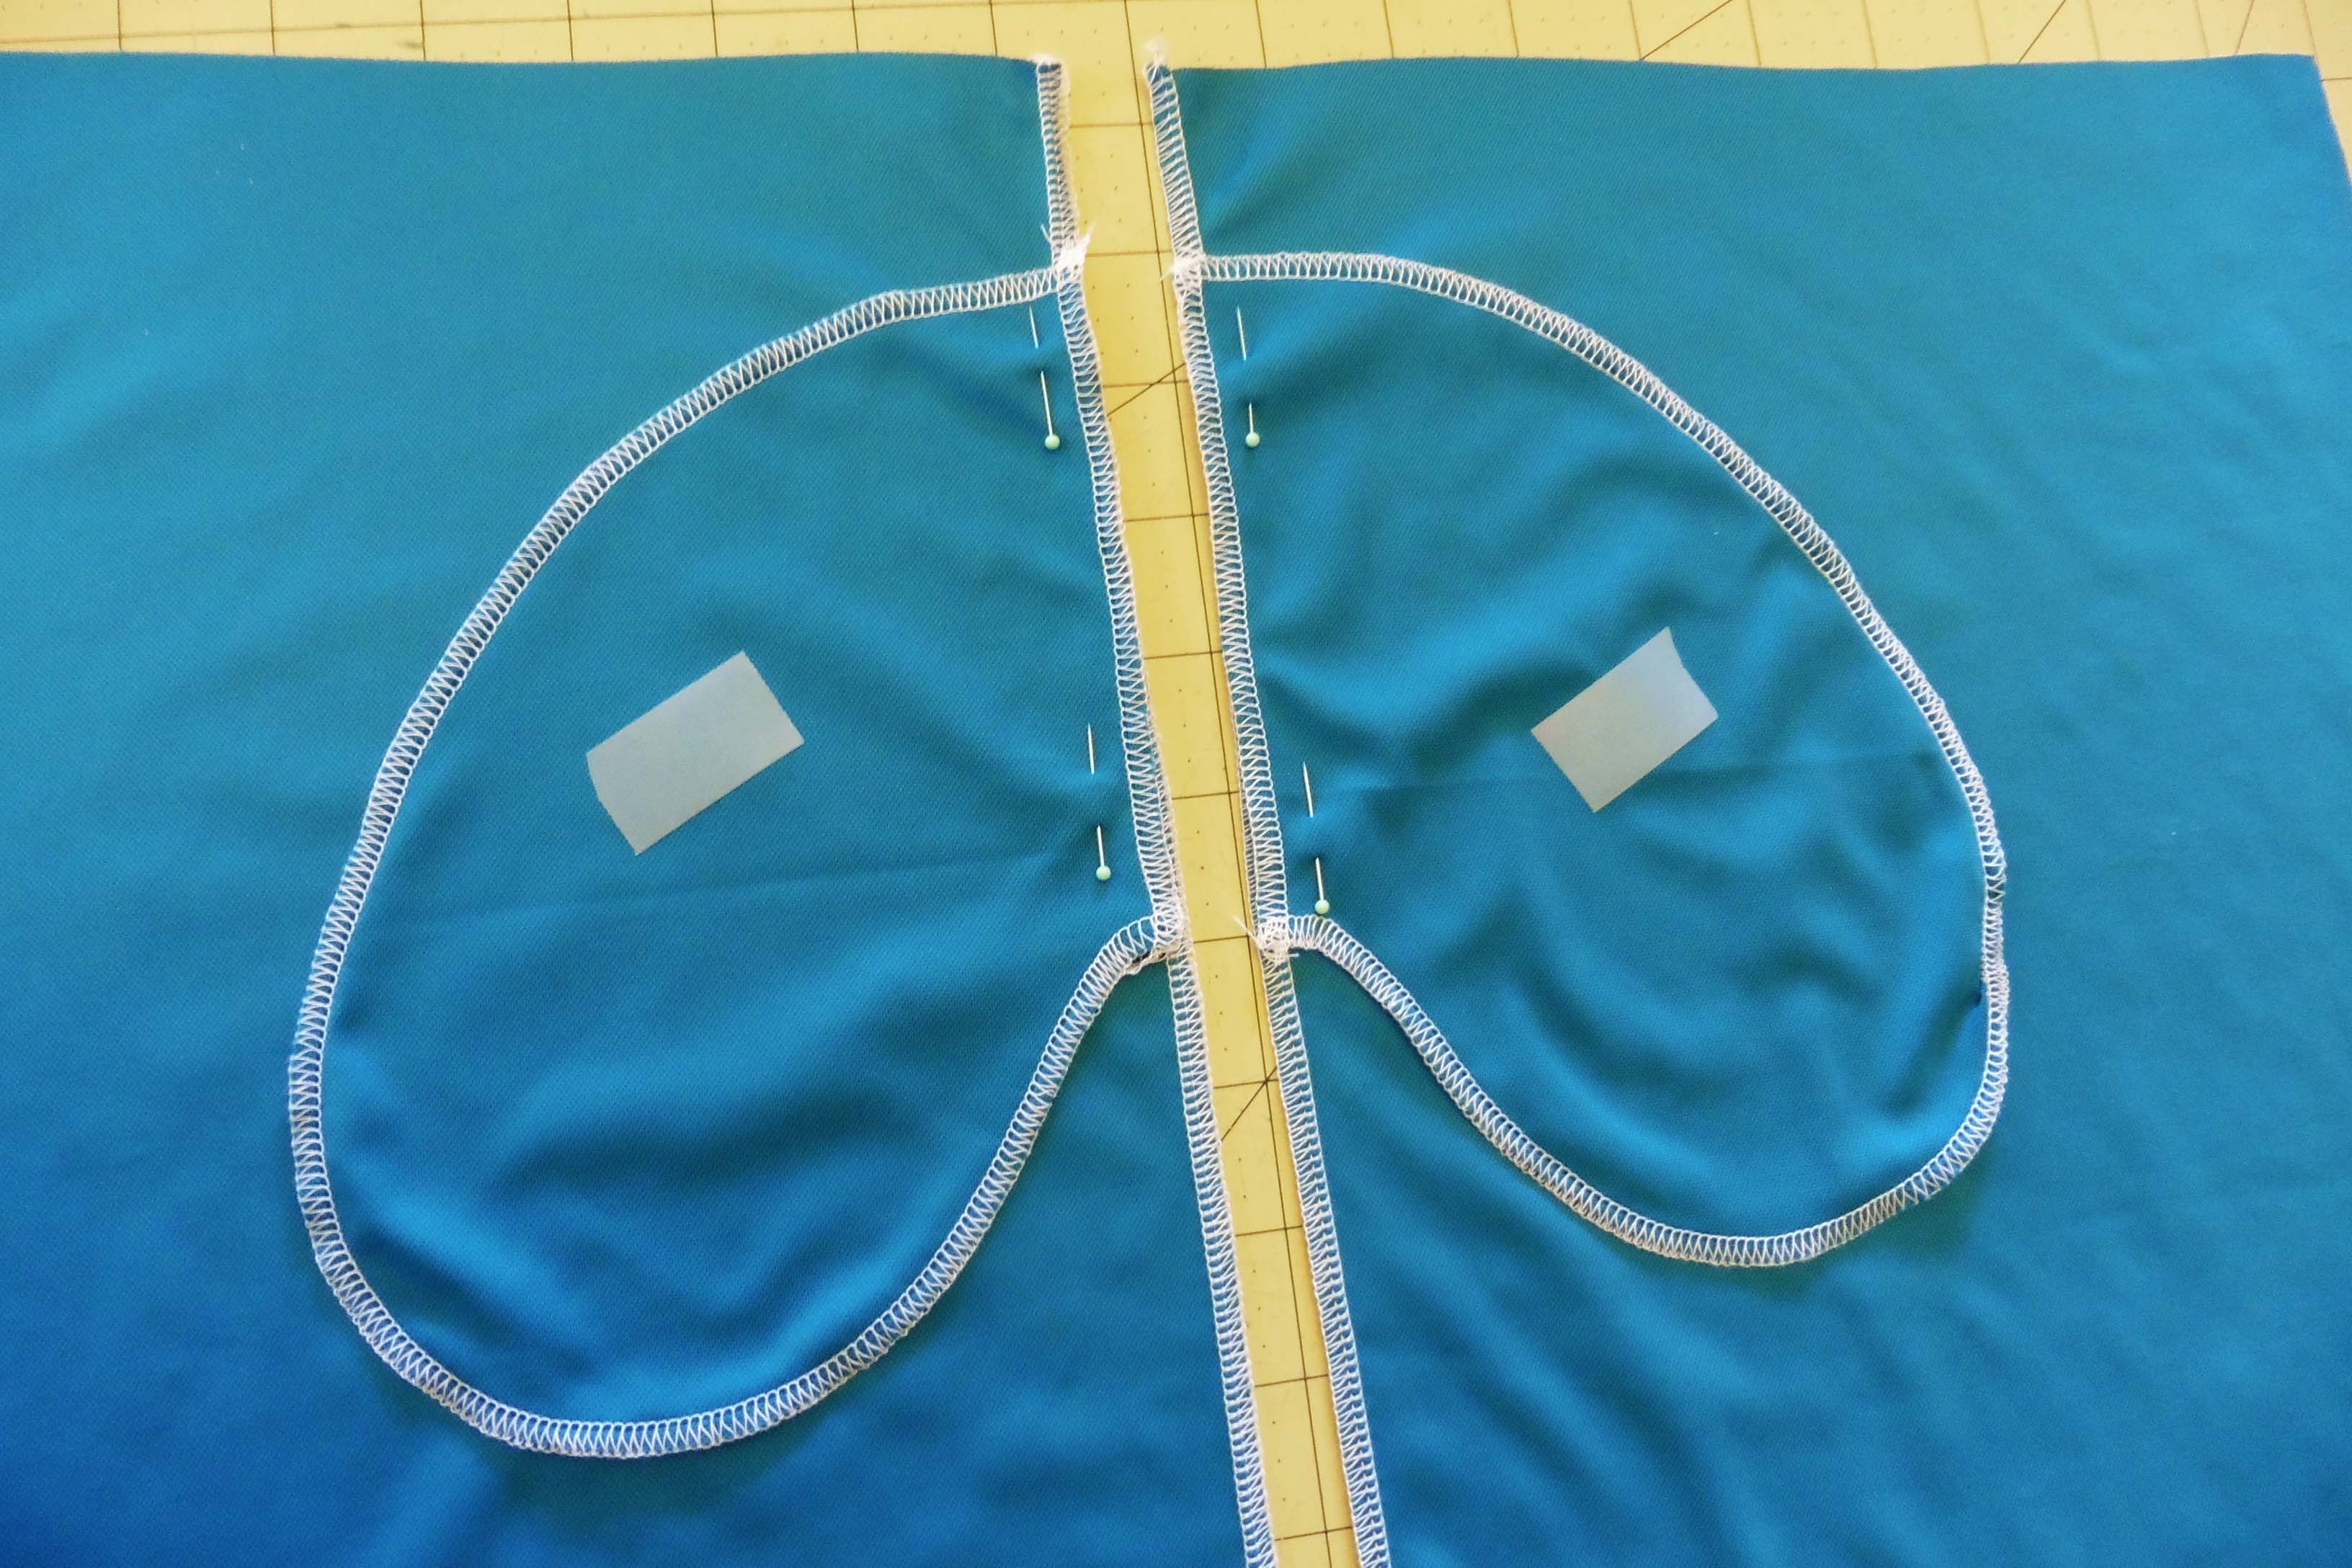
Place a pocket piece 1.5″ from the top raw edge on each pant leg’s side seam (picture above). Pin and then straight stitch along the side seam using a 1/4″ seam allowance (picture below left). Repeat with other pant legs and pocket pieces (2 shown above, but you’ll have 4 total).
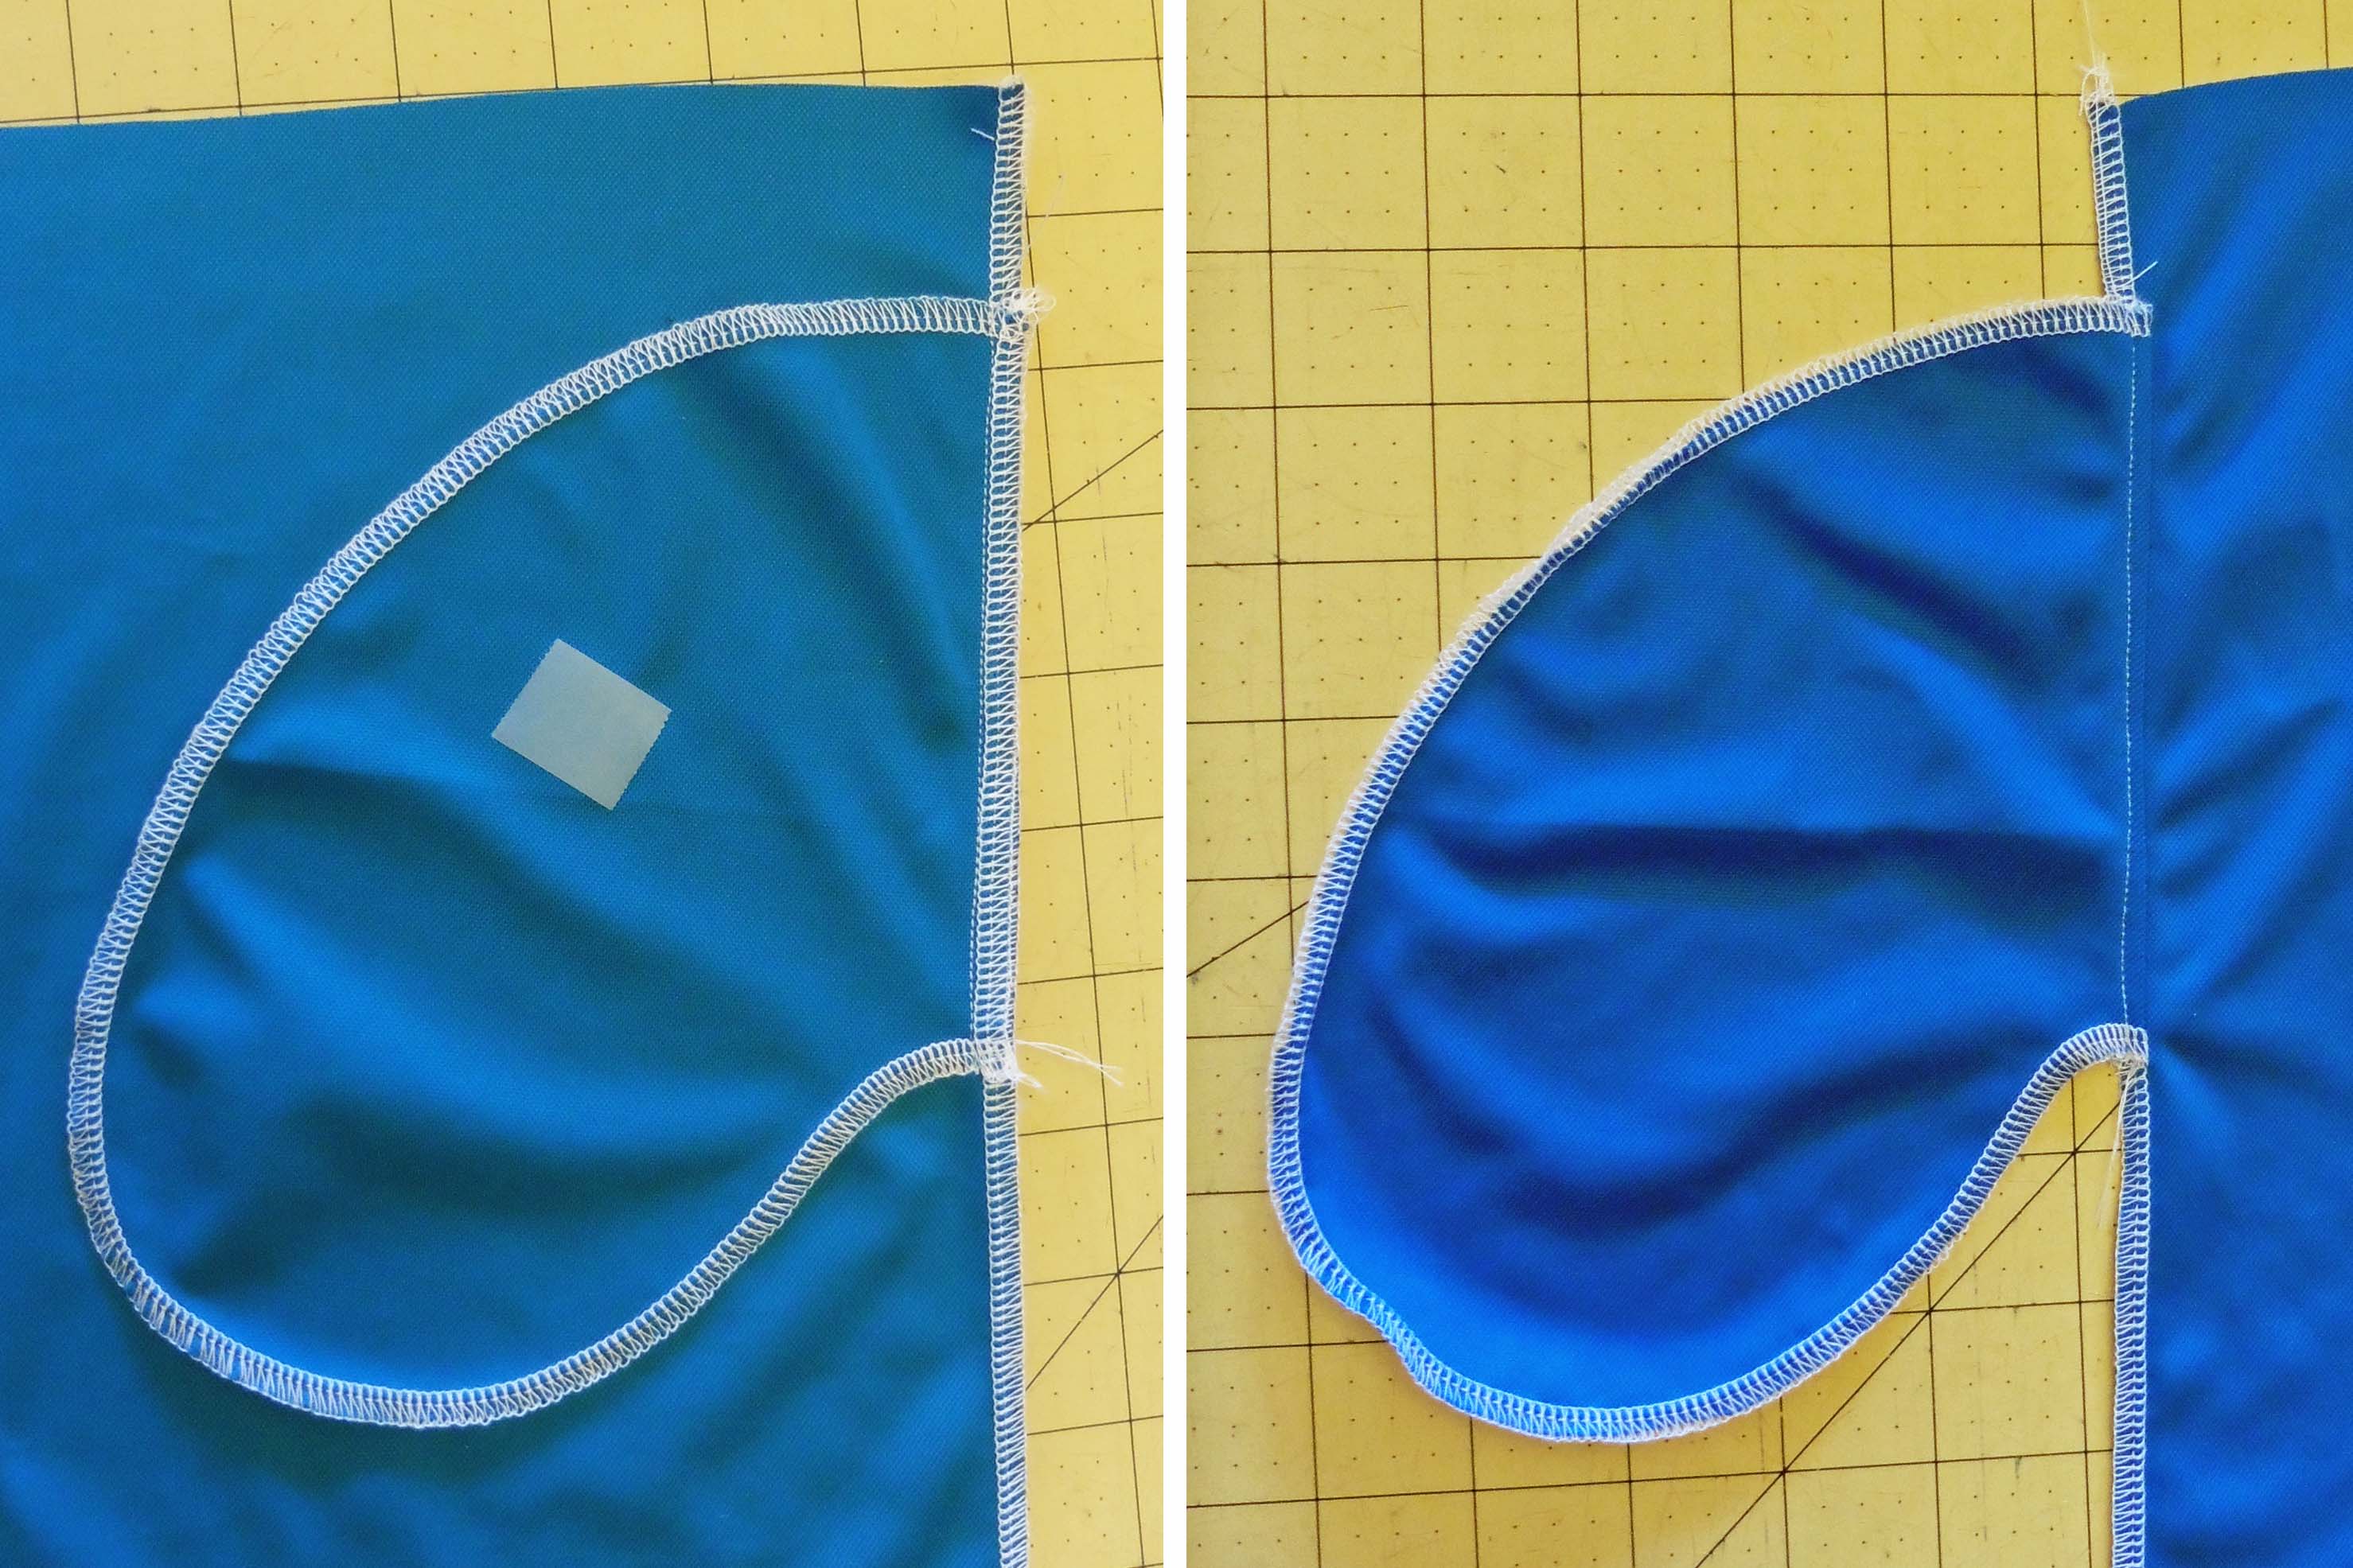
Next, fold your pocket piece out, keeping the allowance on the pocket side of the seam. Straight stitch 1/8″ away from the seam line, securing the seam allowance to the pocket (picture above right). This will help keep the pockets inside the side seam of the finished pants.
Pin one front and one back with right sides together, aligning the side seam edges and pocket pieces. Stitch from the top down, with 3/8″ seam allowance. Stop with your needle down when you are 3/8″ past the top edge of the pocket. Lift your presser foot, turn toward the pocket, put your presser foot down and stitch around edge of pocket. Stop again when you’re 3/8″ past the edge of the pants with your needle down and put your presser foot up. Pivot toward the bottom of the leg, put the presser foot down, and continue stitching down the remainder of the side seam.
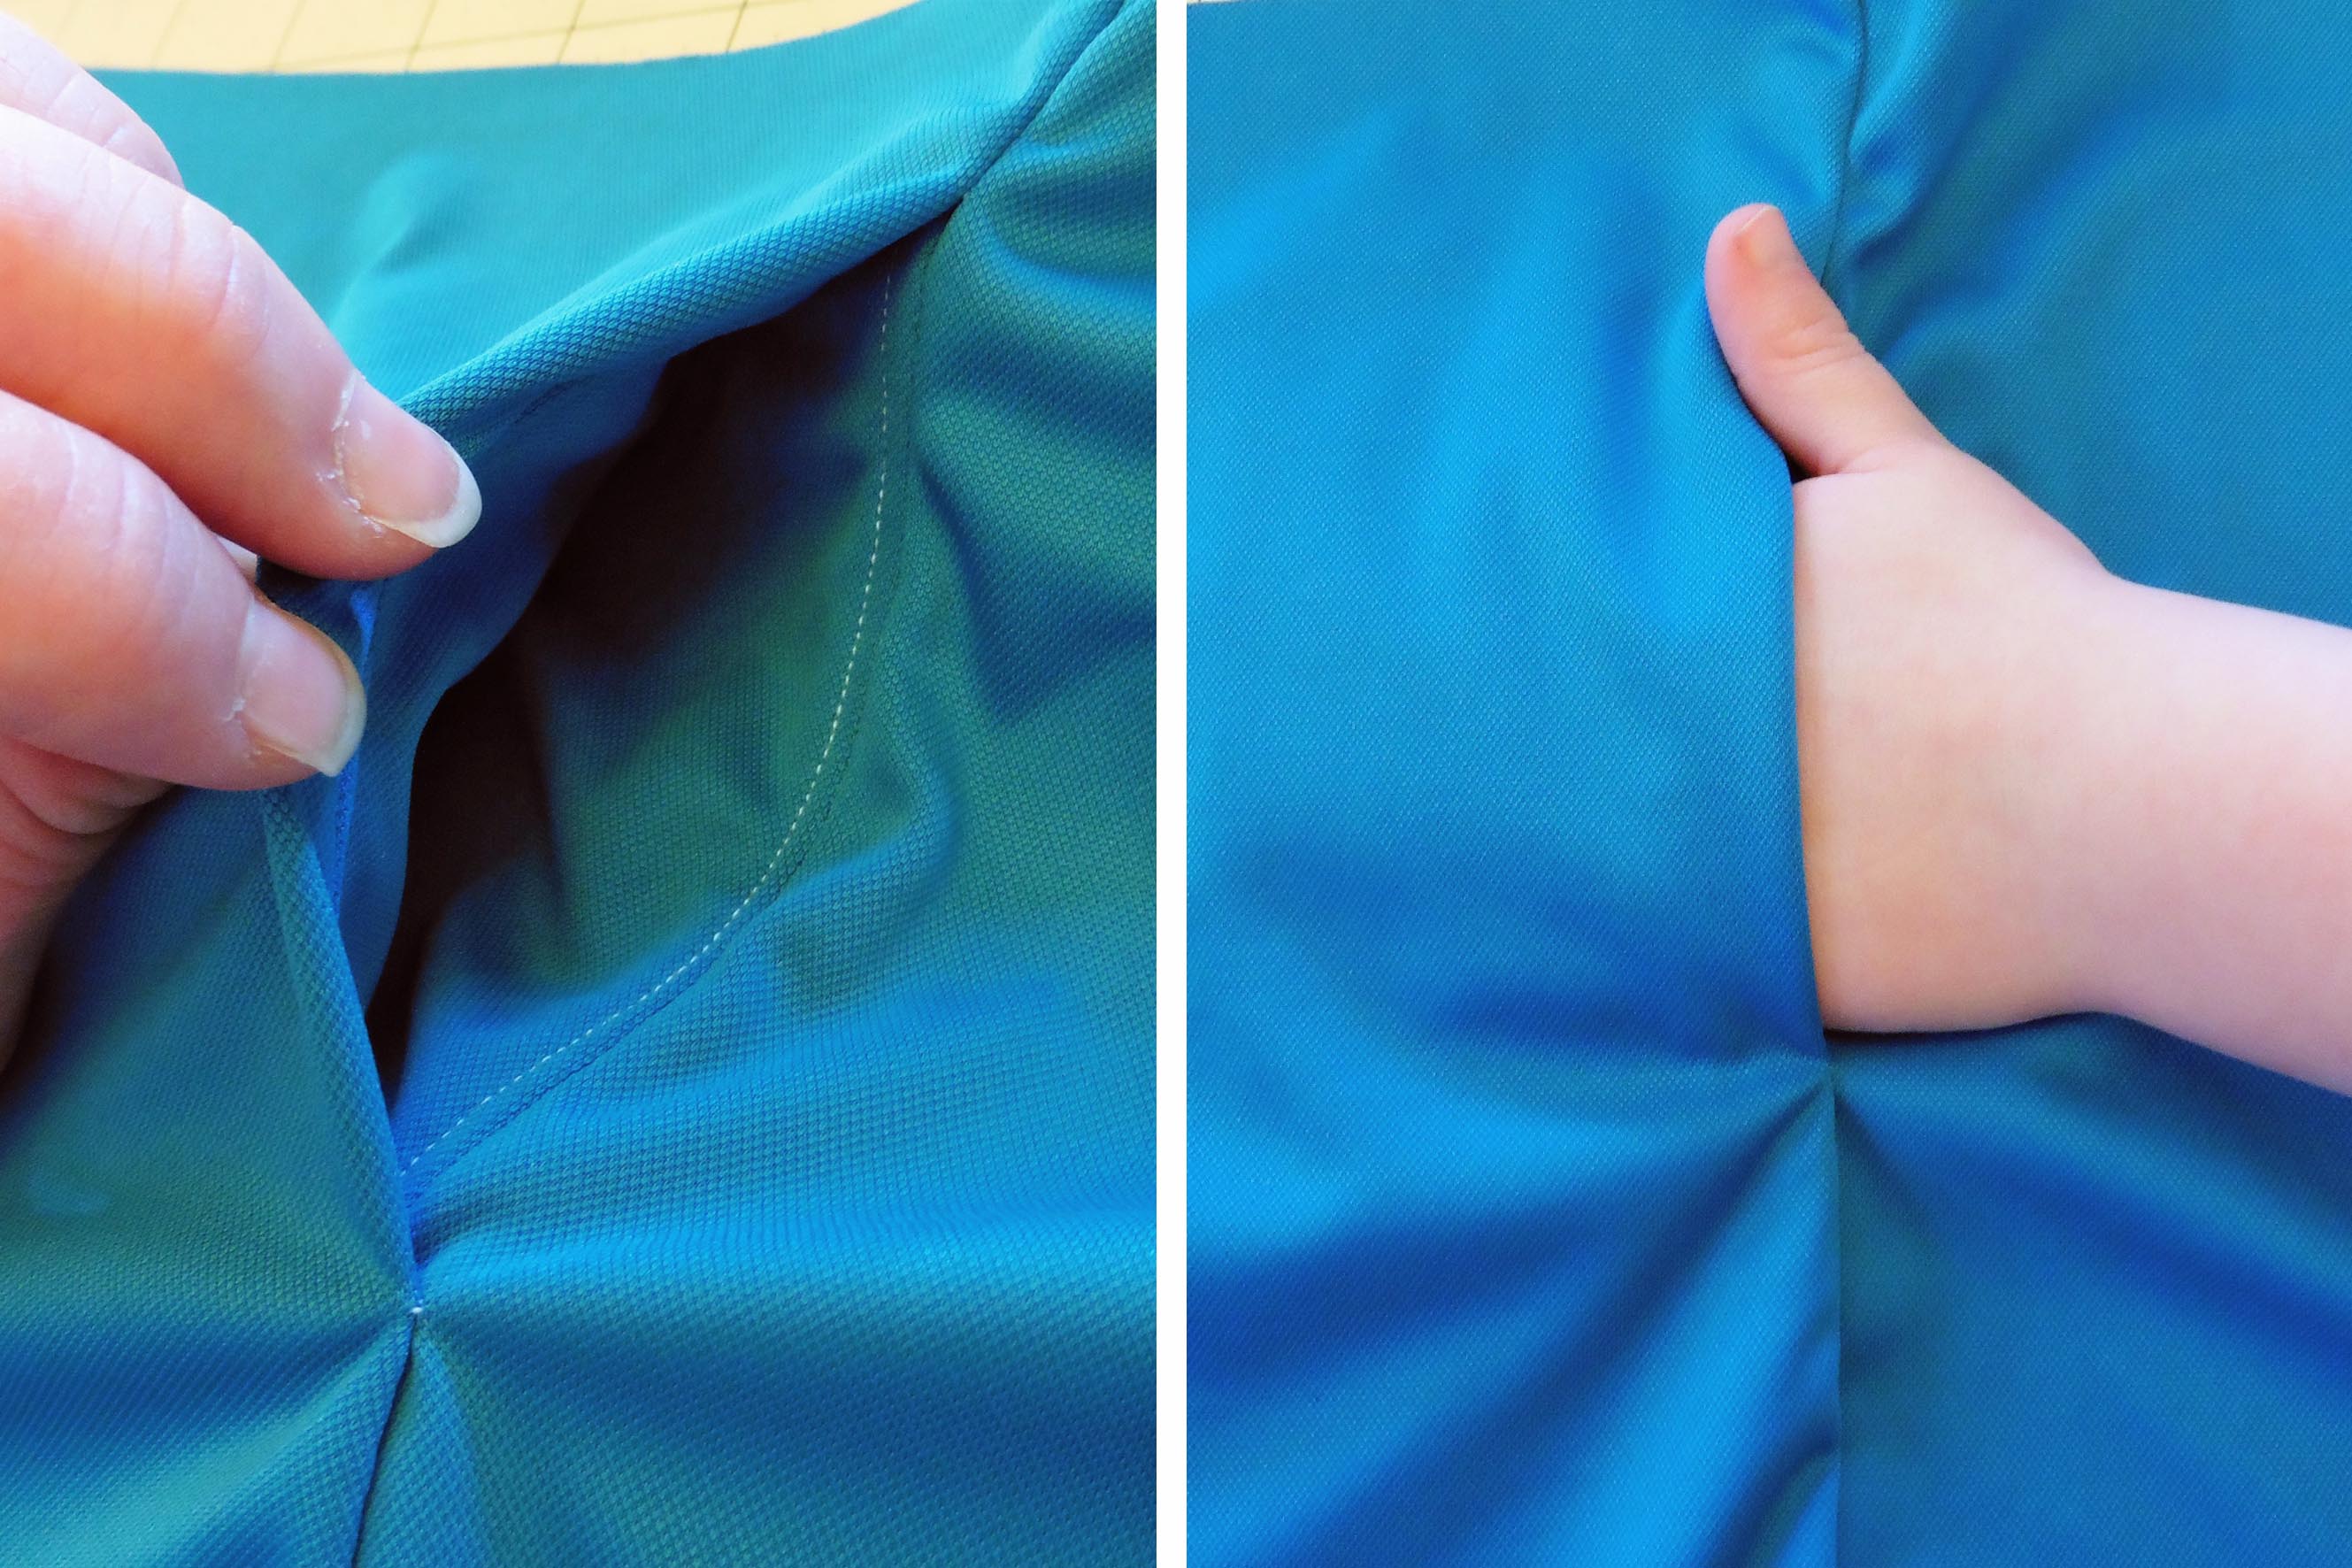
Turn your pant leg right side out and admire your new inseam pocket! Now you can continue your pants construction by following the pattern as written.
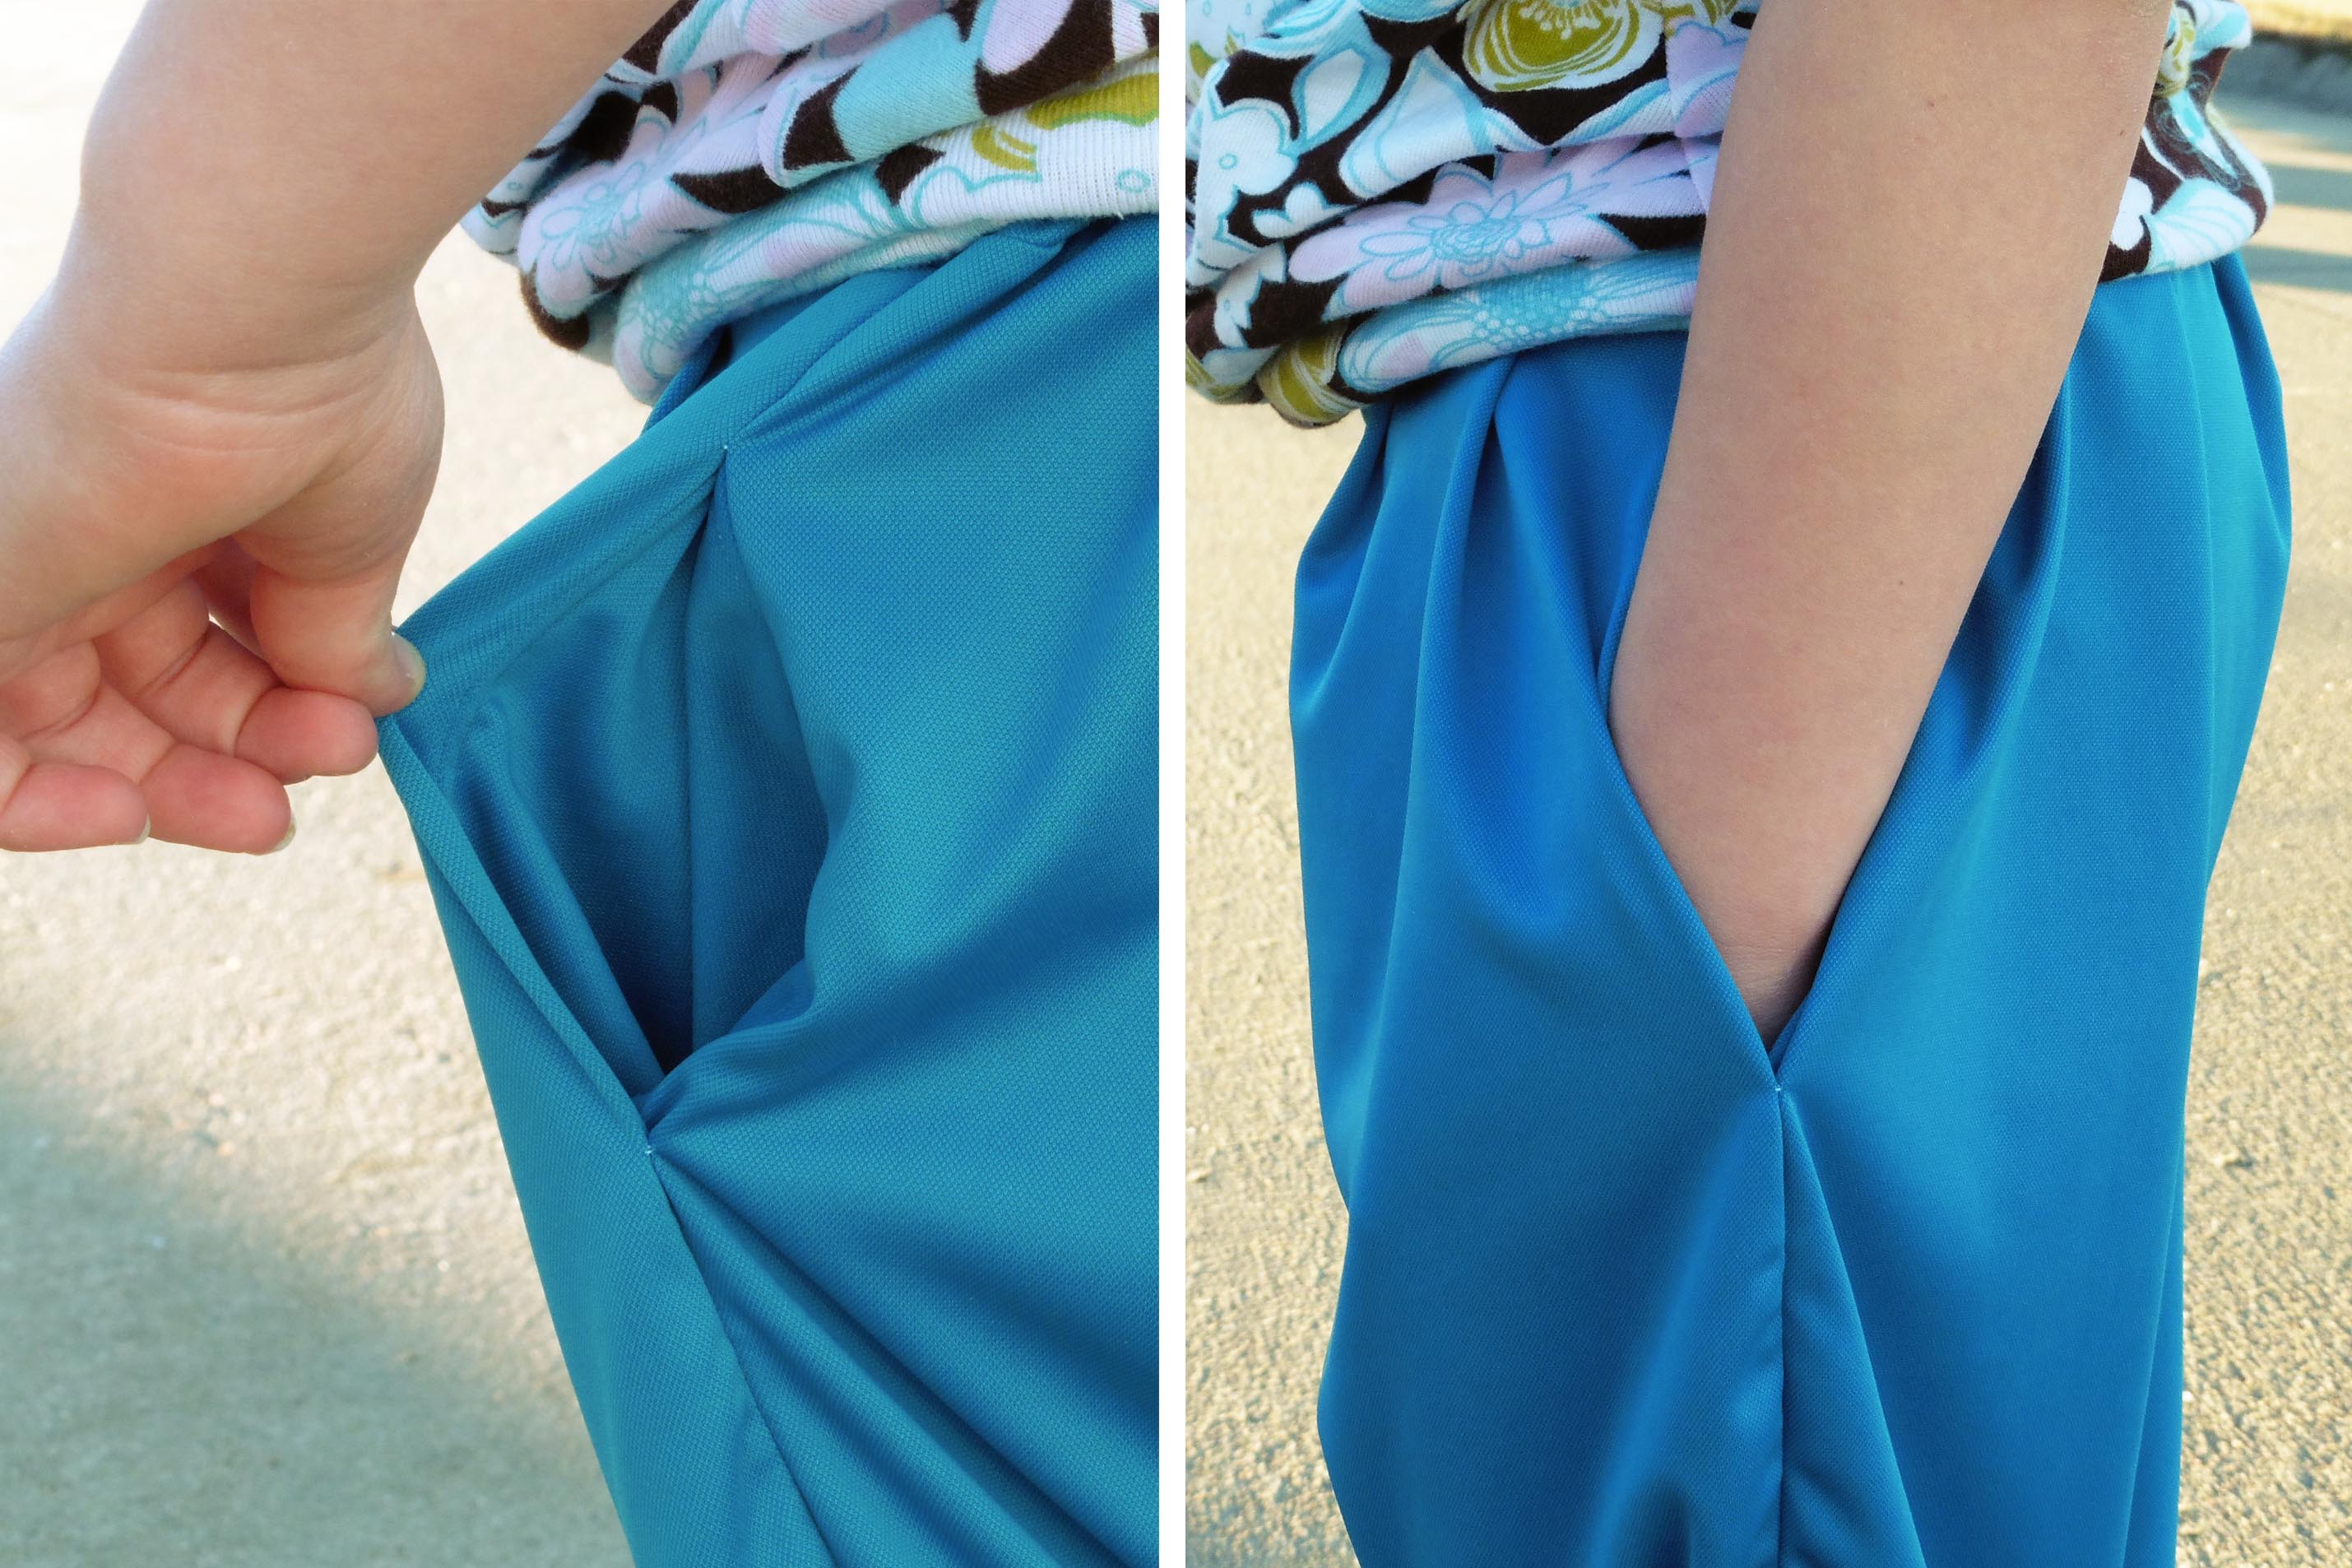
I love how easy it is to add pockets to the side seams of pants and skirts! Pockets truly make clothing better (at least in my opinion)!
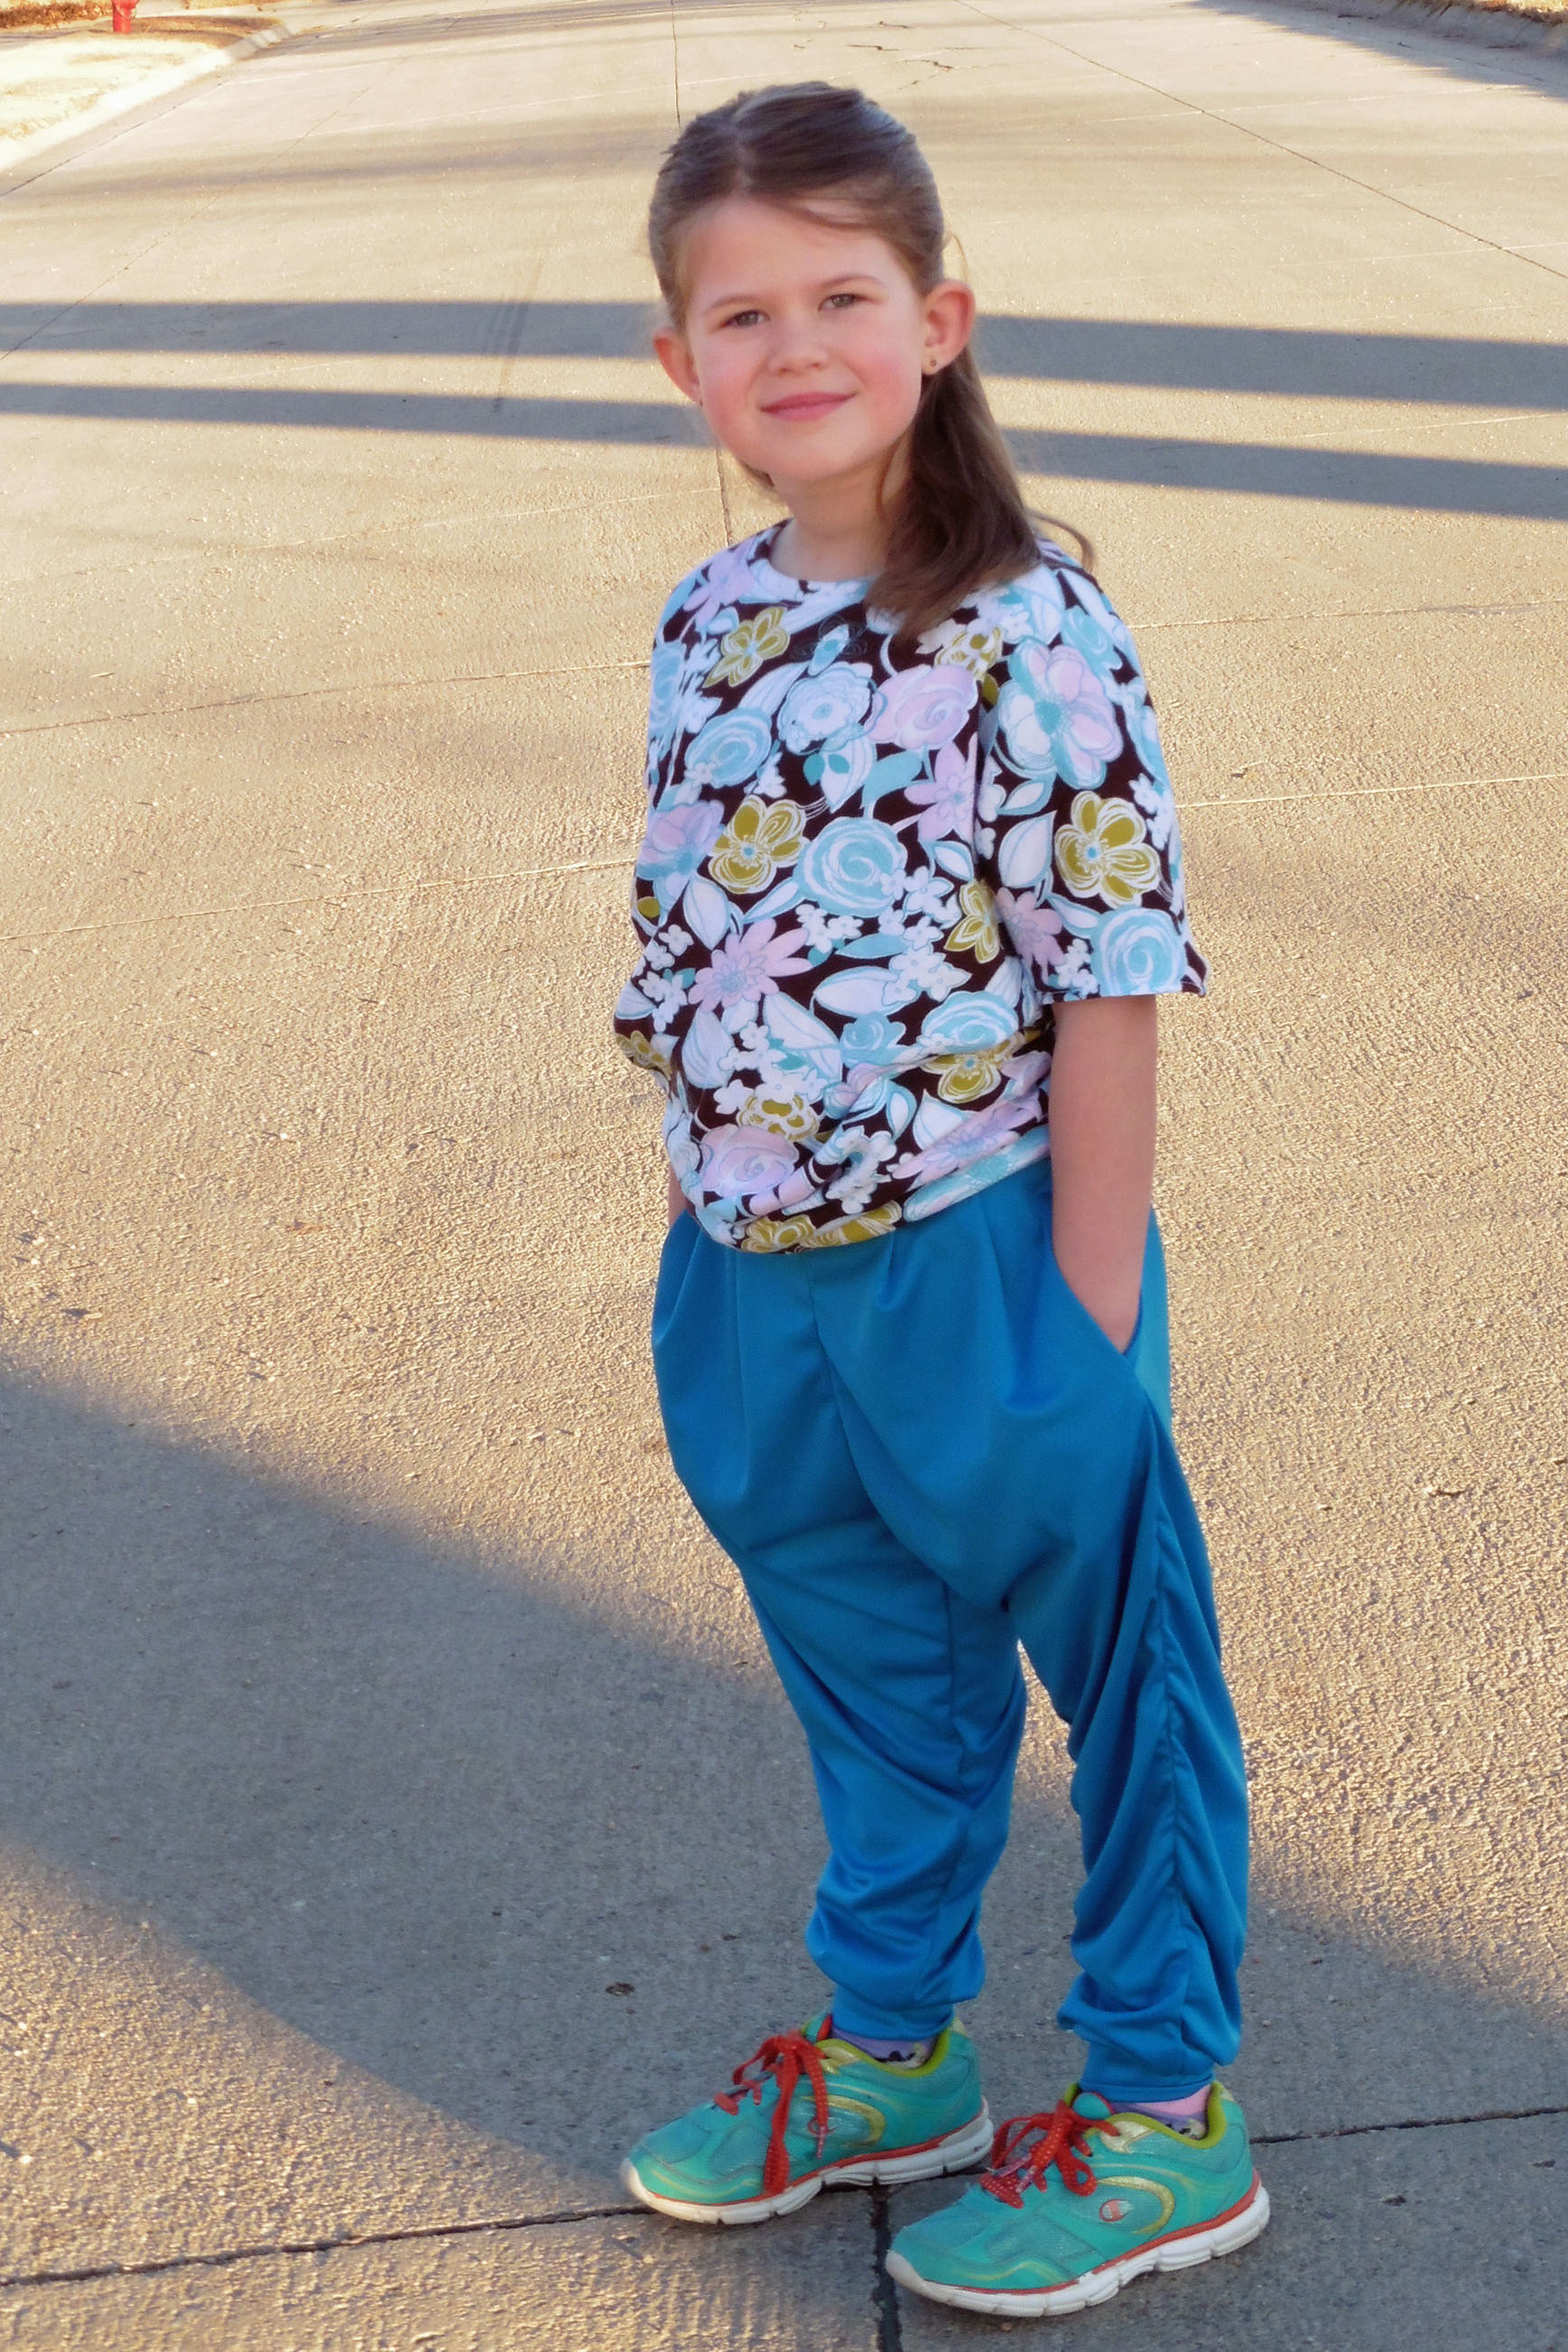
My daughter paired her new blue Freestyle Harem Pants with a floral Asymmetrical Drape Top for a casual, fun look. I love that these pants can be styled so differently by use of different fabrics and accessories.
** Note: The pants aren’t supposed to have any gathering down the legs like this pair seems to. This ruched look was, I think, due to my thin knit combined with a triple stretch stitch. I may have accidentally stretched it while sewing, too. Good thing my daughter loves the “fancy wrinkles.” Haha!
Happy Sewing!! ~ Joelle
8 Responses
Have YOU Bundled Up Yet? | Everything Your Mama Made & More
[…] sewing up new Freestyle Harems to demonstrate adding inseam pockets and making a matching shirt by request for my 7-year-old earlier this week, I witnessed a bit of […]
Freestyle Harem Hack: Using a Yoga Waistband | Everything Your Mama Made & More
[…] seam, and to the sides where the gray dotted line is on the pattern (the same line I used when I added inseam pockets to the harems back in […]
Experimenting with Freestyle Harems | Everything Your Mama Made & More
[…] Skirt pocket because it was close by, but there’s a free multi-size pocket pattern available in this post if you need one. I added them without making a side seam like I did on my […]
Vertical Welt Pocket | Everything Your Mama Made & More
[…] I will show you how to modify the FREE multi-size inseam pocket available to download from this blog post (I used the adult size). If you own the Girl’s or Women’s Capsule Skirt pattern, feel […]
Freestyle Harems Times Two | Everything Your Mama Made & More
[…] goofy mood while taking pictures! My younger girl got a couple pairs when I hacked the pattern to add pockets and a yoga waistband last year, but the blue ones are getting short and she wanted a new pair. I […]
Watermelon Slice Sundress to Welcome Summer – Everything Your Mama Made & More!
[…] before sewing that side seam. I used the free inseam pocket that you can find and download from this post about how to add a pocket to the Freestyle Harem […]
Christina OBrien
I would love to try this pocket Pattern
best water softener consumer reports
Great blog here! Also your site loads up fast! What web host are you using?
Can I get your affiliate link to your host? I wish my website loaded up as fast as yours lol