Not only did this turn out SUPER adorable, it was fast, easy & only cost less then .50!!!! Best part? It’s also a nice ‘green’ environmental re-con! So I went to a church yard sale today & saw a few mens XL under shirts that I liked the fabric of… you know I have a problem when I see clothes are fabric to sew… not just clothes lol 🙂 ! Anyways I got got a bag full of great stuff for $2… which ended up at .20 each… & I got 2 of these shirts! So I pay for them & then get a great idea… I’ll make dresses for the twins! It’s all I could think about on the drive home… so I came home & did just that!
I am very happy with how it turned out & am taking a break to post some pics & the tutorial before I finish the 2nd one up. This is an awesome way to recycle those old t-shirts you have sitting around. Anyways first the pics, then the tute! It only takes a few seams & can be done on a serger or a regular sewing machine. It is stretchy & easy to get on, so kiddos can easily dress themselves. I will say that its not the best for crawling as it gets pulled down a lot, but otherwise it is great & can grow with them! First has a fun summer dress… then a summer tunic top & then a skirt!!
So here are the pics of little miss Carlie 🙂 She is standing good & taking 3-8 steps in a row now!


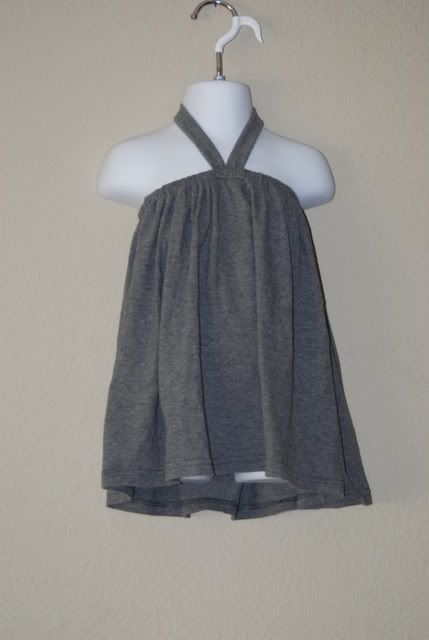
And on the mannequin as a toddler tunic…
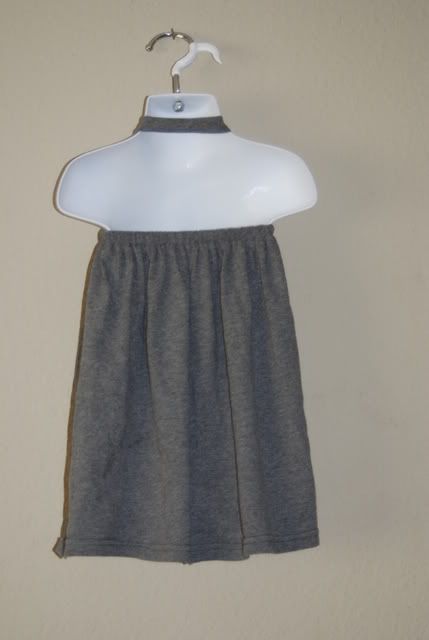
Finally on the OTHER mannequin as a skirt 🙂
Now for the FREE tutorial!!!! This dress was made with a mens XL jersey t-shirt… the finished product is about 14.5″ long. It also works as a tunic top for taller toddlers & girls & if you fold the neck peice inside (or skip it) it makes a great skirt for bigger toddlers, girls, teens & adults too. It is a perfect light weight summer peice! I plan on making a matching yoga waist shorts tutorial out of the sleeves too… so check back soon!
T-shirt Summer Dress or Shirt or Skirt 🙂 Tutorial
Supplies:
XL mens t-shirt that stretches both ways (pull collar & bottom & then pull under both armpits… it should stretch all ways) you can use smaller & bigger shirts… a mens XL with make a dress for a 1-2yr old, a tunic top for most 2-10 or 12yr olds & a skirt for a toddler, girl, teen or adult! Jersey knit cotton is ideal.
3/8″ elastic 18-20″
Pins
Safety Pins
Scissors
Thread
Sewing Machine or Serger
And of course an adorable little monkey to try it on 🙂
STEP 1: Take your t-shirt & cut it all the way across right below the armpits…
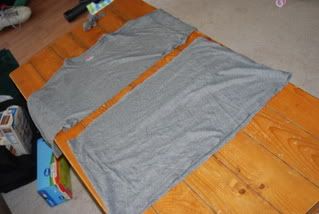
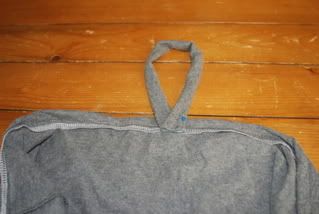
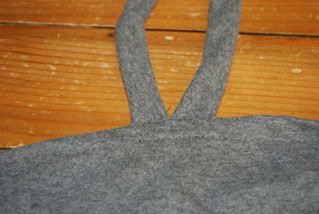
STEP 2A: On the top remain part of the shirt cut out your neck piece… this is a rectangle that is 2″ wide & as long as you need to pull over your little ones head! For most 15″-18″ should be more then long enough (remember it will stretch). If you are just making a skirt you can skip this & all neckband steps!
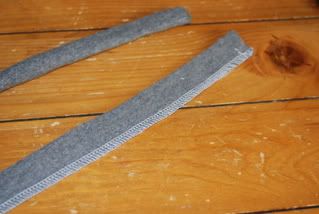
STEP 2B OPTIONAL: If you have a serger you can now finish the short ends of your neck peice & the top raw edge of the dress body. This just gives is a little more professional look. If not its okay!!!!! Knit does not need to be finished as it does not unravel!
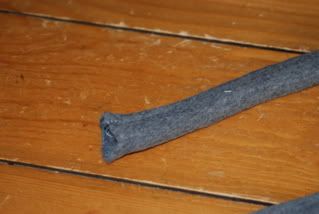
STEP 3: Fold your long neck piece in half with the ‘right’ side (outside side of the t-shirt) is touching each other inside… you should now have a long 1″ piece… you know want to sew a 1/4 seam the full length to form a tube. This MUST be a stretch stitch… sergers work best, but most sewing machines have a stretch stitch… & if not you can use a narrow semi-long zig zag stitch… all 3 will work fine. You then want to turn the tube right side out so that the seam is inside & you have a long tube…
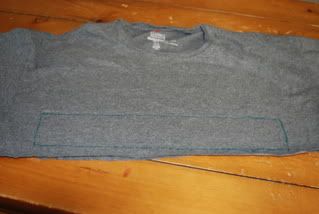
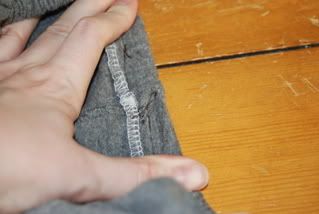
STEP 4: You know want to grab the bottom of the t-shirt that we are turning into the body of the dress. You want to fold the top edge in about 3/4 of an inch & pin… this is to create the casing… you want to do this all the way around the shirt.
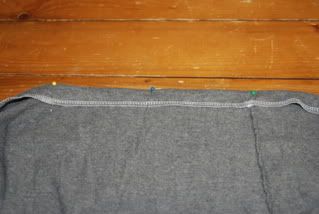
STEP 5: Sewing the casing! You will want to sew about 1/2 for what will be the ‘top’ of the dress… this will make a 1/2 casing to hold the 3/8″ elastic. Make sure to start by the side seam from the tee as it will now be the side seam on the dress. You want to leave about a 1″ opening at the side seam so you can feed the elastic through. This is done on a regular sewing machine with your stitch length set at 4 or longer.
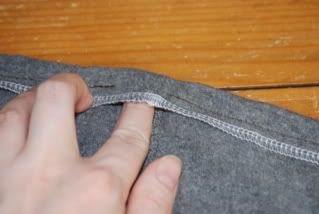
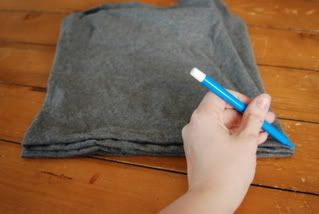
STEP 6: Find the center front of the dress… I do this by grabbing the 2 side seams & folding in half & marking the top edge… then transfer the mark onto the inside of the casing.
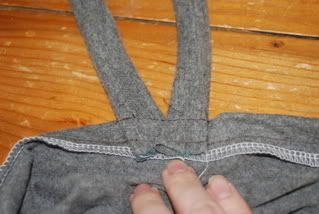
STEP 7: The neckband… this is when you need to bribe your assistant with a banana cookie so you can safety pin it & test it over their head! You want it to fit over their head but still be short enough to allow for good front coverage. If you child has a really big head you can add a button hole at one end & a button at the other… you then only attach the end with the button to the dress. When you get the sizing right pin it to the front middle of your dress on the INSIDE of the dress (note you see the casing)
STEP 8: Now take it to your sewing machine & sew it in the same place as your casing seam, & then sew at the very top edge as closed to the edge as you can… you only need to sew a few inches, just make sure to back stitch on both ends! I used brown thread so you can easily see the seams on the back side…
STEP 9: Feed your elastic through! This is where the safety pins come in handy again. Then this time you bribe the little monkey with some water melon so you can test it out & get the elastic adjusted just right! I cut 20″ of elastic & when I sewed my elastic together I had a 1″ seam allowance so my finished dress is 18″ wide at the elastic. The dress fits my skinny 11.5 month old twins… who wear a 6/9 month width, but it stretches to fit me as a SKIRT! It could easily fit a 32″ waist. I just used the cheap soft stuff from Wal-Mart. Anyways once you feed the elastic through you sew the 2 ends together where ever you want it to fit. Then trim the excess elastic leaving about a 1/4 inch tail & push it back inside. Now you need to pull the gathers out of the way… & sew the casing closed! I have also found that to keep the elastic from twisting or the end lump from floating around I like to run a quick stitch on the side seam up to the top edge (see photos below)
Thats it YOUR DONE!

If you try out any of my free tutorials & have any pictures that you would like to post in my new photo gallery please email me. Enjoy & happy crafting!
19 Responses
strawberrieshk
Wow, those are gorgeous!!
lol, I like how she’s looking like, “Yeah, I’m cute!!” In the first pic!
Teresa
Wow! That’s a great idea. I cant wait to try it. I’m gonna go raid my husbands t shirt drawer now.
MissLyn
That is absolutely adorable! Wish I had a girl to sew it for.
Thanks for sharing…
mylittlestitches
God this has made me so broody! You have the most beautiful daughter ever.
Jenn
What a great idea!!! Thanks for the tutorial! 🙂
JESS
This is so cute. I am going to make one for my DD and I want one for me to. LOL
Annette
OMG your daughters are adorable!!! Thanks for all the tutorials. I’m listing them on ma.gnolia so I can find them again.
Emily
So cute and good for the enviro. Love the food bribes lol, that’s my secret weapon too!! DH is an XXL and I’ve squirrelled away his discarded shirts, now I know why :).
Barb
I’ve been looking for the different uses for old t-shirts. Thanks for some great ideas.
lore
can’t get over that beautiful model ;o) great idea.
Marie-Madeliene
Très malin cette utilisation d’un t-shirt !
Quite smart, i like it, easy, and very “sustainable development”
Translation:
Very clever use of a t-shirt!
Quite smart, i like it, easy, and very “sustainable development”
Jocelyn
Thanks so much for this tute! I left my computer straightaway and raided my scrap box! I finished one dress today in about 30 minutes, I didn’t use a t-shirt, though, I had some pretty (cotton) turquoise fabric with brown polka dots! I hemmed it with solid brown cotton and used brown satin ribbon as the halter tie. It’s gorgeous!!! Thanks for the inspiration!!
Jennifer Blattner
Thanks so much for posting all these wonderful tutorials!! I am addicted to making the babylegs and am getting fabric for a crib sheet today. My next mission is to raid my hubs’ closet for tee shirts to make the dress! I am thinking the dress paired with babylegs! Adorable, yes? 🙂
Thanks!!
Angela
i think you may actually be TOO clever!
DeniseS
I love this and have made my daughter 4 of these and have a pile of old t-shirts waiting to be repurposed.
skye
I blogged with my version and linked you here http://skyebluecrafts.blogspot.com/2010/12/dress-1.html
amie
Just made one of these this morning. so cute and so easy. will be taking pictures when the miss wakes up and posting them on my blog. thank you.
Brenda
Oh my GOSH!! Made this today and it came out soooooooo cute!!! I also added a fabric flower made out of the same t-shirt!!! Thank you for the step-by-step and pics to go along!!! Wonder if I could attach a pic??
Kymy
If you sending me the picture I can post if for you 🙂