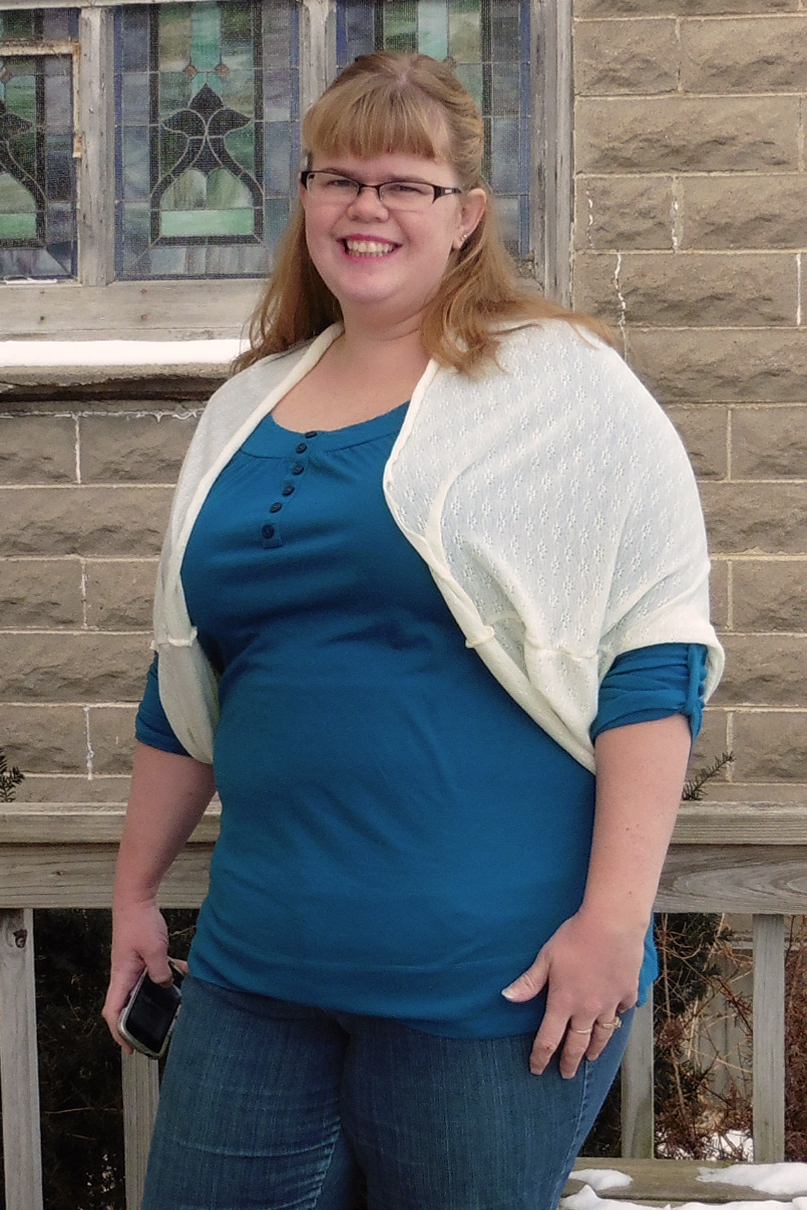
Guess what I’ve got for you today!?! A free tutorial for this beautiful Simple Sweater Shrug!
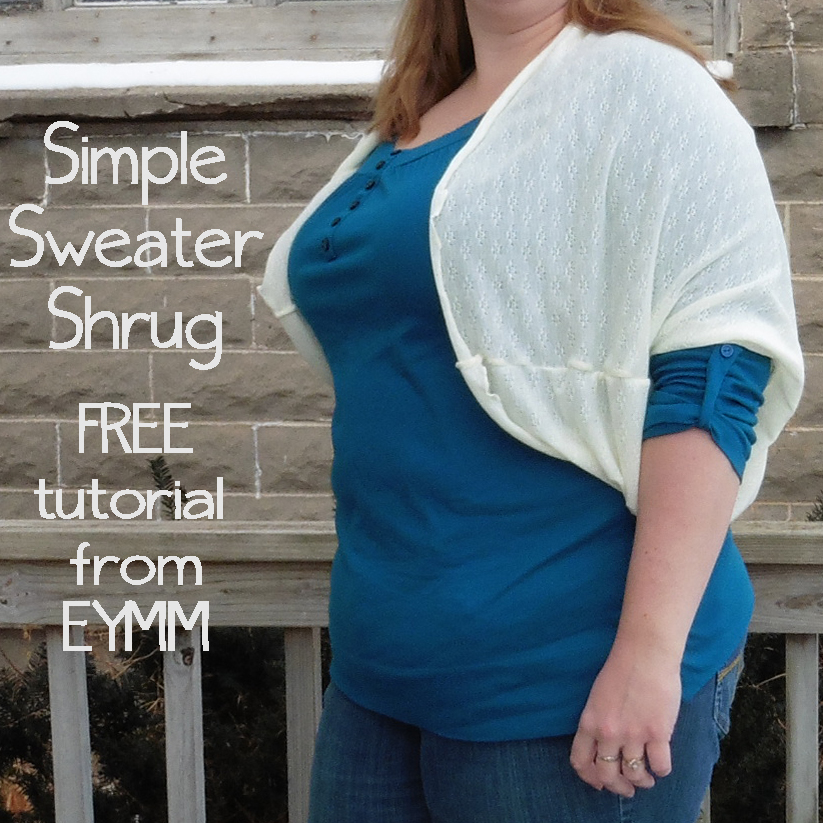
To be honest, when Kymy ran this one past me, I wasn’t so sure it was something I’d love … but I am so glad I gave it a try because it looks great and was SO easy! Seriously, it was less than an hour from me picking fabric off the shelf and gathering my supplies to having a finished shrug to put on!

I used a thin drapey sweater knit, but it would be so cozy in a thicker chunky sweater knit or you could try jersey knit for a sleeker look. Here’s the rundown of how it goes together so you can sew one for yourself or make one for a special girl in your life.
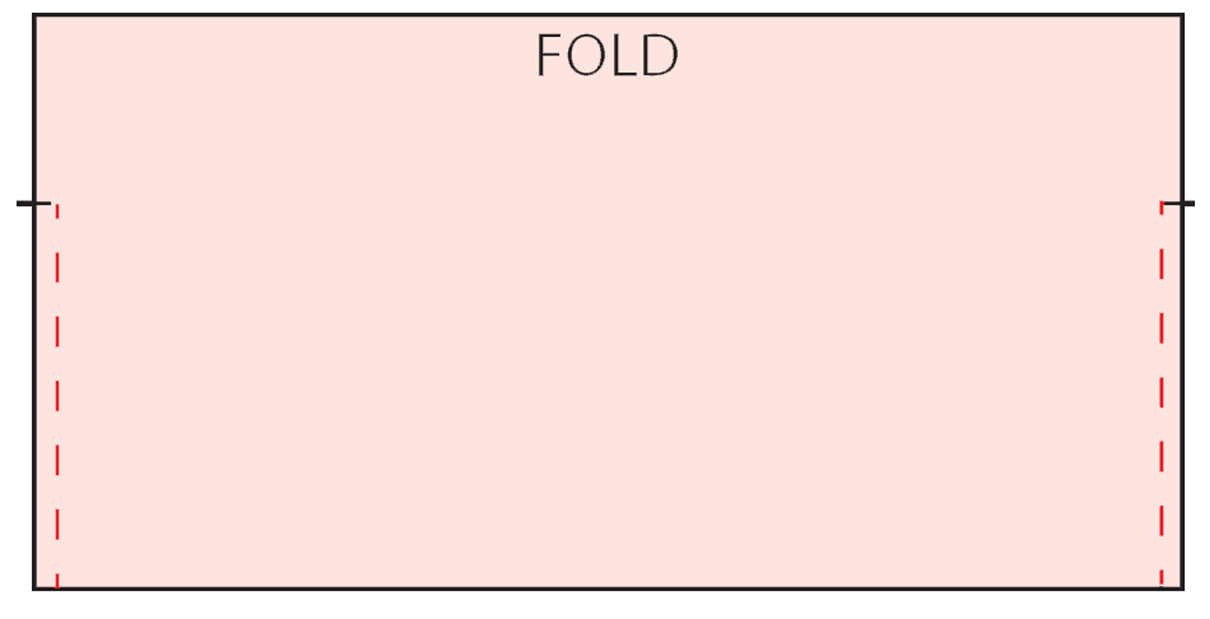
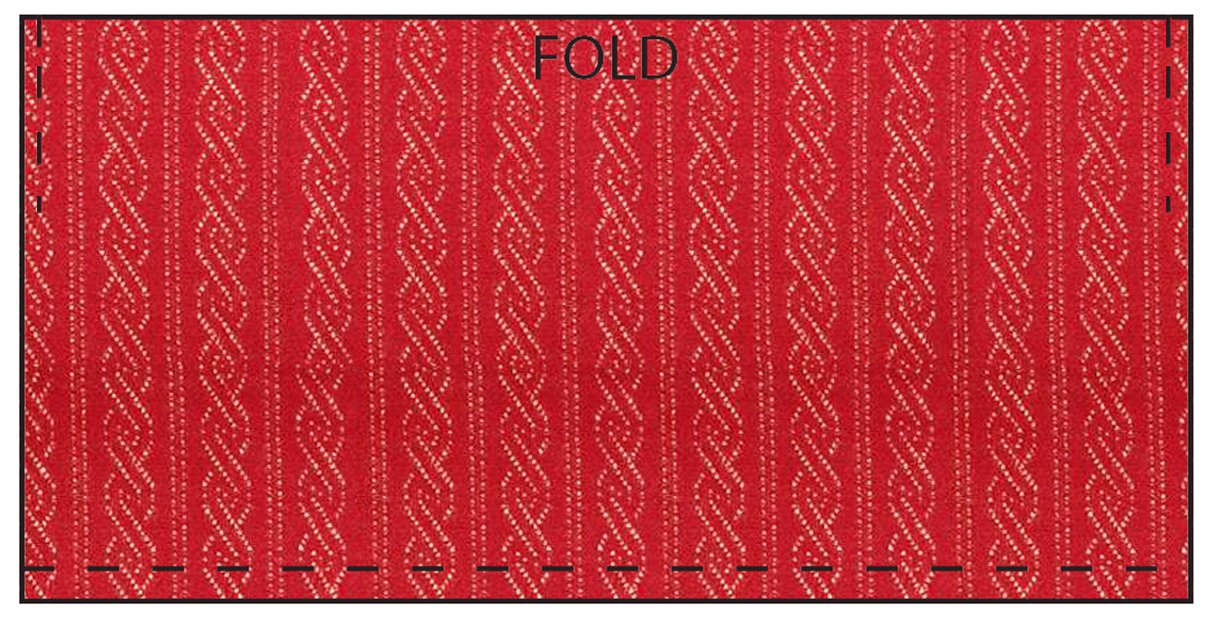
First, you’ll need to measure from the top of your shoulder to the fullest part of your hip (don’t worry about being too exact, it’s pretty forgiving). Take that measurement and multiply it by 1.33 and then add 2 inches. This final number will be how big of a square you’ll want to cut from your fabric to begin.
For example: I measured straight down from my shoulder to hip (over the curve my chest) and came up with a measurement of 30 inches. And, since …
30″ x 1.33 = 40″ + 2″ = 42″
… I started my shrug by cutting a square that was 42″ by 42″.
** Helpful Hint: So that it would be a more manageable size and fit on my rotary cutting mat, I folded my fabric in quarters and then cut 21″ by 21″ along the two unfolded sides, so it was a 42″ square when unfolded.
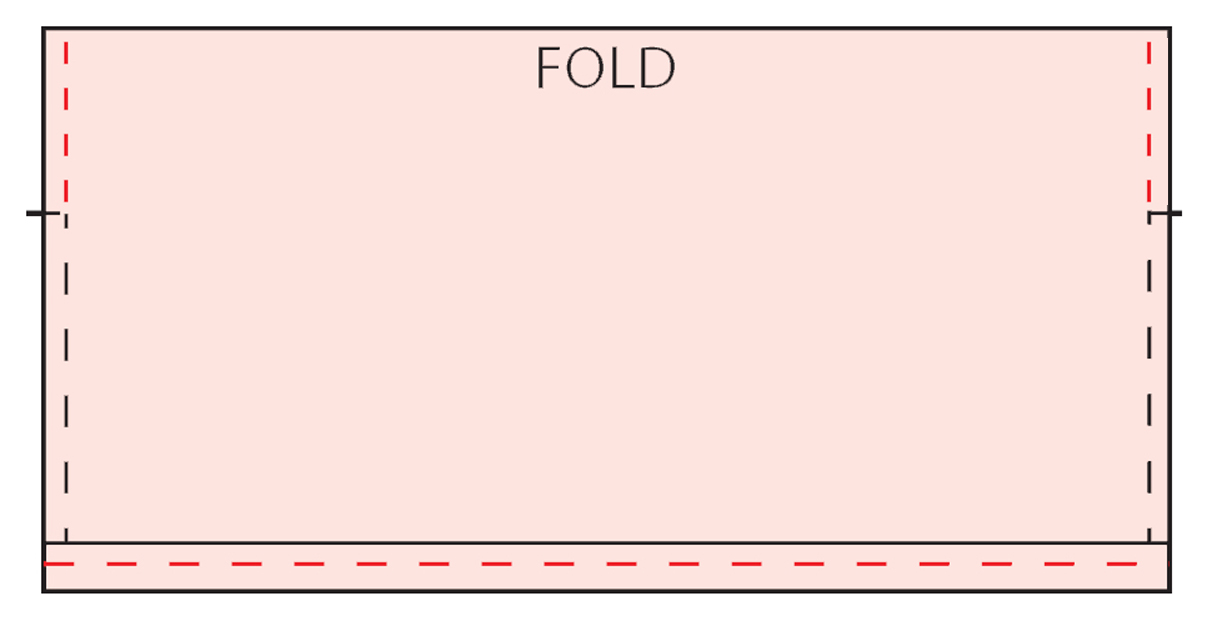
Next, take your square and fold in half with the right sides together. Stitch both the short ends, leaving a gap unstitched next to the fold for the arm holes. For the different size ranges, the arm hole “gap” measurements are as follows:
toddler sizes — 3″
girls sizes 4-8 — 4.5″
tween sizes 10-16 — 5″
women’s xs-xl — 7″
women’s 1x-3x — 8″
women’s 4x-5x — 9″
** Remember, the actual size of your arm hole opening will be double the “gap” measurement because of the fold.
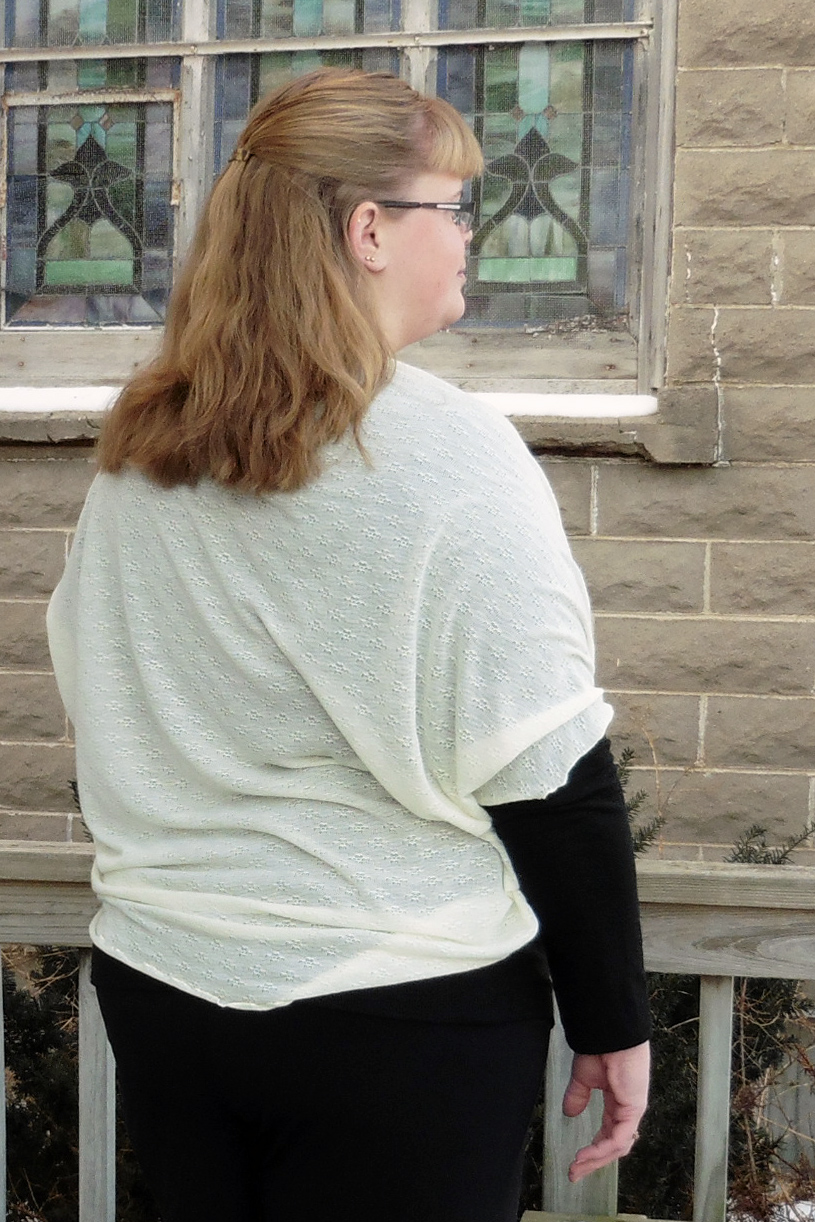
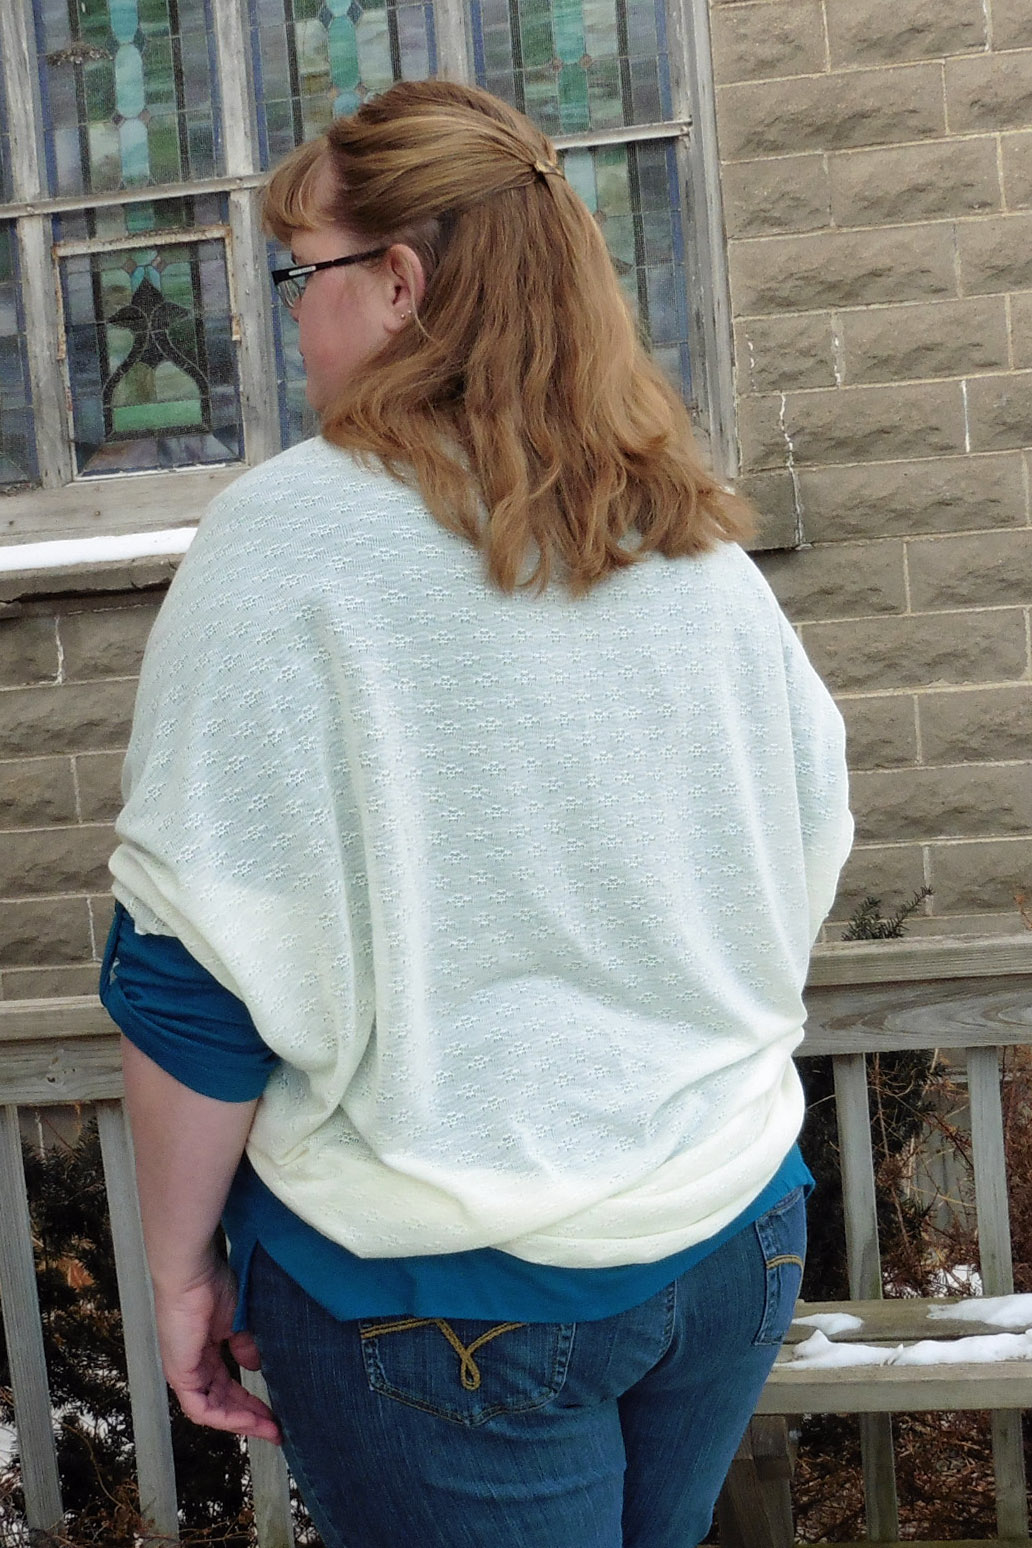
All that’s left now is to hem the raw edges of the bottom and arm openings and you’ve got yourself a shrug! You can either fold all raw edges a half inch to the wrong side and stitch or “cheat” like I did and use a rolled-hem to finish the raw edges. I love the way my serger created a lettuce-edge on my almost-sheer sweater knit!
Turn it right side out and that’s it … your Simple Sweater Shrug is ready to wear! Told ya it was “sew” easy! 😉
This shrug is pretty forgiving if you don’t have an exact shoulder-to-hip measurement, so it would make a great, easy gift for any woman in your life … or you can whip one up while the turkey’s cooking and look fabulous before company arrives for Thanksgiving dinner.
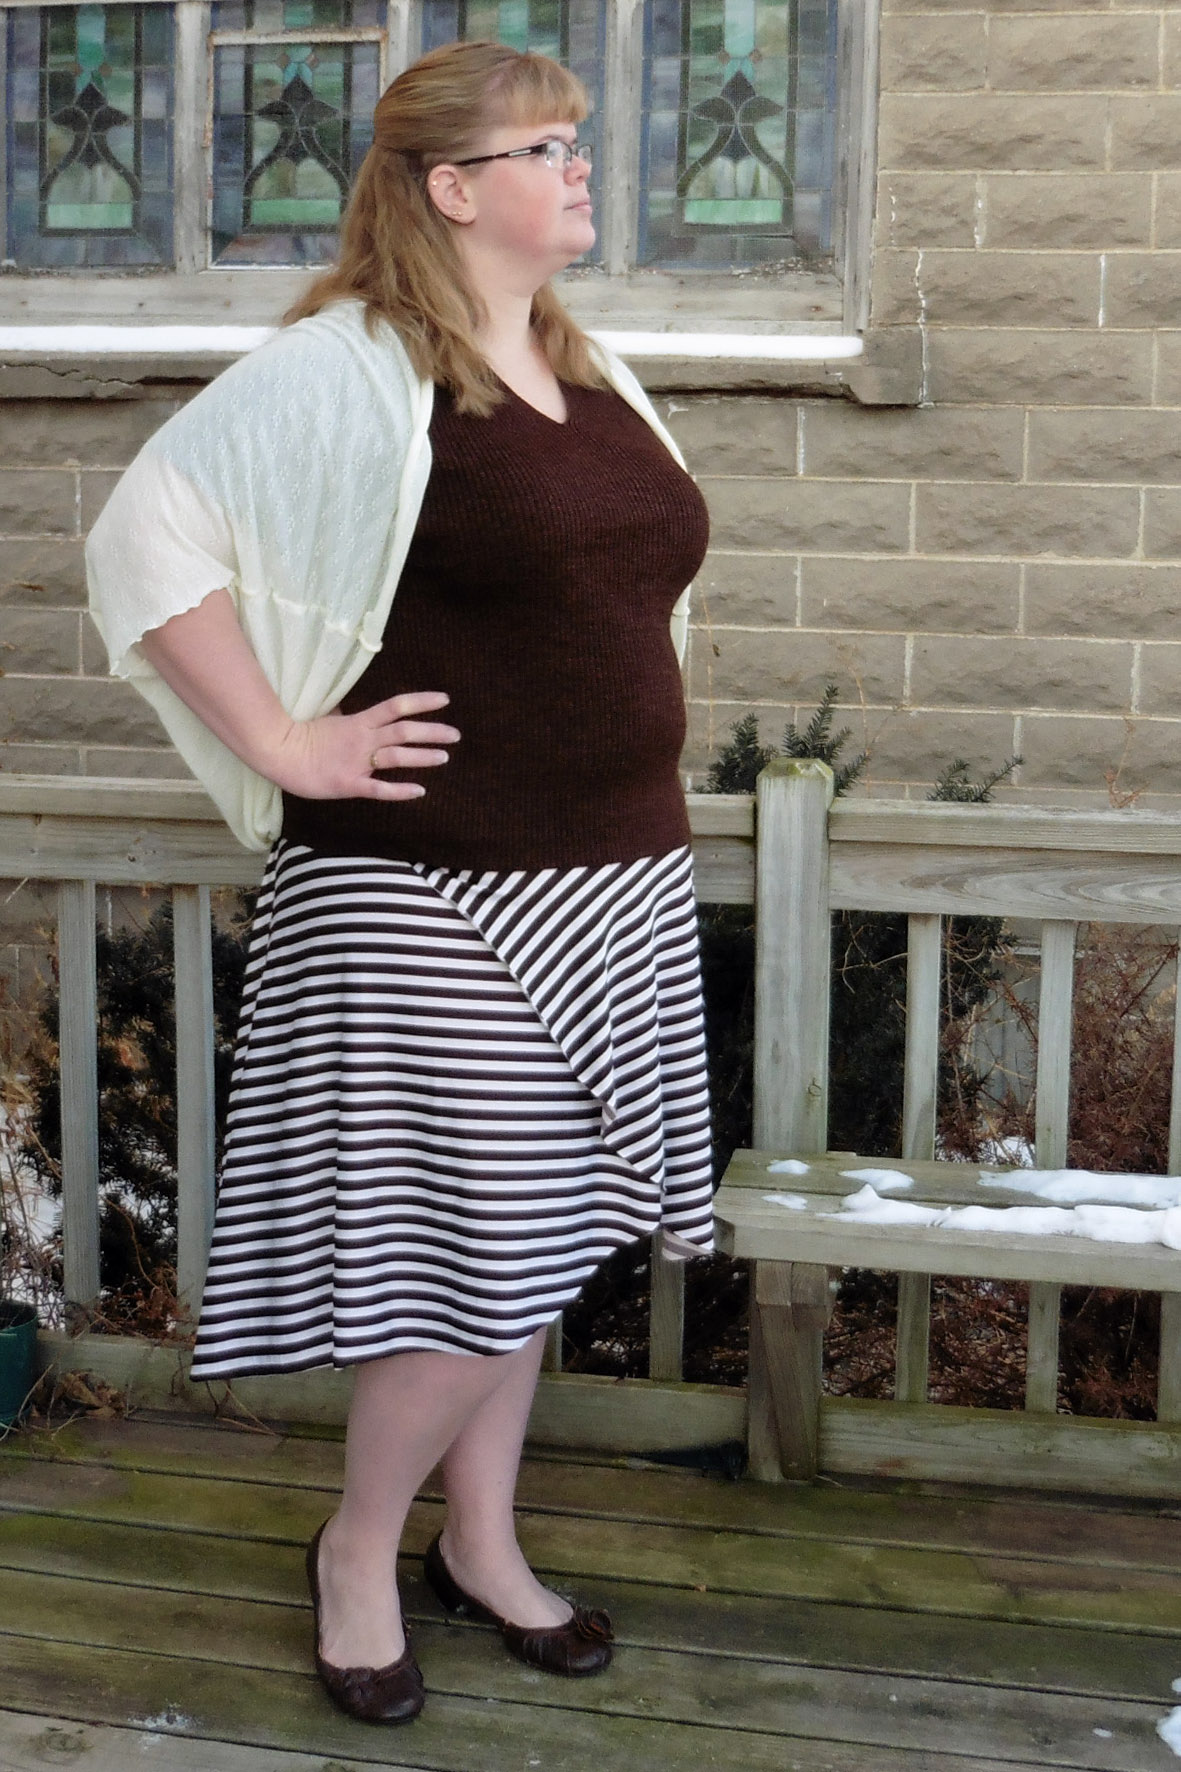
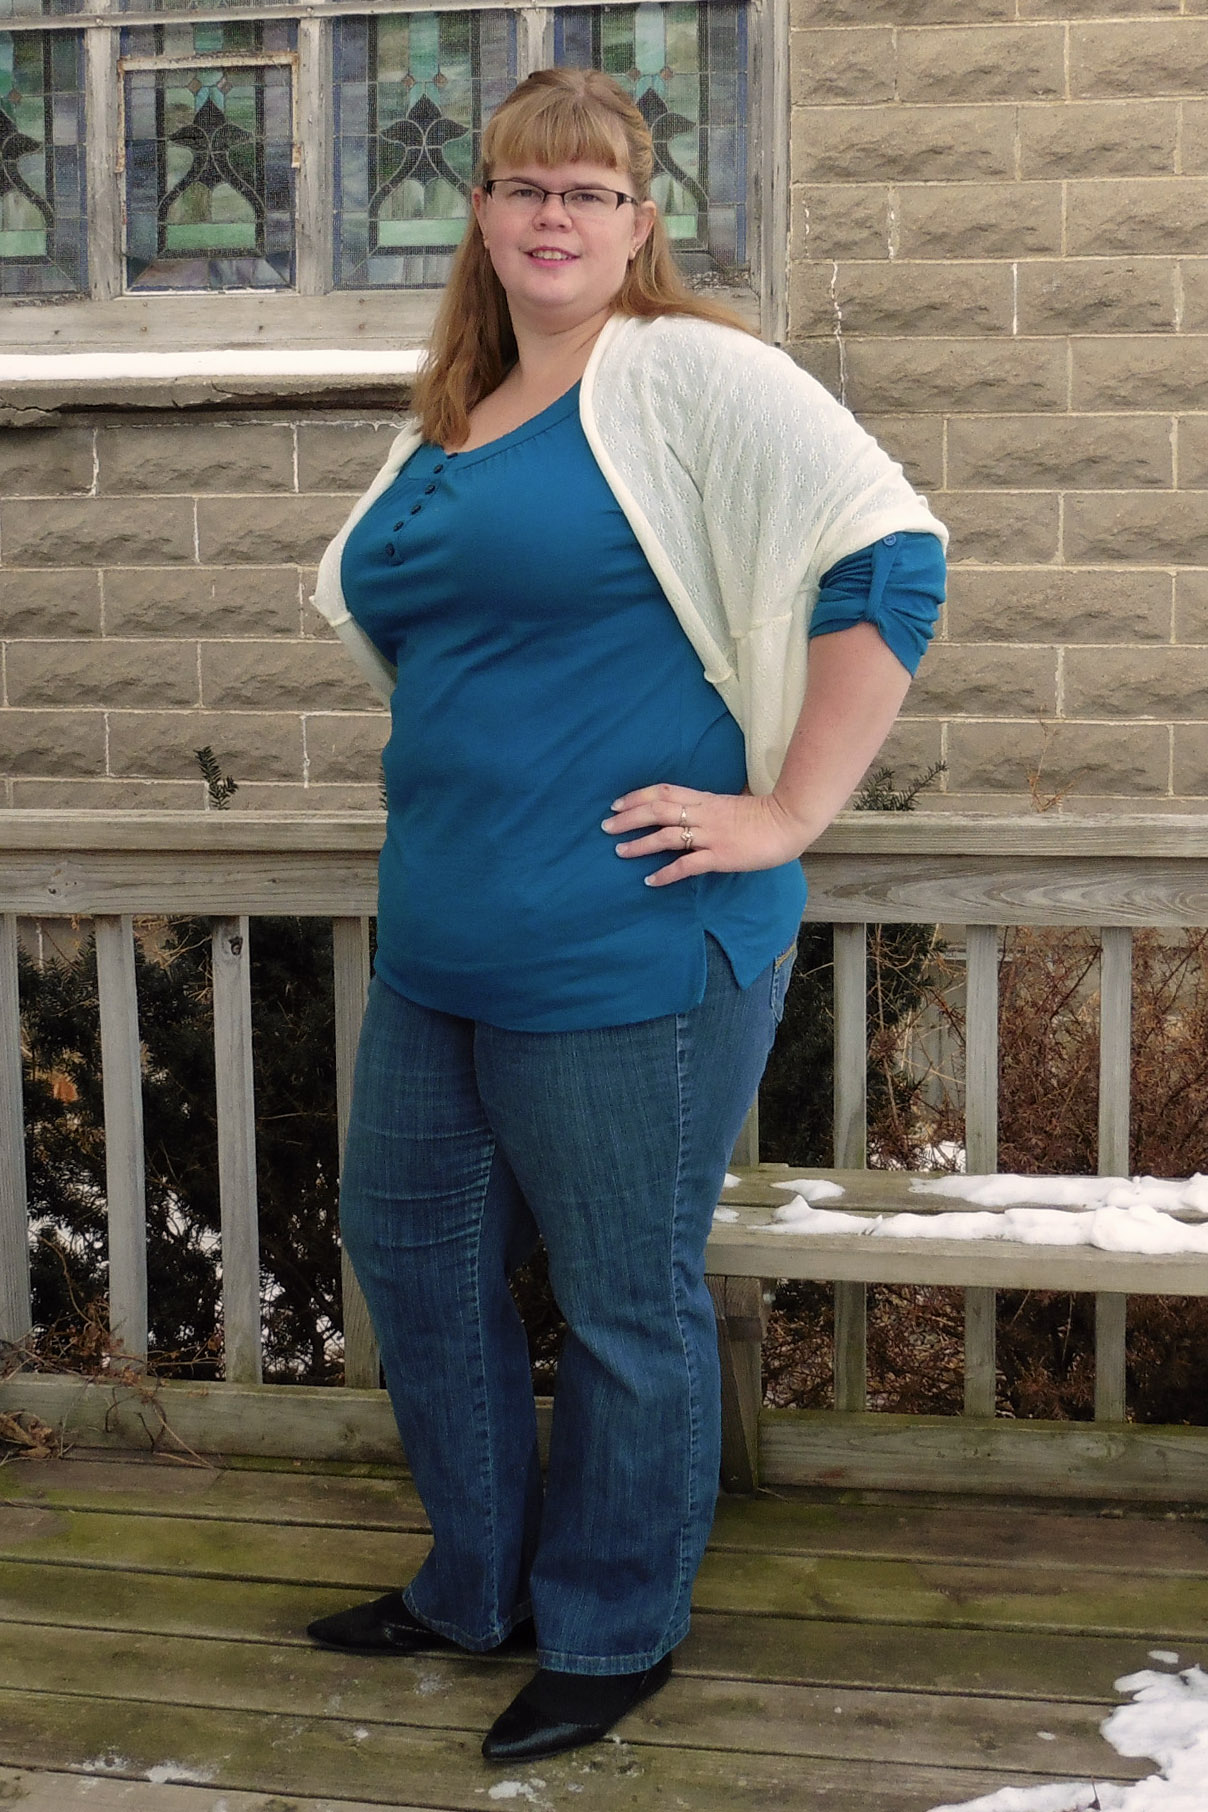
The Simple Sweater Shrug makes a great layering piece and you can dress it up or down. Paired with my EYMM Calla Lily Skirt (sewn/blogged here) or with jeans, this shrug looks fabulous either way!
Happy Sewing!! ~ Joelle
Leave a Reply