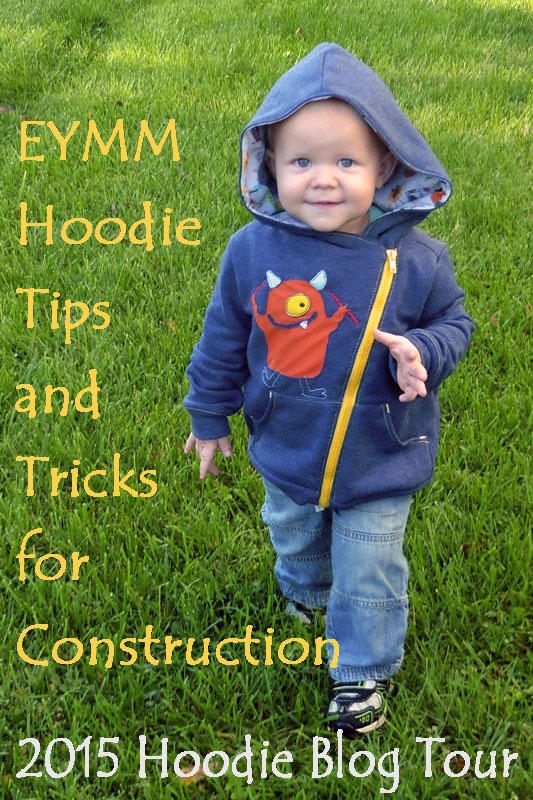
Sometimes I think my kids will never slow down with this growing business! Fall has officially hit and I’ve discovered that four of the five of them need new jackets that will work for the now-chilly mornings, but won’t be too bulky for the still-warm afternoons.
Zander’s Hoodie to the rescue! I spent one very long evening last week tracing and another evening cutting out hoodies in the 4 different sizes!
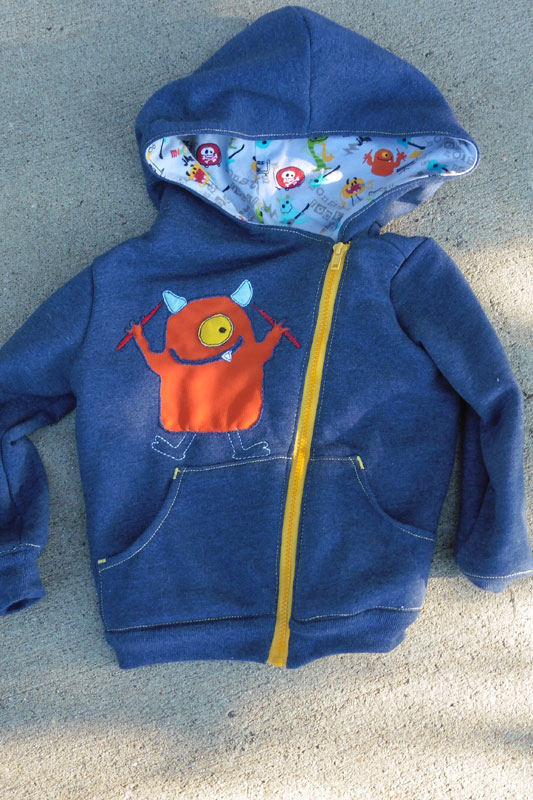
So far, I have just this one completed … my goal is to get the others done before the end of this blog tour! Since I was already sewing up hoodies, I decided to take note of a few tips that help construction go more smoothly.
If you’re uninterested in my construction tips, scroll all the way to the bottom for some gratuitous cute toddler pictures and to find links to the rest of the 2015 Hoodie Blog Tour. Plus, there’s an awesome coupon code down there for 50% off!!
Kymy gets quite a few help requests concerning the asymmetrical hoodie’s integrated hood design (meaning the hood is part of the jacket’s front rather than being a completely separate pattern piece) and about installing the hoodie’s lining, so I’m focusing on those two areas. I took a some pictures to illustrate my written tips, then decided that videos would explain a bit better (I made my first video tutorials!). I’m going to include both the written and the video tips for the hood/neckline seam and the lining, but I also have a couple tips that didn’t need video.
Okay, here we go!
*NOTE* The first tip works for not only Zander’s Hoodie & Hooded Vest and the His & Hers Hoodie & Hooded Vest, but also for the Four Seasons Cardigan & Duster in both girl’s and women’s sizing because it also has the integrated hood design.
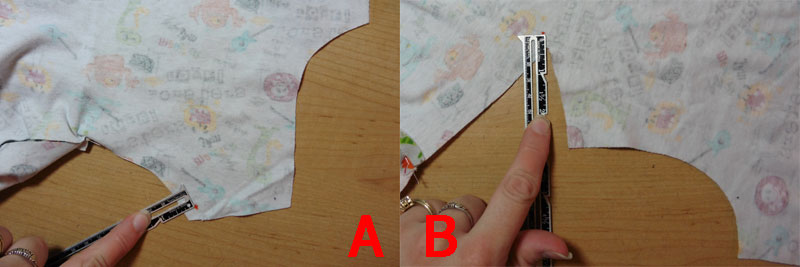
My first tip involves lining up the inner shoulder point on the hoodie’s back piece with the pivot point on the front/hood piece. The easiest way I’ve found to do this is to mark a dot on the fabric’s wrong side (I used washable Crayola marker) that is 3/8 inch from both the shoulder edge and the neckline edge on the back piece (see orange dot in picture A). Next, take the front/hood piece and mark a dot on the fabric’s wrong side that is 3/8 inch in from the point of the v-shape where the shoulder meets the bottom edge of the hood (see picture B).
When you put them right sides together in preparation to sew the seam, match up the corresponding dots and pin right at the dot (you can see this pin near the bottom of picture C below). Do this with both back shoulders and both front/hood pieces. You will also want to pin the bottom of the hood seam to the center of the back neckline.
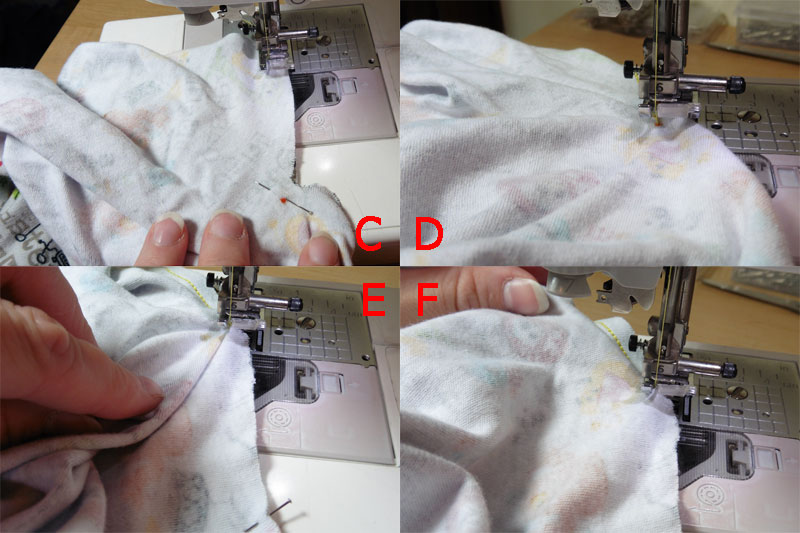
With the front/hood piece on top, start at one outer shoulder edge (see picture C) and sew** the shoulder seam until you reach the first dot, where you will stop with the needle down and lift your presser foot in order to pivot (see picture D) and prepare to sew around the back neckline.
There will likely be a mess of wrinkles/folds along the bottom edge of the hood in front of the foot and needle (see picture E). You simply need to lift and move these folds behind the needle (see picture F). Your presser foot should still be up at this point, so it is easy to move the folds back out of the way and smooth out the fabric, aligning the bottom raw edge of the hood with the back neckline edge. Sew along the back neckline curve, stopping at the opposite shoulder’s dot and repeat the steps above to smooth the fabric and align the second shoulder seam. Sew to the outer edge of the second shoulder and the shoulder/neckline/hood seam is done!
**Tip: If you’re unsure about your ability to keep the seam free of wrinkles/folds, try sewing the seam with a long basting stitch first just in case you need to seam rip and fix anything. Once satisfied with your seam, go over it again with a normal stitch length to secure it in place.
Since all of this is kind of hard to describe and photograph, I recorded a video when I sewed this seam on my hoodie’s outer fabric (pictures above are the lining fabric).
Hopefully my video explains a bit better (or at least easier) than the written directions.
My next tip is a little trick to help get your pockets even with each other! Yay!
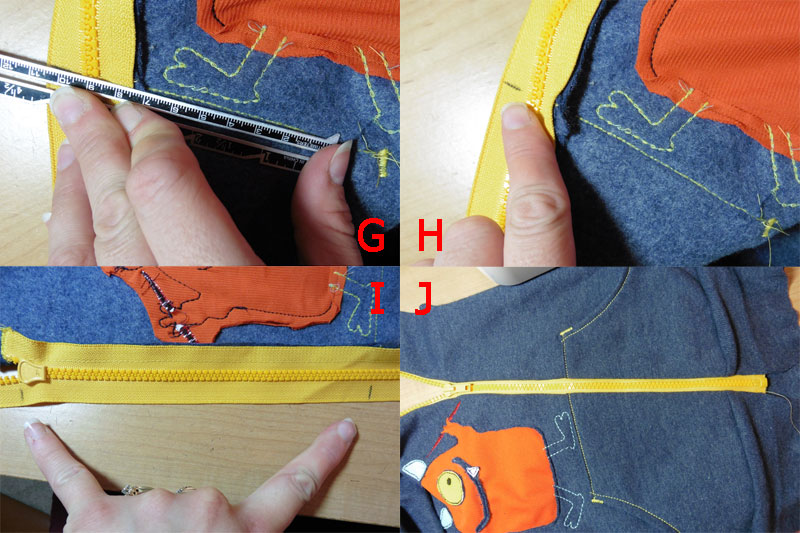
First, follow the pattern directions to sew the pockets on and to sew the zipper to one side of the hoodie. Then zip it up and flip over to the fabric’s wrong side. Take a straight edge (hem gauge, ruler, paper, etc.) and line it up along the stitching that attaches the top of your pocket (see picture G). Make a small mark even with the straight edge on the back of the zipper side that is not yet sewn to the hoodie (see picture H).
I also like to mark where the top of my too-long zipper curves into the seam allowance on the first side sewn (see picture I) and the bottom band seam placement (not pictured). When placing the zipper on the second side, pin these marks to corresponding points to help ensure it’s all aligned well. Sew** the second side of the zipper on, zip it up, and check that everything looks straight (see picture J).
** TIP: Use a long basting stitch to sew the zipper on, so it will be easier to seam rip in case the pockets or bottom band seams aren’t straight across the zipper. Once satisfied with the alignment, go back over the basting stitches with a regular stitch length to secure the zipper’s final placement.
My other big tip today is a trick to help sew the lining to the little “tab” area that lays behind the zipper. I’ve figured out that adding just one little step before attaching the lining makes a world of difference.
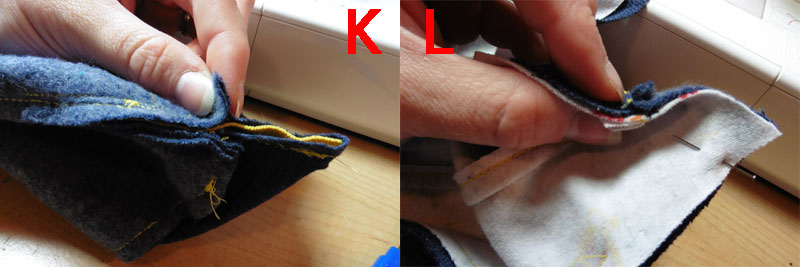
In the pattern directions, when wrapping the bottom band around the zipper bottom, you should have left the last/top 3/8 inch of the band unsewn. You also should have left the bottom 3/8 inch unsewn when stitching the front center piece to the zipper’s back (both of these mentioned steps can be found on page 9 of the Zander pattern directions and page 10 of the His & Hers pattern directions). The ends of these two mentioned seams should butt right up against each other on the back of the zipper, at about the same point where the bottom band meets the hoodie body on the zipper’s front (see picture K, where I’m pinching these two unsewn ends together).
So the tip I’ve developed is to sew these two “loose ends” to each other! This can be a little tricky because you have to fold the bulk of the zipper back out of the way. The stitching you want to add should be a line that is 3/8 inch from (and parallel to) the edges sticking out between my thumb and finger in picture K (the edges facing the camera). This additional little seam will start where the two previous seams butt against each other and end at the raw edges of the inner bottom band and bottom of the front center piece (the edges facing the top of picture K).
When you pin the lining on, press the seam allowance of that new tiny seam open and line it up right sides together with the seam that connects the lining’s front center piece to the smaller front right piece (see picture L). It should now be practically a straight line when you sew that part of the lining to the hoodie! Sew the lining in, clip the corners, and turn right side out and check out how it looks.
Updated to add: If one of your fabrics stretches more than the other (usually the lighter weight lining will have more stretch), before sewing you’ll want to lay your lining completely in/on your jacket and pin very well to make sure all the edges match up all the way around. If your lining doesn’t match up exactly with the outer hoodie, you may have to trim the edges a little to make them the same size so they’ll sew together easily. Sometimes, due to the odd shapes of all the hoodie pieces and cutting them out separately, pieces may get cut slightly differently because of pattern sliding or fabric stretching.
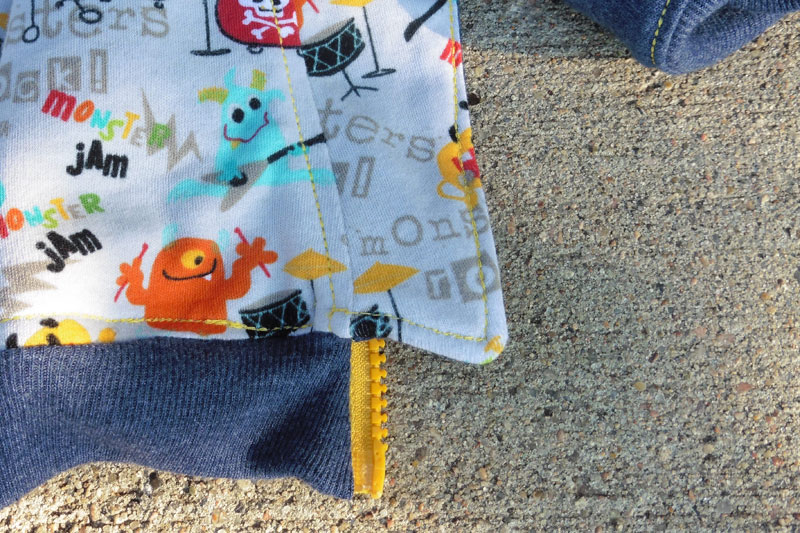
Here’s what the inside of the finished “tab” area should look like after topstitching.
Now, like I mentioned before, this is the second tip that I think is easier to see demonstrated on video than to read about … luckily, I realized that before sewing the lining in and I recorded it for your viewing pleasure! Haha!
Isn’t that easier to understand? Haha! I figured I’d include the written out directions just in case there’s someone out there who needs help but doesn’t have video-streaming capability.
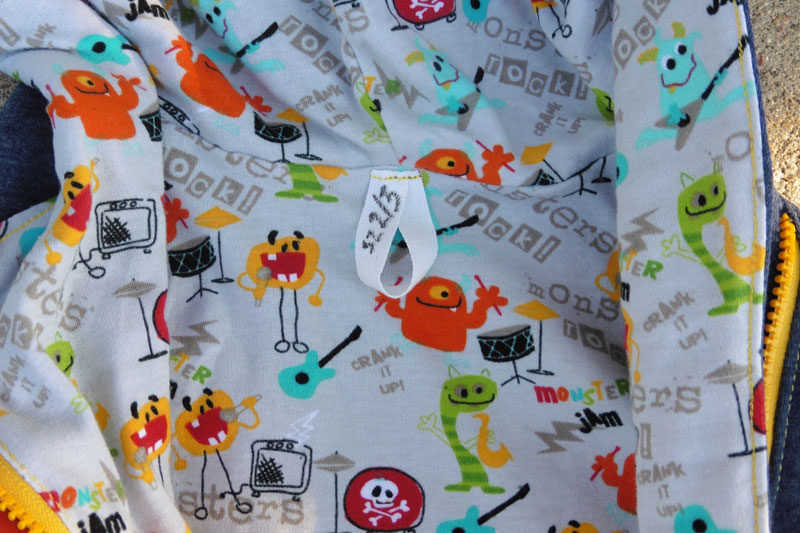
One final tip is to add a small loop of twill tape at the neckline. This can be done after the hoodie is completely finished and serves 3 purposes. First, it acts as a loop for hanging on a coat hook. Second, you can write the size (or a name )on the loop. Third, it will hold the hood and neckline on the lining from pulling away from the main hoodie’s fabric. This is because the way I’ve attached it is to align the seam at the bottom of the lining hood and the outer hood before pinning the loop on. Using a thread that will blend into your outer hoodie fabric, stitch through all layers with the loop facing up toward the hood. Then fold the loop downward and topstitch across it again to conceal the raw edges of the twill tape. You could also use ribbon, but probably wouldn’t be able to write on it without it smearing or rubbing off.
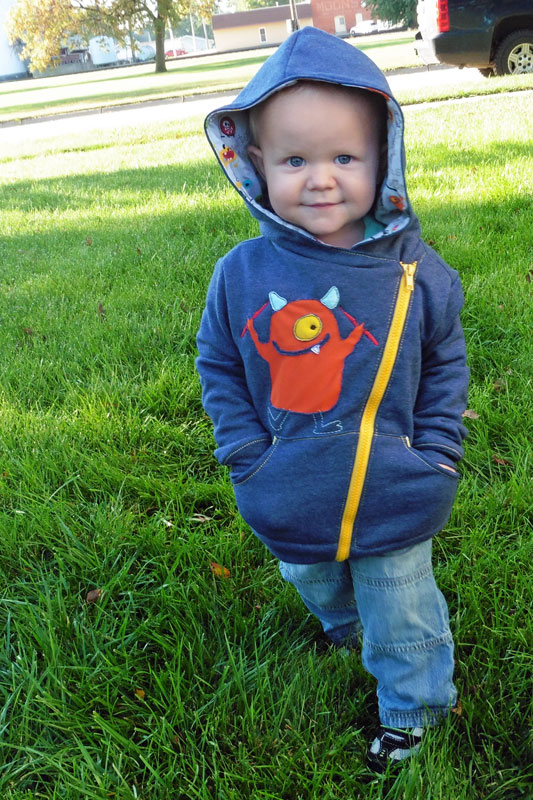
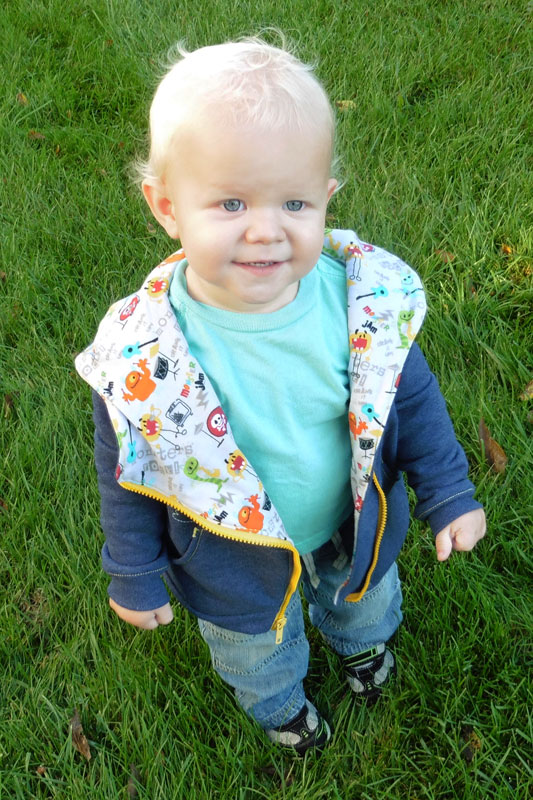
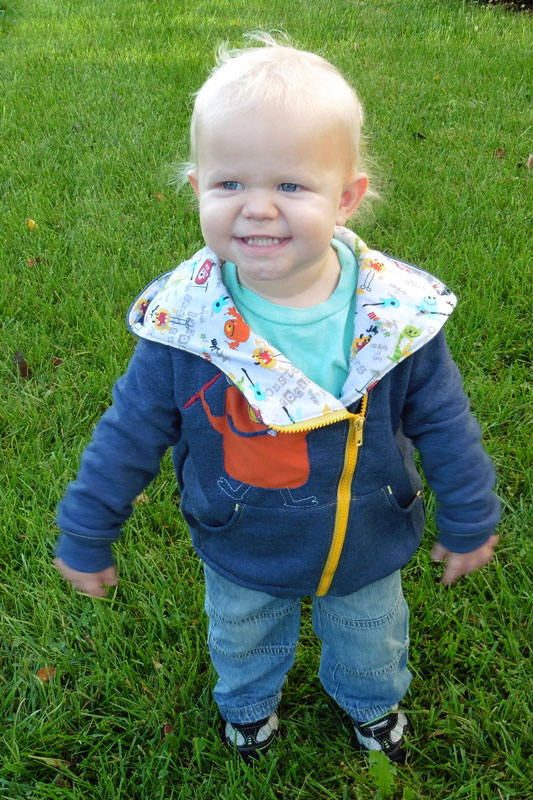
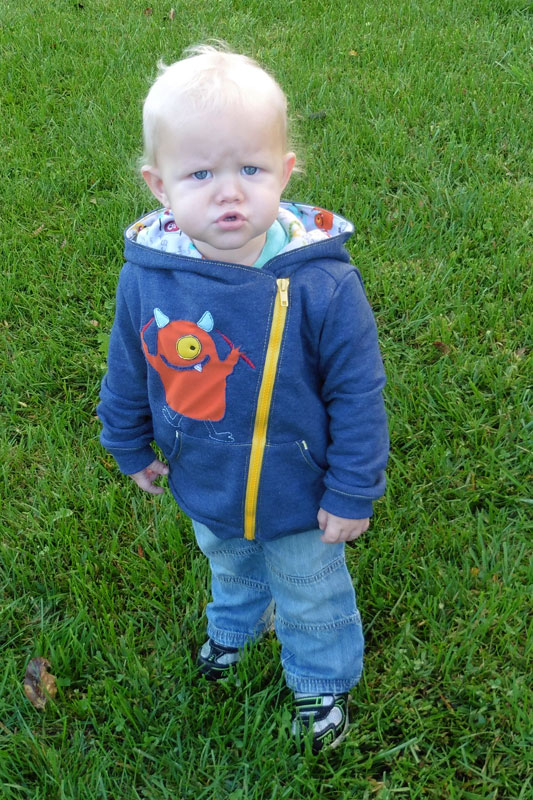
Now, for a “few” superfluous cute baby pics to help off-set the cut-and-dry tone of my boring-ish constructions tips. 😉


Make sure to visit the other stops on the tour to see more versions and hoodie inspiration! Many are giving away a copy of the pattern! (Psst … check out the awesome savings listed after the tour links!)
*NOTE* The links below won’t show the tour posts until 7am PST on their day of the tour, BUT you are welcome to click through and check their blogs out at any time.
9/25
Blessed X Five and Capture, Craft, and Cook
9/26
9/27
Rebel & Malice and Manning the Machine
9/28
Welcome to Our Crazy World and Connected by a Thread
9/29
Pretty & Precious Clothing and Boutique Birdie
Hop over to the EYMM shop and use code FALLHOODIES2015 to save 50% on either hoodie pattern! Coupon is good for Zander’s Hoodie & Hooded Vest (newborn-18tween) or His & Hers Hoodie & Hooded Vest (adult XS-5XL) and expires 11:59pm PST on Sept. 29.
*NOTE* These two patterns are INTERMEDIATE TO ADVANCED sewing level, as they include zipper installation and some unique assembly techniques.
Happy Sewing!! ~ Joelle
One Response
Essence B Underwood
He is so adorable and I love his hoodie!