First off let me say that though I wish I did, I was not the one who came up with this awesome idea! All the credit goes to Marzipan from Sewing Mamas. Anyways I have purchased a couple different types of nice woven tags and have been very pleased with them, but no matter what type they are or how they are attached they always seem to itch! I was reading on the Sewing Mamas forum one day & a mama who was having the same problem asked the question to which Marzipan came to the rescue! These 100% cotton twill tape tags or clothing labels can be made and applied a few different ways. They are soft, wash well and are durable… though the best part of course is the no itch/scratch part. Also twill tape comes in a variety of sizes & colors from 1/4″ to 1 1/2″!
I know lots of mama’s had lots of little questions, & after using them a few times & being very pleased I wanted to make a tutorial to share.
Twill Tape Tags & Clothing Labels
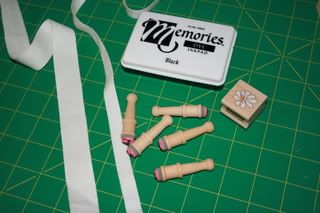
Supplies:
100% Cotton white or natural colored twill tape in various sizes that match up with your stamps
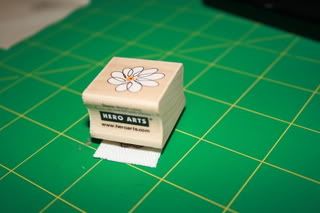
Picture & letter stamps to create your tags (make sure they fit the twill tape you have)
Ink Pad (I use just a plan craft ink pad, but you can use fabric ink/dye)
Scrap of paper
Measuring device
Scissors
Iron
Sewing machine or needle & thread
STEP 1: On your scrap of paper stamp out the designs you want to use & measure how big they are…
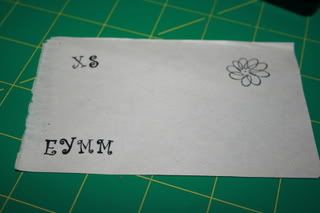
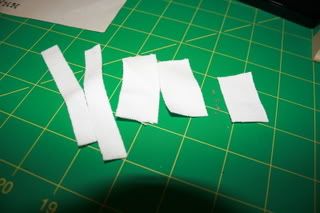
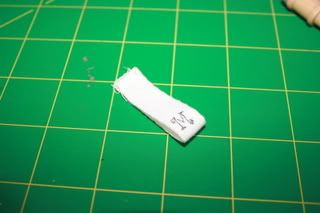
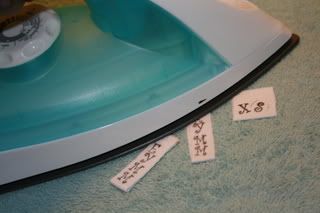
STEP 2: Cut your twill tape… if you are going to make the fold-over sew IN tags that you want to double the length of the design & add 1″. Exp my ‘EYMM’ design is 1″ long double that & add 1″ so I cut 3″ peices of twill tape. My ‘XS’ design it set the other way & only about .5″… double that & add 1″ I cut those at 2″ each. Finally the sew ON tags… these you measure and add .25″… so my stamp is almost 1″ so I cut the tape at 1.25″ Remember this is a lot of trial & error!!! Do what looks best with your stamp & particular size of twill tape!!!
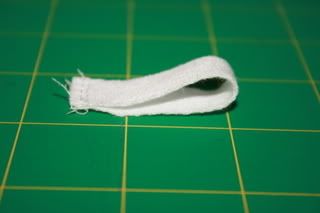
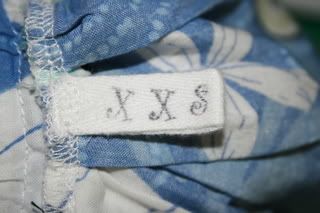
STEP 3: For the fold over tags you want to fold in half & sew a 1/4″ seam allowance on the raw edge.
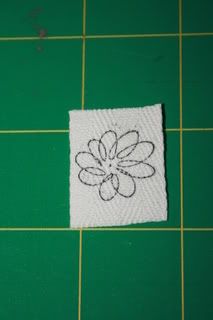
STEP 4: STAMP!!! For fold over sew IN tags you want to start at the bottom & work your way up… for sew ON tags just stamp in the middle.
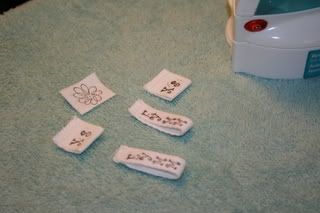
STEP 5: HEAT SET! With your iron set on cotton gently mover your iron over your tags for 30-60 seconds. You want them to get hot because this sets the ink into the fabric, aka staining it!
And your tags are DONE!!!! Who would have thought it was so easy & inexpensive to make your own tags?
USING YOUR TAGS 🙂
For the fold over sew IN tags you do just that! You can also sew in multiple tags for your label & then a size tag for example.

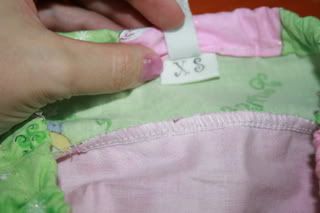
For sew ON tags you sew them on the exterior or interior of an item… simply sew them down with a 1/8″ seam all around the edge. With these types of tags the raw edges will FRAY! It is 100% cotton & there are only 2 things that can really help… either zigzag it on like an applique or you can use fray check which seals the ends BUT fray check will dry hard & make them itchy as well as it doesn’t wash well. Here are pictures of how to put these kind on!
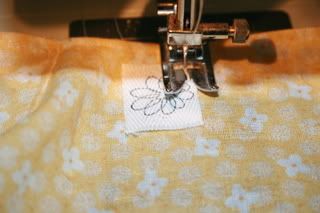
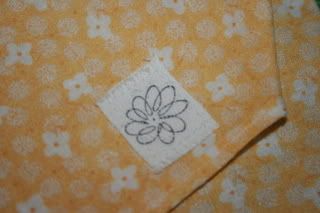
Finally this is a repeat picture but this is a picture of the first tags I made for the twins dresses… it has held up VERY well these dresses have been washed on warm with stain fighter & then machine dried at least 5 times.
I hope that this helps lots of mamas, aunties, friends & grandmas out there label their wonderful creations!
30 Responses
Shelly G.
I have used twill tape for years to mark the backside of clothing for my children… I have never decorated them… This is a wonderful idea… Especially because twill tape comes in all sizes and colors now… How fun… Thank you for the tutorial:)
Kim
How neat! I’ve always admired people who sew. I can manage a square pillow on the machine and hand hemming. I’ve always thought it would be something I’d love to learn to do. Right now, I have too much else taking my time that I feel is more of a priority! Maybe one day!
Kayce
You have just made my day! I’ve been racking my brain on how I can mark my recycled tshirt dresses with sizes without spending an arm and a leg on tags. I can’t wait to try this out – the kids can even help me!
Thanks Kymy!
Sandra
Hi! This is a wonderful tutorial…..just wondering where you get your cotton twill tape? I’m having a little trouble finding it.
Thanks!
Kymy
Sandra I got mine for JoAnn’s. You should be able to find it at your local fabric shop. But the best variety can be found online. Hope that helps!
DeeLight
Great idea!! Thanks for sharing.
Kei
Fantastic idea! I will definitely be using this idea for labelling baby clothes!
Denise Bruning NZ
Hi, Thanks for helping me to find the answer to my problem of tags.
I’ve got a Smiley face stamp I can try it with. I liked the tip about ironing in the ink to set it.
Cheers
Denise
Trina
You are a genius! I made some with twill tape but used iron on transfer paper. I like this method better! Thanks!
Stephanie
Hi, Thank you so much for this wonderful idea. I was just browsing the internet looking for labels for my doll clothes cause using iron-ons is for the birds. Thanks for the great tip you just saved me alot of money!
Deb
What a clever,fast and cheap method to make labels. Thank you for this idea!
Jennifer
So using the regular craft in pad as opposed to the fabric ink, still works and will not fade or run?
Very genuis idea. I am going to Sew try this out.
so glad i found thsi page.
Christy
wow, that’s so neat! thanks for the fab tutorial!
Nichole
What a GREAT idea!!!!! Thank you.
Stylinmommy
This is such a cool idea! I’m so glad I found this. I just bought a huge roll of twill tape at a garage sale a couple of weeks ago and had no idea what to do with it. This will be fantastic!
Melinda
This is such a great idea! I am having trouble finding some mini number stamps like the mini curlz alphabet set. Any Ideas?
Thanks!!
Kymy
I got mine from JoAnn’s, but I have seen them at Micheals & my small local craftshop as well!
woven labels
Absolutely amazing! I’m sure ma mates gonna love this article. Thanks Kymy!
Luralie
I love your tutorial and I’m looking forward to trying it, too! I ‘ve posted a link to your tutorial on my blog.
Thanks again for the great tute!
Luralie
samantha
I just browsed your blog and thank you for the info. on clothing labels and tags. These are extremely expensive to have done, but you take the disappointment and turn it into “I can do anything myself” a real joy.
Wendy
somehow missed this but am glad I took a look. Love it, thanks for posting this!
Evelyn
I have bought twill tape… turned out it was polyester, so had to go get cotton twill tape… I have tried and tried… but it will not stay… I am utterly confused as to why it is not working. Please help! I have bought stamps, done everything… please help me!
Kristy Neeley
THANK YOU!! I love thi idea. i looked into all kinds of expensive labesl at one time but they were expensive!! I am gonna try this! Kristy from Aprons and Apples a crafty thrifty diy healthy blog!
Carol Sullivan
This is AWESOME!! I LOVE your blog. I just stumbled upon it and so glad I did!!! Keep doing a great job!
Mak Teh
oh thank you thank you so cool..u are so clever.now I can make my own label.
Pam Pike
Thanks so much for this tip. I’ve been searching for a good source to buy twill tags from but I may just be able to make my own.
ramesh
How to secure a 4mm cotton/woven twill tape edges?
i tried to stitch /bar tack/ heat seal but, its looking bad.
Kymy
I either serge or attach them with a 1/8″ seam allowance and leave them raw. You can also use fray check which is clear but does dry a tad rough.
Leah
I was on line to order some of these for $45 dollars when I just happen to stumble across your site! THANK YOU SOOO MUCH! This is going to save me a lot and looks like a blast!
chataquaka
I Really Love This Idea!!!!!