When I began sewing for my family, my main focus was up-cycling old clothes/curtains/sheets into “new” clothes. My reasoning was simply because it was so much cheaper than buying new fabric. I was learning and was hesitant to spend a lot on something that I might mess up, so I re-purposed many things into “new” for my girls when they were small and learned a lot along the way. Now that I’m more experienced, I still like to browse thrift stores and clearance racks for “fabric” to make unique clothing for my kids and occasionally for myself. So, when Magda was looking for contributors for her annual Refashion Month hosted over at House of Estrela, I signed up right away!
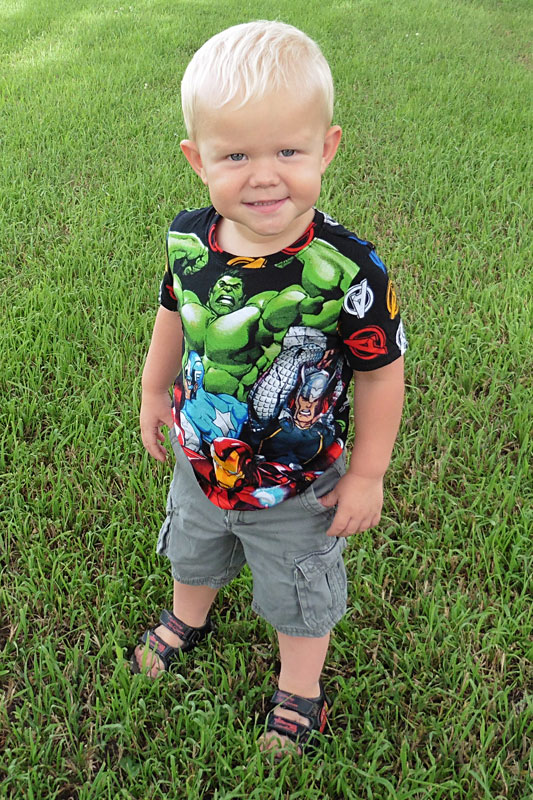
Who can resist a great sale rack find? Not me, apparently even when it’s boxer shorts … and especially when the 2-year-old falls in love with them and begs to take home the “superhero shorts.” How could I tell him no when I know I can refashion them into something that he can wear and we’ll both be happy. I’m happy because he gets a new shirt for just $1 and he’s happy because he gets to wear his beloved Avengers!
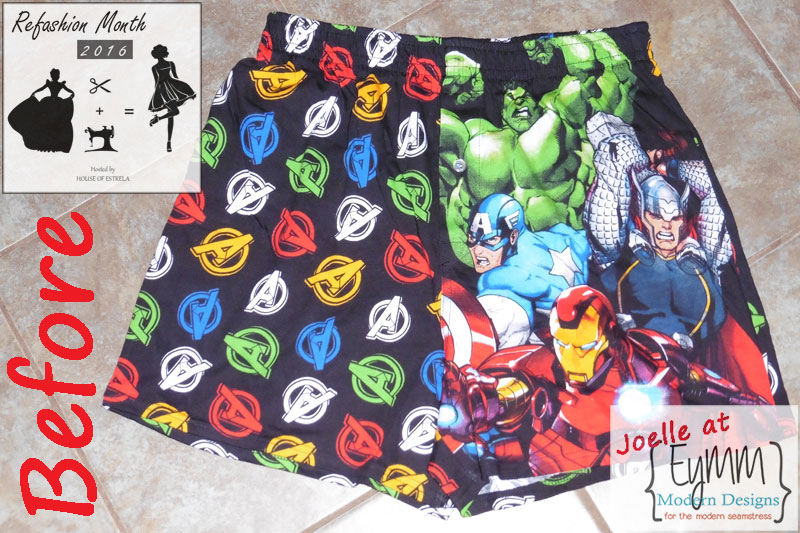
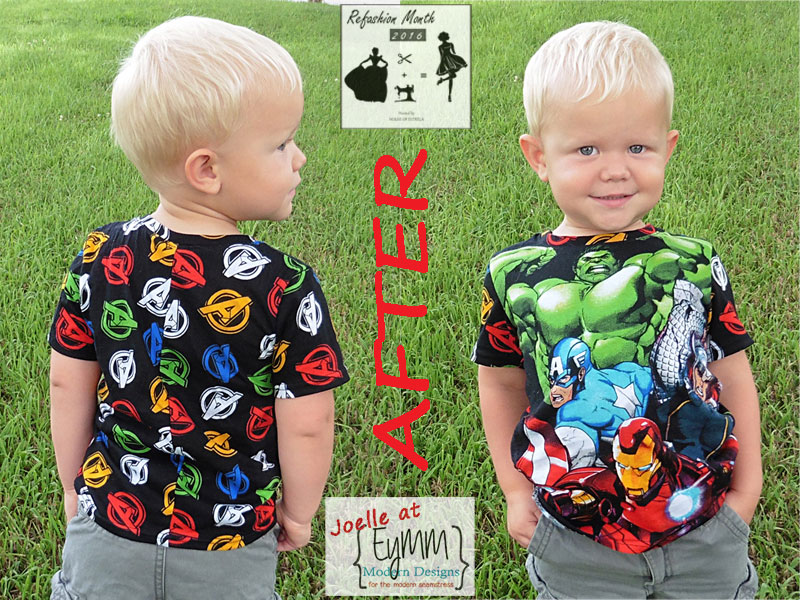
When I bought these knit boxers, I thought I could easily cut a Parker’s Vintage Fit T-shirt out of it for my toddler … and if I could save time along the way by re-using the existing hems, then all the better! However, I slightly under-estimated his size (or else I over-estimated the size of the shorts). I ended up spending lots of time ripping the fly and waistband stitching out of the boxer shorts in order to make enough fabric available to put my pattern on. I spent more time seam ripping the original shorts than I saved by re-using the existing hem (read to the end for a mini-tutorial on how I finish my seam ends when re-purposing hemlines). For the record, the boxers were a size men’s small and the finished shirt is a size 3T and I had only small scraps left over!
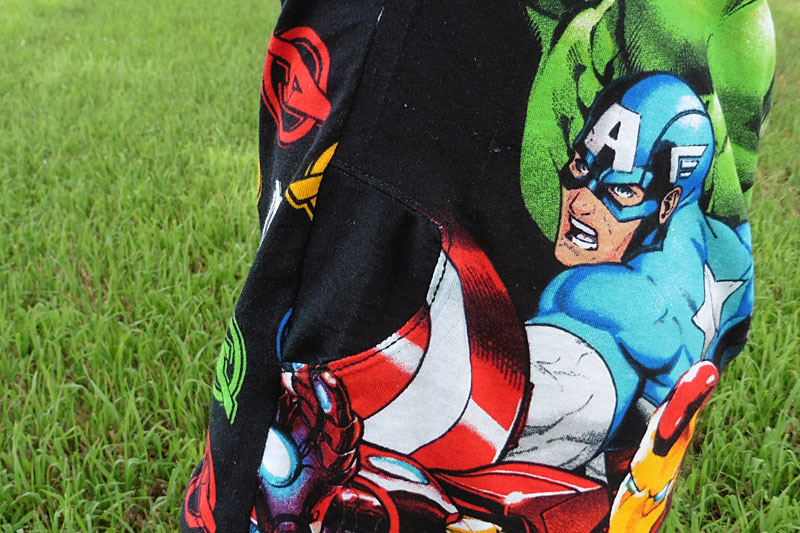
Even with all that ripping, I still had to fill in a small part around the bottom curve of the shorts fly to fill in this spot on the side of the shirt’s front. It’s not perfect because of the funny curved shape, but I figure the kid will never stop moving enough for anyone besides me to notice! LOL
I also had to rip out the buttonhole stitches from the original shorts fly and then had these “lovely” slits on the shirt front. Luckily, they fell in the middle of Hulk’s bicep and so the black zigzag stitches I used to close the holes blend right in to the shading of his muscles. Again … barely noticeable when the kid is bouncing all over like little boys tend to do! 😉
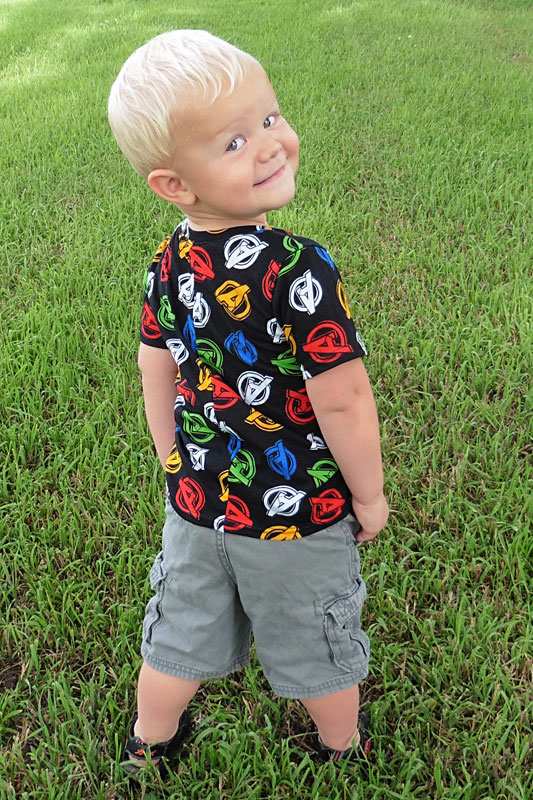
When laying out all my pattern pieces onto the shorts fabric, I really wanted to re-use the original hems so I wouldn’t have to press and sew new ones (hemming will always be one of my despised tasks). I found that the easiest way to fit the back and both sleeves along the original hem was to use the shorts’ side seam up the center back of the shirt. I debated whether it was worth it to save me from hemming and decided that it was and that I’m calling it a “design element.” Haha!
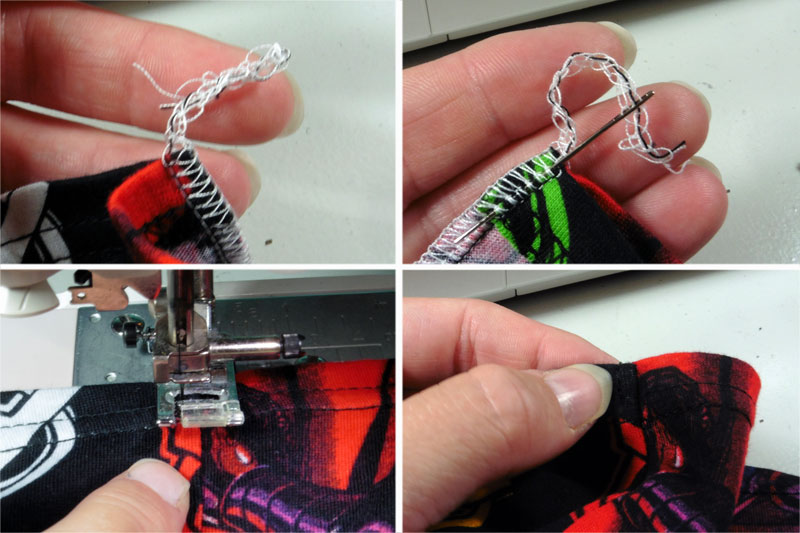
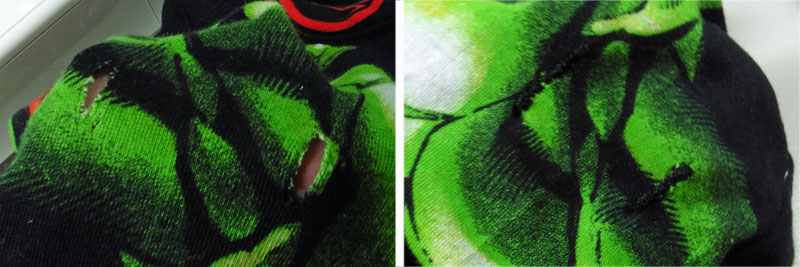
I took some pictures of how I finish my side seams and sleeve seams when I’m re-using an existing hem, so I could include a mini-tutorial for anyone else who’d like to know this little trick. I sew/serge my seams as I normally would, leaving a bit of serger thread tails at each end like in the above top-left photo (if you’re sewing rather than serging/overlocking, you can backstitch and trim threads and skip to the next paragraph below and the bottom two pictures above). I use a needle to thread the tails back through under the stitching like in the above top-right photo and then trim them short.
Next, I lay my seam allowance over to one side (I press them toward the back side, but that’s just personal preference) and stitch them down from the right side of my shirt like in the above bottom-left photo. I like to go forward and back a couple times to make sure it’s well tacked down. The end result looks like the above bottom-right photo and simply keeps the seam allowances from being so noticeable in the finished shirt. Easy peasy! I love when refashioning saves me steps in creating something new … especially when the steps saved involve pressing new hems!

I’m so glad I snagged myself a spot in House of Estrela’s Refashion Month 2016. Head over to Magda’s blog to see what else she has on the docket for this series!
Happy Sewing!! ~ Joelle
4 Responses
Vicky Myers
Wow – that really is squeezing every drop of fabric out of the boxers! Thanks for the tips re the threads when serging, much better than my shortcut of tying a knot and hoping for the best!!! I wouldn’t recommend my method!! #refashionmonth
Joelle
Yeah, I didn’t even have any scraps big enough to keep! Glad you enjoyed the tips. 🙂
Miranda
Very clever! And your little boy is such a cutie!
Joelle
Thank you!