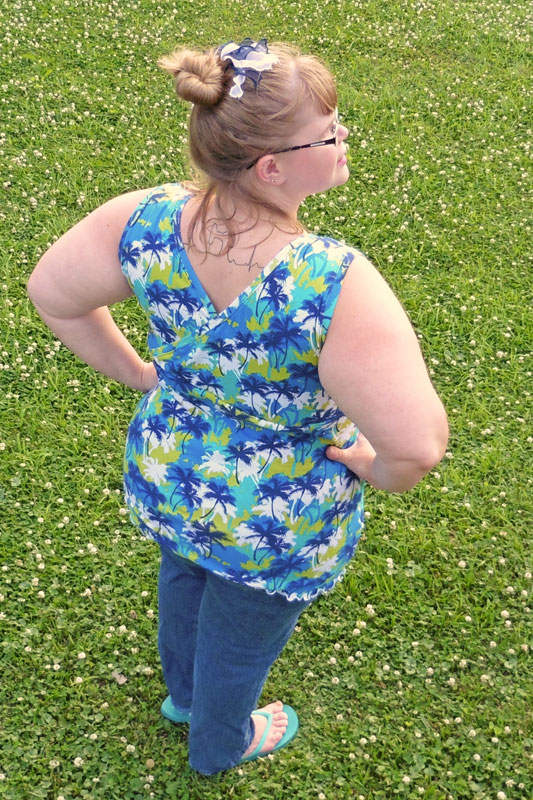
I’ve been thinking for a while about using the front bodice pieces for the back of the Everyday Essentials Cami. When I saw a similar dress come across my Facebook feed last week (which was a pattern that didn’t come big enough for me), I got a better idea of how it would look and decided to take the plunge. I knew that the palm trees fabric I got from my Girl Charlee KnitFix in June would be a perfect top for vacation to Florida this week, so I whipped one up over the weekend.
This hack is pretty simple. I just used the same front bodice pieces to mimic the cross-over on the back of my cami. You don’t need to gather the back crossover (since it’s not fitting over boobs 😛 haha). By the way, because I was making a top to wear by itself, I didn’t gather the front either since it allows for more modest coverage. Besides replacing the back of the bodice, the only other thing you need to change is the neck binding, since the neckline has obviously changed.
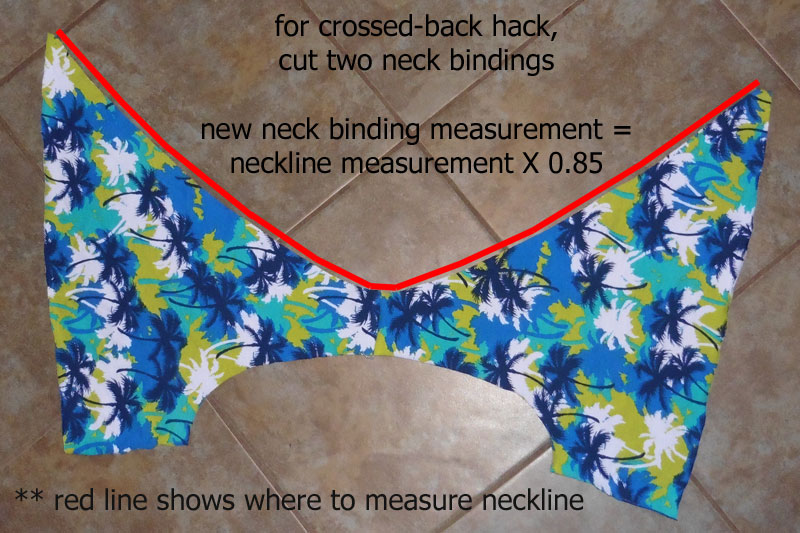
First, cut four front bodice pieces (two sets of mirror images). Sew two mirror-imaged bodice pieces to each other at the shoulder. To figure out the new neckline binding, you will measure from point to point (red line in above photo) and take that measurement times 0.85 (effectively finding 85% of the length). Don’t forget to cut two neck bindings, because you will need one for each side of the crossover. Attach the bindings as the pattern directs. You’ll need to sew the side seam before binding the arm holes.
Next, line up the side seams of the bodice with the side seams of the cami/gown skirt and overlap the back crossover to match the top width of the skirt. Repeat with the front crossover if doing the modest, no-gathers version. If you choose to do the gathers on the front bodice, follow those directions in the pattern. Sew the bodice to the skirt (and support band, if you’re using it) and hem the bottom.
Really, that’s all there is to the Everyday Essentials crossed-back hack! Put it on and admire your lower back neckline! I love how mine shows off my tattoo. 😉
Happy Sewing!! ~ Joelle


2 Responses
Lori
You go girl! I love the idea for this top. It looks absolutely fab-o on you as well. Thanks for sharing.
Joelle
Thank you!