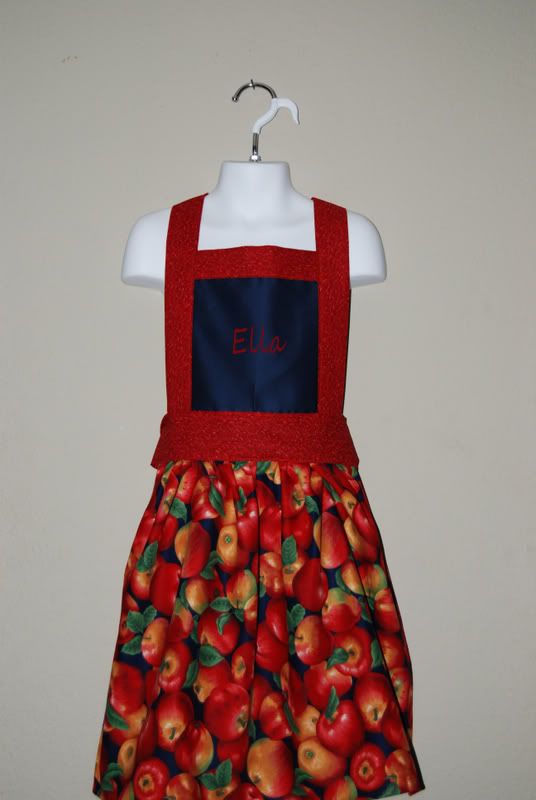
Sorry it has taken so long! Things have just been crazy around here & I totally spaced that I hadn’t posted the tutorial yet until Linda sent me a PM this morning :). If you are wondering what apron I am referring to the original post is here… SOOO first is first cutting the fabrics!!! This is pretty easy & can be done with a rotary cutter pretty fast 🙂 I have bought yardage in multiples so you might be able to rework it… I will give you sizes of the pieces that need cut! Don’t forget to check out all my other free tutorials including my list of 139 free apron patterns & tutorials!
All my measurements are for 1/4″ seam allowances. You need 3 fabrics…
‘A’ = the chest square fabric
‘B’ = the skirt fabric
‘C’ = the strap & ties fabric
Toddler Size (2-4)
Fabric A…
cut 1 square 8″x8″
Fabric B…
cut 1 rectangle 14″x22″ (for direction fabric your ‘top’ & ‘bottom’ will be the longer edges)
Fabric C…
cut 1 strip 6″x33″ (neck strap)
cut 1 strip 6″x8″ (top edge)
cut 2 strips 3″x48″ (waist)
Girls Size (4-8)
Fabric A…
cut 1 square 9″x9″
Fabric B…
cut 1 rectangle 16″x26″ (for direction fabric your ‘top’ & ‘bottom’ will be the longer edges)
Fabric C…
cut 1 strip 6″x34″ (neck strap)
cut 1 strip 6″x9″ (top edge)
cut 2 strips 3″x52″ (waist)
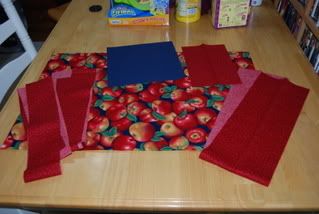
Your pieces should look something like this…
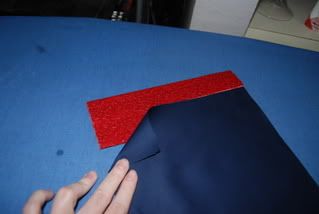
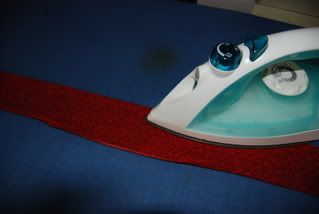
Now you want to make your bias style trim out of the 2 6″ wide pieces of fabric C. To do this I use an iron… fold in half long ways once & iron a crease….
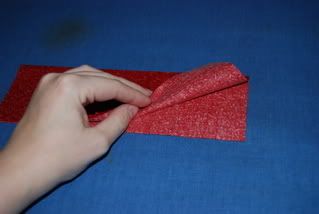
Now open it up & fold your edges into the center crease & iron!

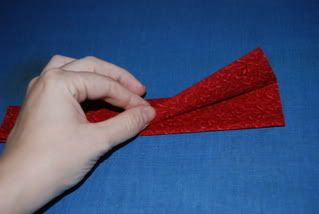
Once you do this with both the edges fold back in half & iron one last time!!!! Now your piece should be just 1.5″ wide but just as long as originally…
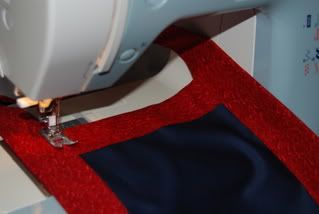
NOW you want to open the short piece up so that you can see the raw two edges… now you take your square of fabric A & line it up with the center of the piece & then fold it back down!
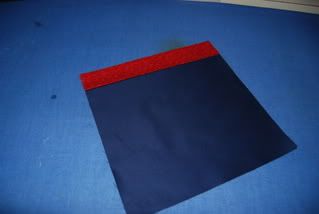
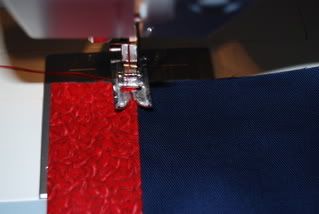
Pin if need & take it to your sewing machine! Since I pressed everything I just take a 1/8″ straight seam down it. If you aren’t sure if its straight you can always install it like regular bias tape.
Now you want to add the neck strap!!! Its always a good idea to try it over your kiddos head before sewing in place, but this should fit easily over most little girls heads. Anyways you want to use the same technique that we used on the top piece of opening it up & lining the square up with the middle edge & folding it back down. You want to start each end at the bottom edge of the square like in the picture…
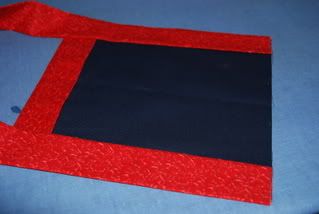
Pin & sew in place the same way! Just continue around the neck strap sewing it closed until you get back to the other side of the apron.
Time for the skirt!!! Hem the 2 short sides & the bottom…
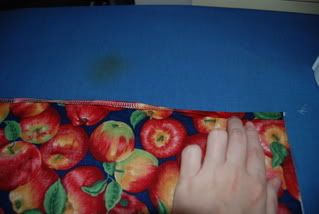
Apparently I forgot the pictures on this part!!! Now you are gonna wanna use what ever method you choose to gather… the 2 rows of basting stitches works great for this small peice. Run 2 rows of LONG (highest number on stitch length) stitches 1/4″ apart close to the top edge of the top of the long side… then pull on the bottom (bobbin) threads to gather. You want to gather it to be 2 inches WIDER then the top piece (10″ for toddler, 11″ for girls)… now set this aside.
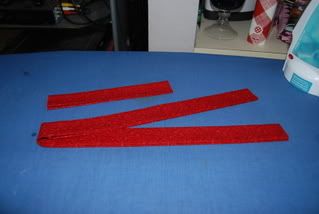
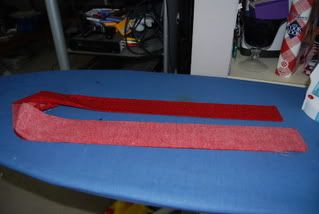
The funnest part (this may take a little patience!) Now you want to take those 2 last LONG 3″ wide pieces of the C fabric… with right sides together you want to sew all but the 11″ in the middle. The easiest way to mark this is to fold in half & mark 5.5″ on each side. This makes more sense in the pictures! Basically you want to leave the middle open so you have a place to put the top & skirt in. With wrong sides together start at one mark AWAY from the center… turn, sew the end, turn & sew to the next mark… stop & backstitch… NEEDLE UP & to the next mark & start again… stop again at the mark on the other side… You should have something like this…
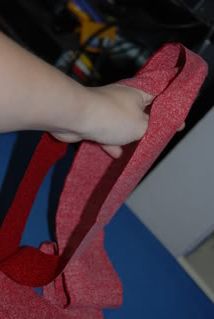
Noe you need to turn the straps right side out! It should look like this halfway through… make sure to get your corners good.
Now your almost done! Once you have both ends turned use your iron to fold the edge of the open part down… it should be easier since it wants to follow the seam… it should fold in about 1/4″ & look like it is sewed too…
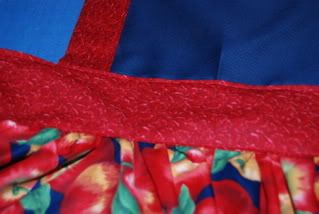
NOW get that top piece & the skirt back… time to pin & top stitch! You want about 1.5″ of the top to go in the waist band so the top looks square… if you can’t eye it you can mark 1.5″ up from the bottom edge & line it up. Then with the skirt you want about 1/2″ to go inside the waist band. Make sure they are centered ( I ‘mark’ my centers with a light crease of the iron) then pin!
Take to your machine & you want to sew 1/8″-1/4″ all around the waist section… this will make a nice finished look & sew in your top & skirt pieces!
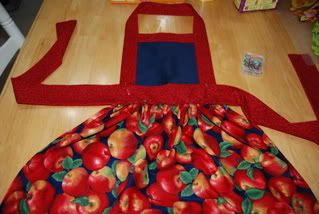
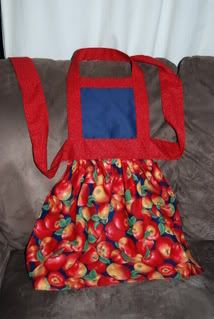
& TADA!
OPTIONAL: To personalize just embroider, appliqué or paint the little angels name on it!
If you have any questions, pictures of finished aprons to share or found an error in my late night tutorial please feel free to email me.
30 Responses
shellyfish
This is so adorable! I can’t wait to try this for my little one!
medj
i wish ive seen this b4 i made a birthday gift for my friend.she loves cooking ,so decided to make an apron for her .but thats very beautiful apron u had.thanks for sharing.
koolcid09
yeah
christine
This is so adorable! And the best tutorial instructions I could find for making a child’s apron. My dd is going to be 4 this month and I’m going to make one for her. Thanks for posting! I think the only thing I’ll add that I saw on another apron pattern is a pocket that is the same width as bottom, divided into thirds so the little darling can carry her things. I’ll use the fabric that matches the straps. If it comes out ok, I’ll try to post.
JessiHarri
Thank you so much! This was so easy. I just made one for a b-day gift for a 2 year old girl!! I have a boy so it was super fun to make a girly apron. I had never done gathering before and your instructions made it perfectly clear. I will be making more of these!
lydia
Thanks..its adorable. I made one for my 8 year niece. I’d like to know if you make one for an older girl U just increse the width and lenght to 2-3″. The TUT was very easy to folow!!
Carmela
I need this apron in a bigger size. Bigger girls need aprons too! More like 10-12 year olds.
jayzee
I’m going to make one of these for my 3-yr-old dd and a matching one for me (larger, of course). The apron looks so cute!
One comment … You say that fabric A is for the skirt, but from the measurements I would guess that is actually for the chest square and that fabric B is for the skirt. Is that right?
Kymy
Jayzee you are correct! In 7 months I have had hundreds of people read & use this tutorial & you are the first person to say anything!!! I fixed it 🙂
Carmen
Is ther any way you could enlarge this to fit an adult woman? I am very new at sewing but would love to make this for myself. Thanks
Nancy Alimansky
Hi-
I want to try the little girl’s apron for my granddaughter who is just turning two. Problem-
the piece I want to use for the skirt only measures 12″ across not 14″. Can I still use it and adjust the strap that goes with it? What do you think? I do have another piece of fabric I could use but the color isn’t as nice as the first choice.
I haven’t sewn in a while so I’m a little wary. Also she’s somewhat petite and I don’t want this to overpower her.
Thank you,
Nancy
Nancy Alimansky
I am hoping for feedback on my recent question
Kymy
Nancy, yes that should work… the 14″ is the length, so 12″ would probably be just fine for a 2 yr old! I would suggest maybe cutting 7″x7″ to even it out a bit. I hope that helps & good luck!
Jocelyn
Thanks so much for this tutorial!! My daughter LOVES cooking, so I made her an apron to go with the pots and pans we are getting for her birthday!
April Schutt
Very cute very fun and super easy. Thanks for sharing this pattern!
emily
yay! i just completed my first sewing project, all thanks to this wonderful tutorial. i think my niece is going to love it
Diane
I would like to make aprons for my two granddaughters. One is just turning two and the other won’t be 2 until May. Will this pattern turn out too big for them?
Kymy
Yes, most likely. For more of a size 12-24 I would suggest trying this. Let me know how it works out!
Fabric A…
cut 1 square 6″x6″
Fabric B…
cut 1 rectangle 12″x22″ (for direction fabric your ‘top’ & ‘bottom’ will be the longer edges)
Fabric C…
cut 1 strip 4″x30″ (neck strap)
cut 1 strip 4″x7″ (top edge)
cut 2 strips 2″x44″ (waist)
A great cheap way to test new patterns is to get cute sheets or fabric from the thrift store!
Lee
I used these great instructions and measurements to make a replica of an anthropologie apron http://anthrpl.ge/uzDdjZ for my 21 month old granddaughter. I included piping (bias tape) on the waistband/ties and left the neck strap longer (44″), then cut it in the middle for tying to the right size. Also added a pocket. Thanks for the inspiration!
Tina Marie
My 9 year old son just made this apron for his 7 year old sister as a Christmas present. I did the cutting, but he did most of the sewing. I had to sew the skirt and bib to the middle, other than that, he did the remainder of the sewing. We are very happy that we found this tutorial. Thank you.
JenZ
I made this for my dd’s 4th birthday yesterday – super easy, and it came out so cute! I will e-mail you a pic later 🙂
Thanks for posting this tutorial!
Anna Garza
I really like copying the tutorial down on paper and was looking to upload it and couldn’t. I have 11 grandaughters which will love this and they are into wanting to bake now. Plus I want to make some matching little potholders to go with them. I would love to make the aprons for the moms so that we can have a bake party and I would love to personalize them all with their names. So let me see if I can get you to get me the how to on the adult size. Is it 1/4 inches for every size larger on the adults or do you have a size for them and make it easy on me.
Either way great job and let’s see how they come out.
Steph W
Thank you for the great tutorial! Here’s mine: http://stephcupoftea.blogspot.com/2010/05/sewing-for-someone-aged-27.html
schmoole
Thanks for the pattern. It was really easy and it turned out great! Do you happen to have measurements for an adult one to match? I want one for me now, too!
Rhonda
I just made it and finished it within an hr! SUPER easy! LOVE the pattern! Thank you!
victoria
do you have a vintage pattern available with ruffled sides and trim, but your aprons are awesome, I make plenty for gifts. thanks.
LisaLadrido (@LisaLadrido)
Thank you so much! I just finished two of them for my little granddaughters! I used dishtowels and they came out so cute. Great tutorial! Lisa
Diane
I loved this pattern! It was so easy to follow and the apron made up super quick! Thanks for putting it out there!
Christine
I have made 2 aprons so far with this tutorial. I made one for my daughter a few years ago when you first posted it, and another this weekend for a friend’s daughter. I had trouble with ironing the fabric down to a 1/4″ in the open part of the waist band, before you pin the top part and skirt into it. I left it go overnight and today my solution was to cut 1/4″ strips of a “lite” fusing material which sticks down, then iron the 1/4″ seam down. (kind of like no-sew hem). This made a nice clean straight edge and very easy to pin the skirt down inside the waistband. Went much more quickly after that! Thank you for such good directions! The apron turned out really great!
Kymy
I actually use this for ironing/hemming! It works for all different sized hems 😉 http://www.amazon.com/gp/product/B00114RI9U/ref=as_li_ss_tl/?camp=1789&creative=390957&ie=UTF8