For Christmas each year, I sew matching pajamas for my mom’s grandkids. This year, that included two newborns as my sister-in-law had a baby boy in November and my sister had a girl in December. I decided that Riley’s Nightgown would be the pattern to use this year, especially since it can be easily converted to a sleep sack for small babies!
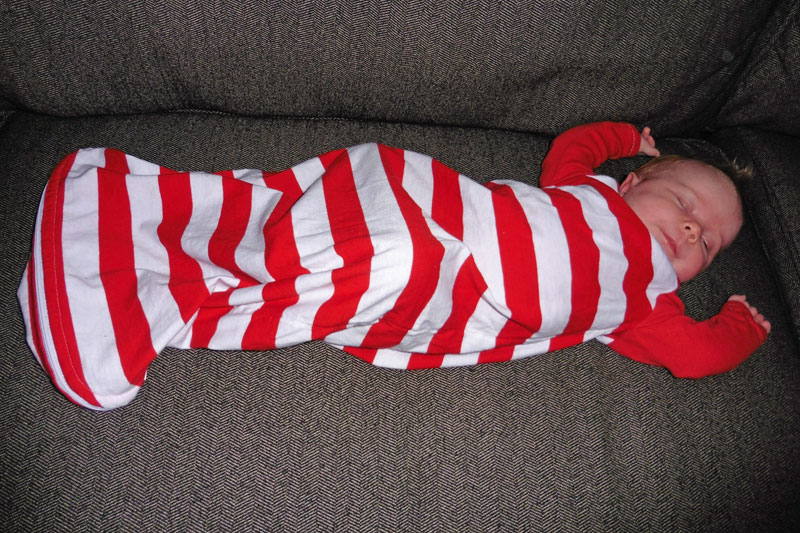
I made two sleep sacks in 0-3 month size, adding length and a zipper around the bottom of Riley’s Nightgown. I took some photos along the way to share how I did it.
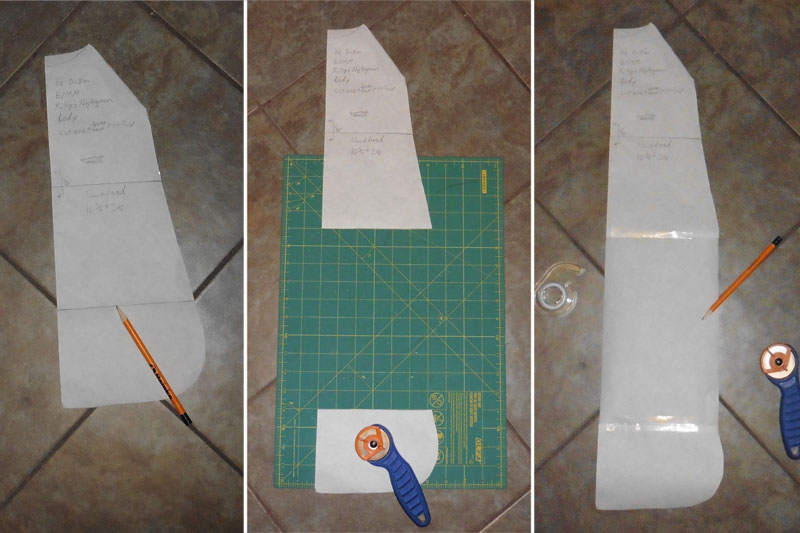
The first step is to add length to the bodice pattern before cutting your fabric. I asked my sister-in-law to measure her son and I measured the pattern piece and found it would have hit him mid-shin. To be sure it would be plenty long enough to zip around his feet, I decided to add 10 inches in length.
To do that, cut the bodice pattern straight across a couple inches above the hem curve (see where my pencil is pointing in the above left photo). Spread the pieces apart (above center photo), tape them to another piece of paper to fill in the gap, and even out the angled (right) edge of the bodice (above right photo). Then you can use your newly modified bodice pattern to cut out your fabric pieces. Also, go ahead and cut out the sleeves, neckband, and hem facings.

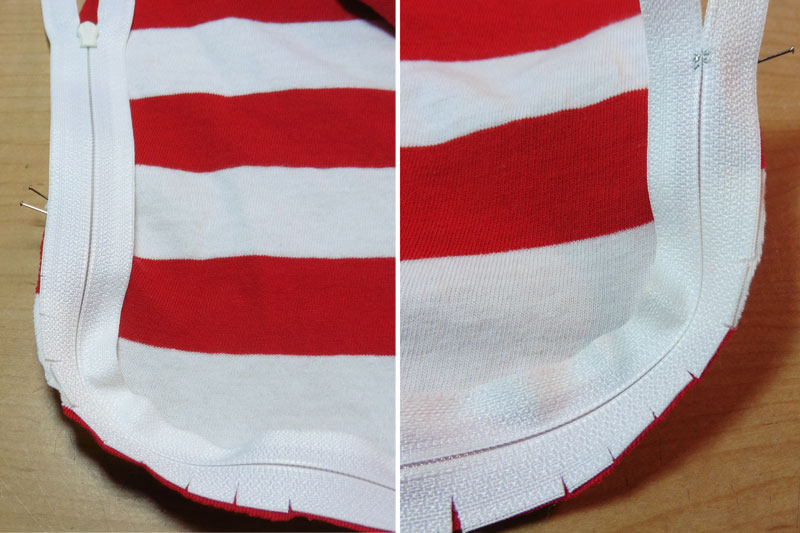
On both the front and back bodice pieces, lay the facing on the hem and find where it ends on the side seams (see my pins in the white stripe) and also mark 1/2 inch down from there (see my pins in the red stripe).

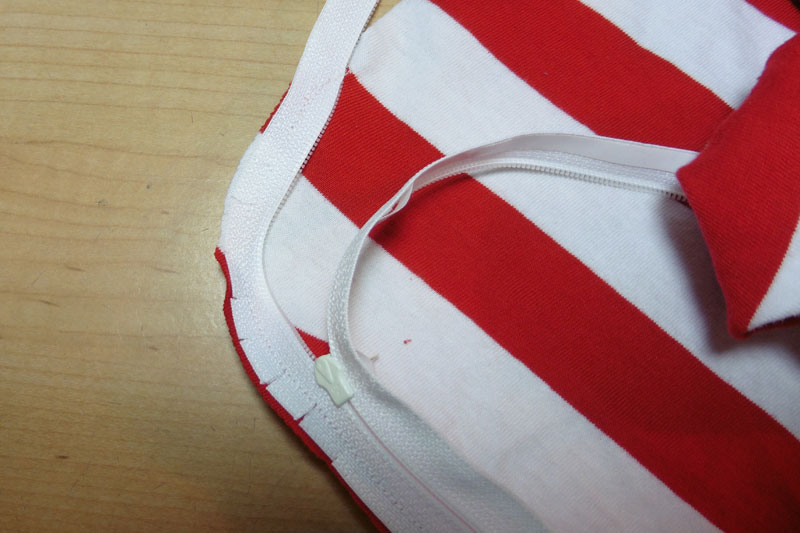
I used Dritz Wash Away Wonder Tape to hold my zipper in place before sewing. It is basically a 1/4 inch wide double-sided tape that won’t gum up your needle when sewing.
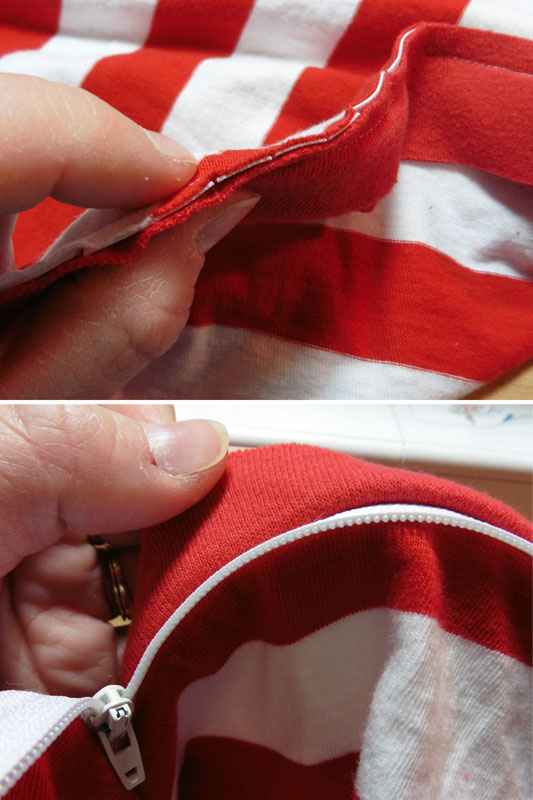
I finger-pressed the Wonder Tape along the zipper and then pulled the paper backing off and positioned the zipper along the hem with right sides together. I clipped the zipper tape to fit nicely around the hem curves. It was much easier to use Wonder Tape than trying to pin through the zipper. I used the lower pins to line up the bottom end of the zipper and for where I stopped the top, so that the ends of the zipper tape would be enclosed in the facing when finished. The above photo shows the zipper taped to the bodice around both curves of the front hem.
Sew the zipper in place with a 3/8 inch seam allowance (rather than the standard zipper allowance of 5/8 inch), so that the seam allowance will be small enough for the hem facing to wrap around. I used a 22″ zipper and had plenty of extra length to work with, so I curved the zip into the seam allowance** where I wanted the “top” to end.
** Be super careful if you curve it into the seam allowance that your needle doesn’t hit the zipper teeth and break. I did those last few stitches with the hand wheel so I could go slow enough to watch where my needle was going.
Repeat the zipper attachment steps for the back hem, being careful that the zipper ends in the same spots as on the front side seams.

Once you’re satisfied with your zipper attachment to both the front and back hems, you can cut off any extra zipper you may have curved into the seam allowance beyond the “top” end (see blue lines in above right photo).
Then, you’re ready to construct the rest of the nightgown using the pattern instructions. Unzip the zipper and start with the hem facing attachment directions.
The hem facing will lay on the back side of the zipper, sandwiching the zipper teeth between the right sides of the bodice and facing. I had to finagle the zipper pull back and forth just a bit while sewing, because the front and back bodices are attached at the end of the zipper, but it wasn’t too tricky. Once again, be super careful if/when you sew over the zipper curved into the seam allowance.
The top half of the above photo shows how it should look along the raw inside edges of the hem (where my finger is), zipper, and facing (where my thumb is). The bottom half of that photo shows how the zipper teeth should protrude from the seam where the facing is attached to the hem (my thumb is holding the loose raw edge of the facing).
Follow the pattern instructions to sew the rest of the nightgown.
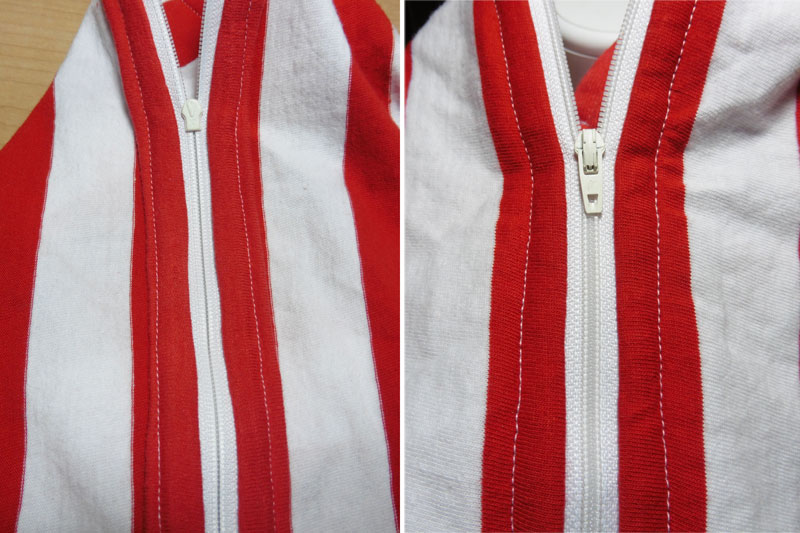
When you finish the inside of the facing, you will wrap the loose raw edge around the seam allowance from installing the zipper and attaching the facing. This will encase the zipper tape and keep it from scratching little feet inside the sleep sack. The above left photo shows the inside and above right shows the outside of the finished zipper/facing combo.
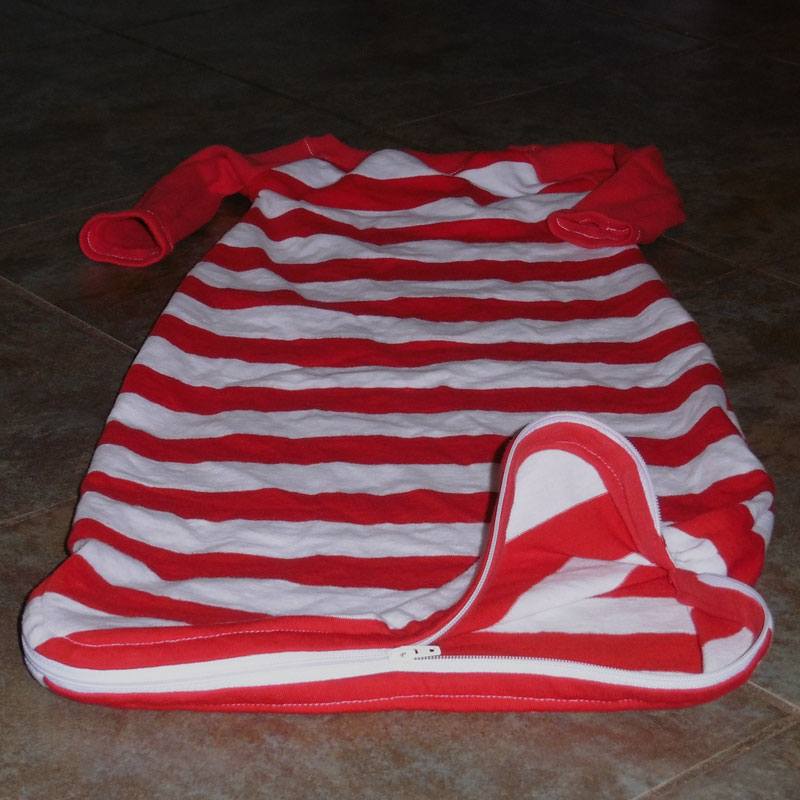
I love how the sleep sack modification turned out. I put this style of jammies on all my babies and hope that my sister and sister-in-law will get good use of them for easy nighttime diaper changes!
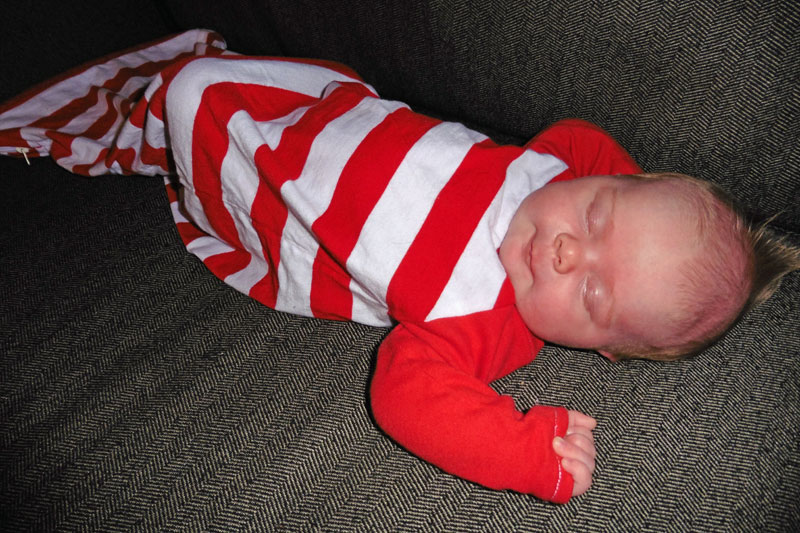
I think my niece approves! At almost 4 weeks old now, it should be a while before she outgrows her new sleep sack. I just wish she didn’t live 1,200 miles away so I could see her in it more often.
Since my sister’s family couldn’t come “home” for Christmas, I have to share two group pictures to show off all the jammies I sewed. I made 5 Riley’s Nightgowns plus 2 Riley’s hacked to sleep sacks, and then used the top of Riley to make raglan shirts to pair with pants for my 3 boys (cause they didn’t want nightgowns “like the girls”). Haha!

This is my five kiddos, with my daughters holding holding my sister’s girls. My kids and I are visiting my sister’s family for New Year’s, but have to head home tomorrow so they can get back to school on Monday.

And this gem of a picture is my kids with my brother’s kids. It was taken Christmas Day evening and 7 of the 8 of them may have been a little sugared up (no candy for the baby, though), so “silly faces” happened to be the best photo I got of the group … ya do what ya gotta do, right? lol
Happy Sewing!! ~ Joelle
One Response
Kim Carter
This so precious I plan on doing these for my great nieces since there are only two and I have over 9 boys. For me this be a real pleasure.
Thank you very much for this lovely pattern