Welcome to Day 2 of the Girl’s and Women’s California Sew Along!
Today we’ll be focusing on finishing the armscyes and necklines. If you’re just joining us (or following along at a later date), you can click below to find the other California Sew Along posts:
Day 1: Color Block Instructions, Cutting Fabric, Sewing Side Seams
Day 2: Binding the Scoop Neck and Armscyes, Finishing the Faux Halter top (this post)
Day 3: Sewing the Elastic Waistband, Hemming the bottom
Without further ado, lets get started with applying the bindings!
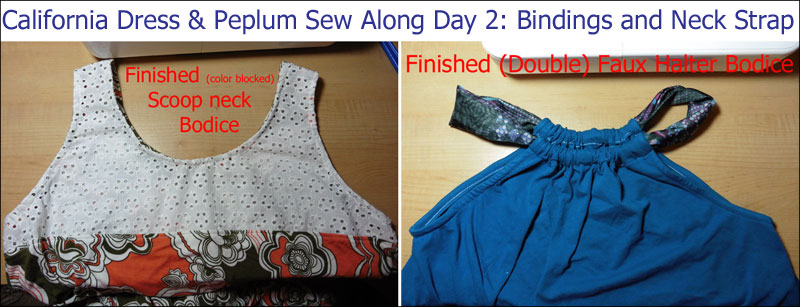
For the California pattern, the scoop neck and armscyes are finished with a binding that ends up “hidden” on the inside of the garment. This gives a beautifully finished outside and completely conceals the raw edges.
I’ve photographed the binding steps while sewing my color-blocked, 2 scoop neck bodices maxi dress. If you are using one faux halter and one scoop or 2 faux halters, I will include any differences in my written instructions and note with asterisks.

Step 1: Take your three binding pieces and fold each one with right sides together. Stitch edges of the short ends together with 3/8 inch seam allowance. If you’re using 2 scoop bodices and did not double the length of one neck binding, you’ll need to sew the two neck bindings to each other on both short ends.
(** Faux Halter difference: Skip Step 1 if using 1 or 2 faux halter bodices.)
Step 2: By folding in half one way and then the other way, find and mark (with pins) each band into even quarters (fourths).
(** Faux Halter difference: Find the center of each binding and mark with a pin.) Set aside.
Step 3: Take your bodice and mark each opening (scoop neckline and 2 armscyes) into quarters. For armscyes, match the shoulder seam to the side seam and find the mid-points (the seams will be two of the quarter marks). For the neckline, match the shoulder seams to each other and find center front and center back.
(** Faux Halter difference: Since there is no shoulder seam, you only need to find the centers of the openings. The side seam should be the center of the armscyes. If using one scoop bodice, match the shoulders to each other to find the center front.)
Step 4: With right sides together, match the pins on the bindings to the pins on the bodice openings.
(** Faux Halter difference: Also pin the ends of the bindings even with the ends of the armscyes and scoop neckline).
Carefully stretch the binding to fit the opening (add more pins if you’d like) and stitch with 3/8 inch seam allowance.
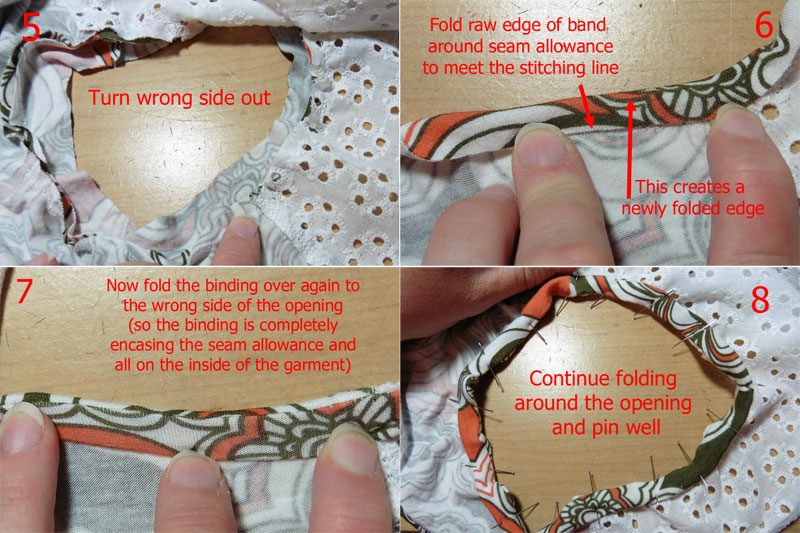
Step 5: Turn the bodice wrong side out.
Step 6: Fold the raw edge of the band/binding around the seam allowance so that it meets the stitching line. Pressing during this step can make the next step a little easier (just don’t drag the iron across it or you may stretch it out of shape).
Step 7: Fold the binding over again to the wrong side of the opening. This makes the binding completely encase the seam allowance and hides the raw edges. The stitching line (from attaching the binding) should end up on the edge of the opening and the binding will all be inside the garment.
Step 8: Continue folding the binding around the opening and pin well. On the right side, stitch around the opening with a stretch stitch just shy of 3/8 inches from the edge. This will catch the fold and secure the binding in place.
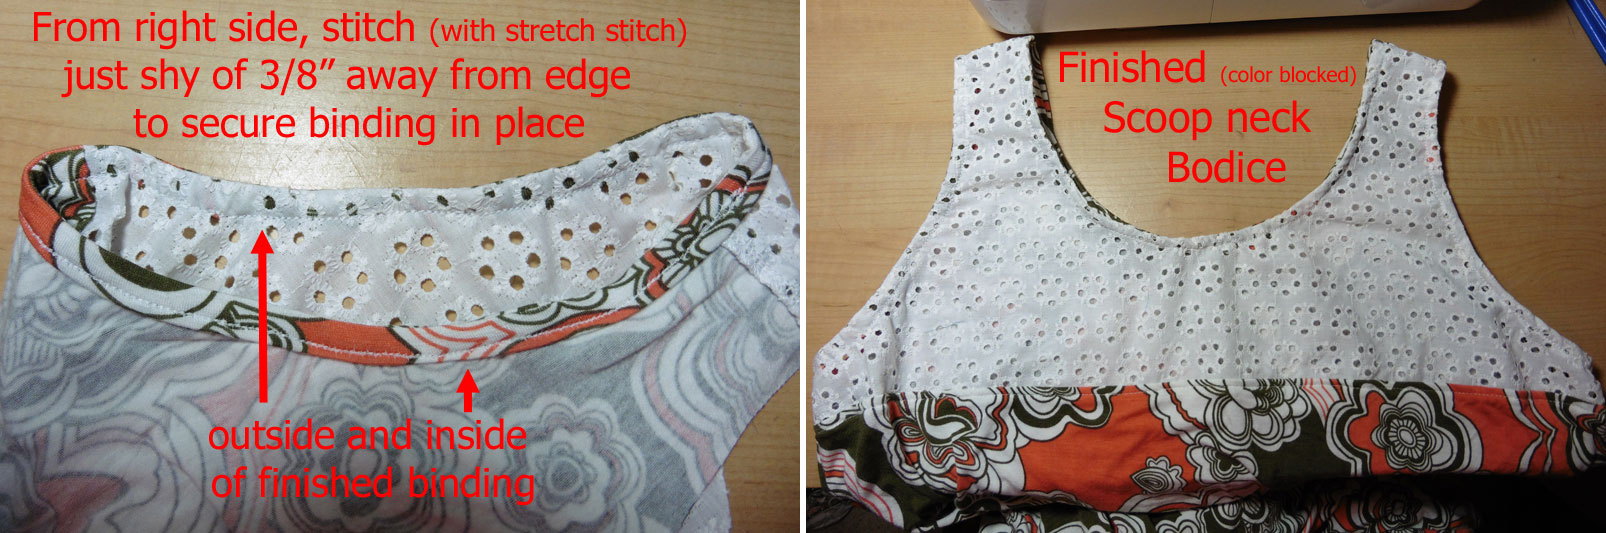
Repeat the above steps 1-8 for each opening (2 armscyes and scoop neckline). Admire your beautiful bindings! If using 2 scoop neck bodices, you’re finished for today!
If using the faux halter bodice (either one or two), continue reading and follow the steps below to finish the top of your bodice and make your neck strap.
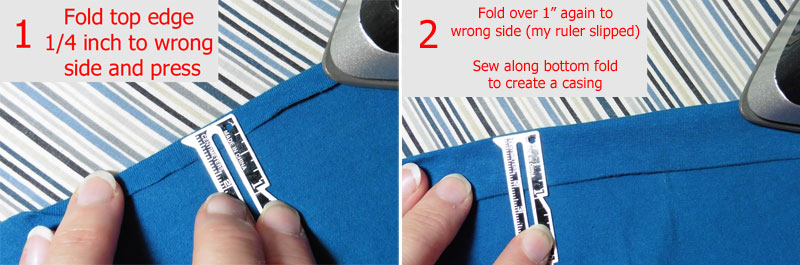
Step 1: Fold the top straight edge of the faux halter 1/4 inch to the wrong side. Press well.
Step 2: Fold the top edge over 1 inch, again to the wrong side (Note: My ruler slipped when I took the picture and I didn’t notice until I put the pictures on the computer after I was finished sewing … it is/should be one full inch folded over). Press well. Edge stitch the bottom fold (stitching should be just shy of 1″ down from the folded top edge) to create a casing for the neck strap. Set aside.
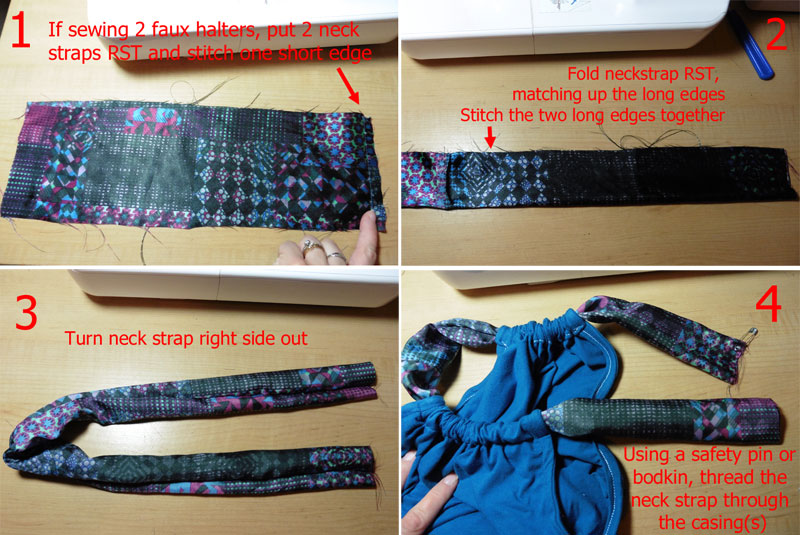
Step 1: If using 2 faux halter bodices, place two neck straps with right sides together and stitch along only ONE short side.
(Note: Skip Step 1 if you doubled the length of your neck strap OR if using only 1 faux halter bodice.)
Step 2: Fold the entire length of the neck strap to match up the long edges with right sides together. Sew the long side with 3/8 inch seam allowance (and use a stretch stitch if your neckstrap is knit).
Step 3: Turn the neck strap right side out.
Step 4: Using a safety pin or bodkin, thread the neck strap through the casing(s) on your faux halter bodice(s).
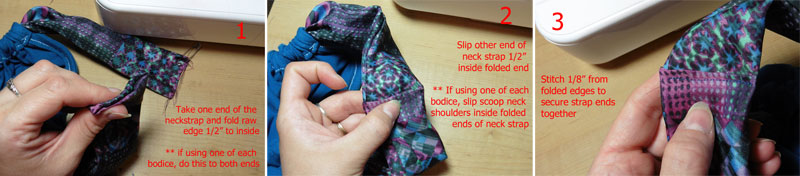
Step 1: Take one end of the neck strap and fold the raw edge 1/2 inch to the inside.
(Note: If using only one faux halter, fold in both ends of the neck strap.)
Step 2: Slip the other end of the neck strap 1/2″ inside the folded end.
(Note: If using only one faux halter, slip the scoop neck shoulder straps inside the two folded ends of the neck strap.)
Step 3: Stitch through all layers 1/8 inch from the folded edge to secure the straps together.
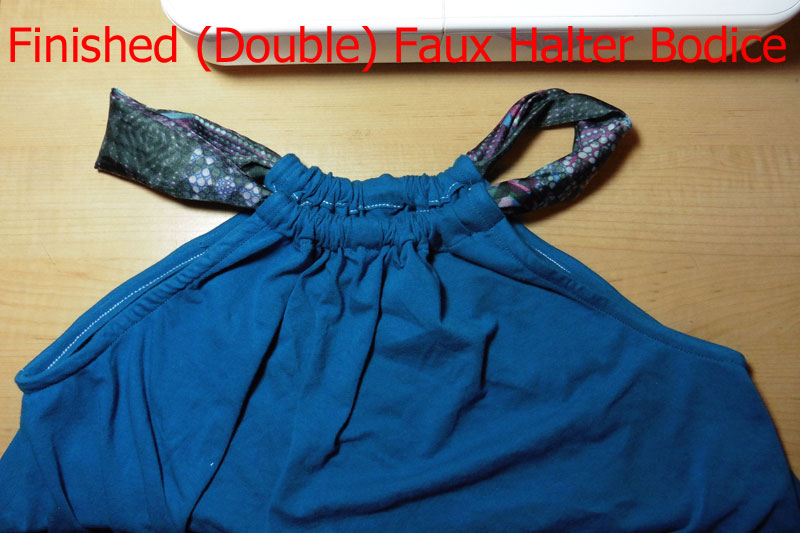
That’s all for today! Admire your finished bodice!
Stop back tomorrow to finish your California Dress or Peplum!
Happy Sewing!! ~ Joelle
Leave a Reply