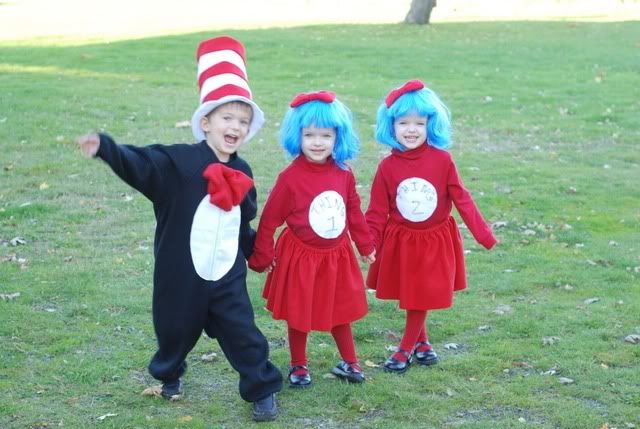
I didn’t think I would be able to top last years Cat in the Hat with Thing 1 & Thing 2. But I think I was wrong!
 I showed you the twins costume last week… but the cherry on top was the baby parrot in the pirate stroller. We got just as many or more compliments then we got last year. A lot of people said the they wanted to dress their little one up as a parrot but there are very few costumes to buy and no patterns to make one.
So not only am I sharing pictures but links to a similar free pattern I based my costume on as well as what I did to make it from a penguin into the cutest little parrot ever!
First pictures of all 4 kiddos with a few extra of the little parrot. I made everything but the black pants my oldest son Zander is wearing & the ship stroller covered was made by & borrowed from my friend Jenn.


SUPPLIES: (for an infant size)
1 yard red fleece
1/2 yard yellow fleece
Green, Blue & White Scraps
Googly Eyes
Poly Fill
1/4″ Elastic
Needle
Thread
Scissors
Sewing Machine
Glue Gun
All my self drafted pattern pieces…
BODY:

The body of the parrot was constructed the same way as this adorable penguin costume. Just using different colors.
WINGS:
For the wings I measured from little man’s shoulder blade to his wrist & cut out a square of paper that size… I then free handed my feathers & traced a pattern for each color. I also made a similar pattern for the tail. (see picture above)
In order to prevent bulk I cut each layer so that it was 1/2″ taller then where the slits of the feather from the row above it. The blue fleece is the only color that is 1 layer. The rest of the colors have two layers that sandwich the layer below. I then used marching thread and sewed a straight line across the top of the feather slits. Sorry I didn’t get better pictures but this should give you the general idea. My feathers were about 2″ long by 1.75″ wide at the top/base of the feather.
When finished I attached a small ring if elastic on the tip of each wing. I then put the body on little man and the hooked the wing on his wrist to find the placement spot and pin them in place and sewed them down. I then repeated the process for the tail!
HAT:
For that hat I just made my own based on his head measurements, but anything will do. I then cut out 2 nose peices sewed them together, turned it right side out, stuffed it and hand sewed it on. I didn’t quite love the nose but it was still cute. I also cut out white eyes and sewed them on finally using hot glue to attach the giant Google eyes the 4 big kids insisted he had to have.PANTS:
I just used a self drafted pattern on hand, but you can easily just trace a pair you have on hand.FEET:
I used the tutorial from the penguin costume again, except I skipped the stuffing.Then all you need is on cheeky boy (or girl) to put it on! It’s extra cut watching him crawl in it! I hope this helps someone out in the years to come.


18 Responses
Coraline's mom
Thanks for posting this! saw it on Craftster when i was debating our family Halloween options with my 4 month old’s 1st Halloween this year. i had already made a dragon costume two years ago for my niece and had done a few other coordinated themes, but I wanted her to have something new but that my husband wouldn’t refuse to be a part of 😀 Pirates and a parrot came to mind but there weren’t good costumes on the market (plus I’m DIY all the way when possible) Also, because of your link to the penguin tutorial I’m addicted to makeit-loveit.com 😀
CINDY LEWIS
your very first line doesn’t make sense.
?? I didn’t think I would be able to last years Cat in the Hat with Thing 1 & Thing 2. ??
Kymy
I didn’t think I would be able to top last years Cat in the Hat with Thing 1 & Thing 2. Thanks for catching that! lol, it has been up for over a year with out anyone noticing. The down side to blogging with 4, now 5 little ones running around.
christina
Are you interested in selling the parrot costume?
kymy
No sorry, it is staying in his baby box.
pam
i love your costumes, do you have a pattern for the girl and boy pirates. This is what my kids want to be and I stumbled upon this, and LOVE it. I am going to get started this week on the parrot.
Kymy
Honestly I just winged my son’s pirate outfit. But here is the link to the twins pirate outfits and they have the link to the patterns I used (which are great for lots of costumes!!!) I hope that helps! http://everythingyourmamamade.com/2011/10/27/argh/
Brandi
I love this little parrot so much! Unfortunately, my sewing skills are lacking! Any chance you would make one and sell it?
Kymy
unfortunately I simply don’t have the time. My sister takes custom orders though through Etsy & may, it’s worth sending her a quick convo to ask. https://www.etsy.com/shop/TheCraftEGalShop
ashley
Kymy, I love this costume we are making it right now, well attempting. I have a few questions.
Where are you slits on the feathers and what are we doing with them. Your feather demensions were 2 inches by 1.75 but they look way bigger what did you use to make the feathers and whats the measurements of the top of the feather if that makes sense?
Kymy
Nope that’s the size they were… you can see in this picture they are on a mat with a 1″ grid It’s at an angle but gives some perspective. My son was tiny at the time. In the picture you can see that there is a 1.5″ gap between each row so they overlap by .5″ I’m not sure what you mean about the top? I cut each piece like full triangles with a feathered edge. Unfortunately this was 2 years ago & the costume is in storage 🙁 it really is a lot of freehand based on the size of the child.
Bonnie
Hello
I am a seamstress but the parrot looks rather complicated and time consuming, how long would you say it takes to make, buying the supplies, cutting out the patterns and sewing the costume together. It would be for my granddaughter, my daughter saw your photo and thought it would not be hard. As the seamstress, it looked complicated to me. How do we access the pattern pieces? Also how would you estimate the cost of the supplies needed? Is it fur fabric or felt? I think fur would be more costly.
thank you.
kymy
This is just a tutorial showing you how to make your own pattern pieces, not an actual pattern unfortunately. There are no measurements because every size and every base pattern is going to be different. I just used fleece I got on sale at Joann’s and it was less then $20 worth if I remember right. It took me less then 3 hours to make without any directions, but everyones skill level, especially when a lot of it is free handing, and dedicated sewing time is different, so I sadly can’t give you specific answers. The most complicated part is making your own pattern pieces for the feathers, and I personally didn’t find that too hard, but I am more comfortable then many doing that.
abbey
So cute!! I want to make my daughter’s halloween costume this year! (Fabric Stache sent me)
Sophie
I’m having a hard time with the wings…
i don’t really understand how you sew them to the body and manage to have them “float” in the air…
how did your baby move with the wings ? i think i got something wrong cause i don’t think you can move your arms in the air with mine… he’ll be stuck with his arm wide open…
kymy
Sorry this comment went into the spam filter :(. The wings are only sewn on to the body at the top red wing.
Siena
Made this costume for my son. Didn’t come out as adorable as yours but close. Was going to post a picture but doesn’t look like there is an option to do that. Thanks so much!
kymy
I would love to see it! If you upload it to flickr or a public facebook you can post the link 😉