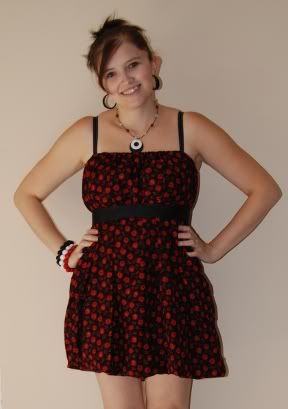
I wanted to take the time to do a quick tutorial for my scarf dress that I made for the Burda/Bernina Challenge! I don’t have photo’s right now, but hope to soon. It really is a SUPER simple dress that is only 4 steps, so it is easy enough to make without pictures! The length of the dress depends on your height & size of scarfs or fabric used.
SUPPLIES:
2 scarfs or pieces of fabric measuring at LEAST 36″ square bigger 40-45″ is best for womens. You can also make this for children using smaller scarfs!
Approx. 1.5 yards soft 5/8″ elastic
3 yards of wide (1.5″ or wider) coordinating ribbon
1 yard of 1/2″ to 1″ ribbon for the optional straps.
A couple safety pins
Iron
ASSEMBLY
STEP 1: With right sides together sew the right & left side seams using a 1/4″ seam. When this is done your 2 scarfs should make a big tube.
STEP 2: Sew an elastic casing all around both the top & bottom edge. I used 5/8″ elastic so I sewing a 1″ casing. I ironed over 1/4″ then again 1″ if you are using thicker or thinner elastic this may vary. Then I sewed the casing closed leaving a 2″ opening at the side seam to thread the elastic through. Here is a great video showing how to make a casing… http://www.graspr.com/videos/How-to-Sew-an-Elastic-Casing-2
STEP 3: Measure, cut & insert your elastic! I just use my waist measurement & cut the elastic 1″ shorter. You may want to test it by holding the elastic around you! You will need 2 pieces, one will be the one that goes above your boobs, the other will be on the bottom that goes up around your waist. Once you have it cut use your safety pin to thread your elastic all the way through… when you get it through pin it & do the bottom, then try it on & adjust the elastic as needed! Sew your elastic together & push it all up inside your casing & sewing your casing closed!
STEP 4: Sash & optional straps! For your ribbon sash simply tie around your rib cage right under your bust tying it in a bow. Cut at the length you choose! Don’t forget to use fray check or a lighter to seal the ends of your ribbon. If you want to add the option straps put the dress on and pin ribbon straps in place then take it off & sew them on! Your done 🙂
TO WEAR:
DRESS: Pull the top of the dress on so that the top elastic sits right about your boobs… the bottom elastic will be hanging down past your knees… grab that bottom elastic & pull it up to your waist or hips. When you do this your dress will get to be just above knee length depending on your height & the size of the scarfs/fabric used. It will git it a bubbly type hem. Then take your sash (ribbon, belt or otherwise) and put it on! You can tie it right below the bust for an empire type top or down at the waist. You can also tie the bow in the front or the back or I like it in the front to the side. It can also be worn of shirts, tanks & bras for different looks of straps. There are tons of possibilities!
SKIRT: If you didn’t add straps then put it on as a dress without the sash… then take the top edge & pull it down to your waist & you are done!
3 Responses
ge0rge1
Your picture isn’t showing up for me, this has happened on a couple other posts. It says “Bandwidth Exceeded. Upgrade to Pro today!”
Kymy
Yeah I exceeded my bandwidth yesterday on my photobucket account… but normally on the 1st of the month it rolls over. I need to hurry up & get my website set up so I can host all my own pictures & not have to worry about it!
Anyways THANK YOU MCDONALDS! They had a promo with photobucket & by sharing a pic in a public group folder I got my free account upgraded for 3 months for free… so I have until the new year to figure stuff out!
amazing
too cute!