Did you know that EYMM has a free NICU Smock pattern? It is one of Kymy’s most highly downloaded patterns, especially in the fall, when it is used in an annual charity sewing drive. The 2016 drive just ended, but if you’re looking for a great way to give back during the holidays you can donate to your local hospital’s NICU (please, contact them first to make sure it’s something they want/need) or the Gracie’s Gowns organization always has families in need and EYMM’s pattern is their requested isolate gown of choice.
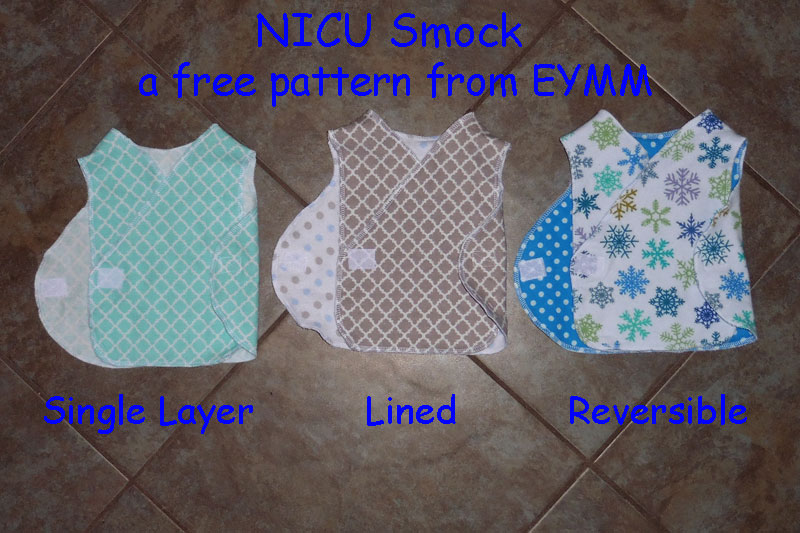
The pattern includes four sizes of smocks and three different options for construction. You can make either a single layer smock, a lined smock, or a reversible lined smock. Because of these different options, some seamstresses have gotten confused about where to place the rough and soft Velcro pieces. Kymy thought it would be helpful if I sewed up a few and showed just where to place each piece. She’s working on updating the pattern and hopes to have it ready soon.
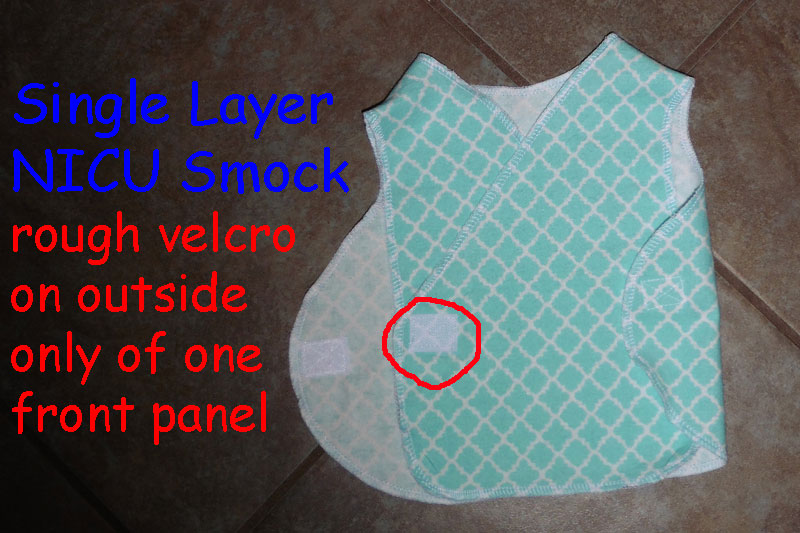
For the single layer version, you will need to cut out one of each of the three included pattern pieces. Sew them with right sides together at the shoulders and finish the raw outside edges with a serger or overcast stitch. The soft side of the Velcro will be sewn to the wrong side of the back piece. The rough side of the Velcro will need to be sewn to the right side of one of the front panels. When put on the baby, the non-Velcro panel will be laid down on his/her chest first followed by the Velcro front panel and then the sides of the back will be wrapped up to secure the Velcro (like the right side of the smock in the above picture).
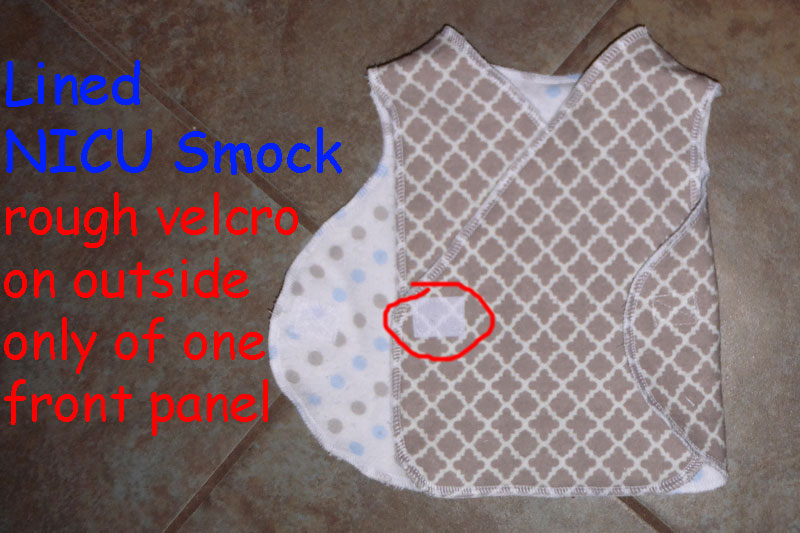
On the lined version, you will cut each pattern piece out of two different fabrics. Sew the shoulders with right sides together and decide if you’re going to serge around the raw outside edges or if you want to sew, turn, and topstitch the smock. To just finish the outside edges, place the outer and lining with the fabric’s wrong sides touching and serge the pieces together around the outside. For the turn and topstitch method, place the outer and lining with right sides together and sew around the edge with a 1/4 inch seam allowance, leaving a 2-3 inch opening. Clip the curves and turn the smock right sides out through the opening, making sure to poke out all corners and smooth the edges. Topstitch around the entire smock, folding the raw edges of the opening in and sewing it shut in the process. Then you’re ready to sew on the Velcro pieces. The soft side of the Velcro will be sewn to the lining side of the back piece. The rough side of the Velcro will be sewn to the main side of one of the front panels. When put on the baby, the non-Velcro panel will be laid down on his/her chest first followed by the Velcro front panel and then the sides of the back will be wrapped up to secure the Velcro (like the right side of the smock in the above picture).
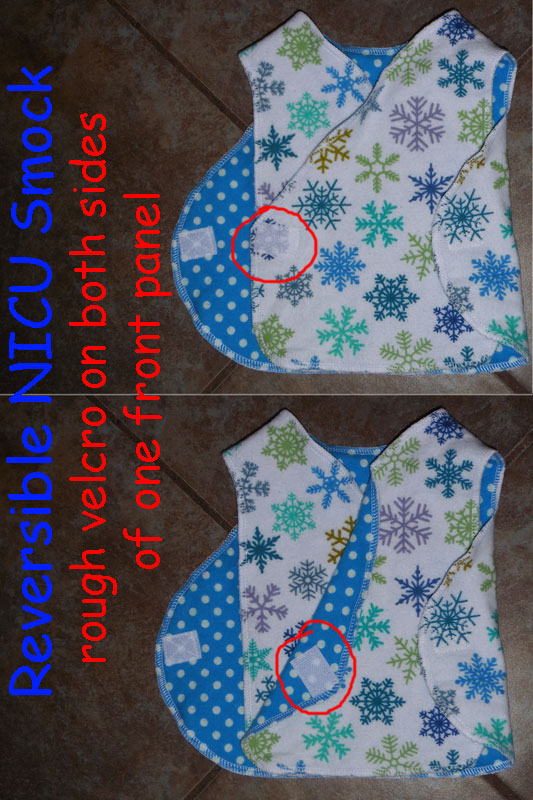
The reversible version of the NICU Smock will be constructed just like the lined version above until it’s time to put on the Velcro. The soft side of the Velcro will be sewn to the wrong side of the back piece. To make it reversible, you will attach the rough side of the Velcro to both sides of one of the front panels (see the red circles above for example). When put on the baby, the non-Velcro panel will be laid down on his/her chest first followed by the Velcro front panel and then the sides of the back will be wrapped up to secure the Velcro (like the right side of the smock in the above pictures).
If you’re looking for way to give back, sewing up and donating a stack of NICU Smocks is a quick and easy idea. I think I’m going to pick up some more flannel (JoAnn’s usually has great deals on flannel after Thanksgiving) and have my kids help me sew up some more smocks to donate locally. If you’re interested, but don’t have a local NICU, feel free to contact one of the organizations that I linked at the beginning of this post.
Happy Sewing ~ Joelle
Leave a Reply