I was stitching away on my latest mash-up of the California Peplum with the Four Seasons Cardigan sleeves, when it hit me that it would be super-cute to add drawstring ties to the elastic waistline. I quickly grabbed my camera so I could show how I made this super-easy hack.

I decided to add one faux drawstring tie on each side, just in front of the side seams. I considered doing just one tie in the center front, but was afraid that it might lead to a maternity look when combined with my empire level waistline (I moved my waistline up about 3 inches from the pattern markings) … and that’s a look I’m not aiming for at this point in my life. Haha!
Adding faux drawstring ties to the California’s elastic waistline is super easy, but changing it to an actual drawstring waistline would be even easier (only one set of openings and no elastic!). I chose to keep the elastic and just put in the decorative ties for two reasons. The first is that I wanted to be able to stitch the bows so they couldn’t come untied (which wouldn’t be a good idea for a full drawstring waist that would need to be untied and loosened to put on over my head/shoulders). Secondly, I wanted to retain the comfort of an elastic waistline rather than having a drawstring not stretching when I wore it.
Okay, here we go:
First, sew up your California Dress or Peplum as written in the pattern (or mash it with the Four Seasons Cardigan sleeves like I did this time) until you’re ready to sew the elastic waistline casing. Instead of sewing the whole casing closed leaving ony one spot to thread elastic in, you’re going to leave more than one opening.
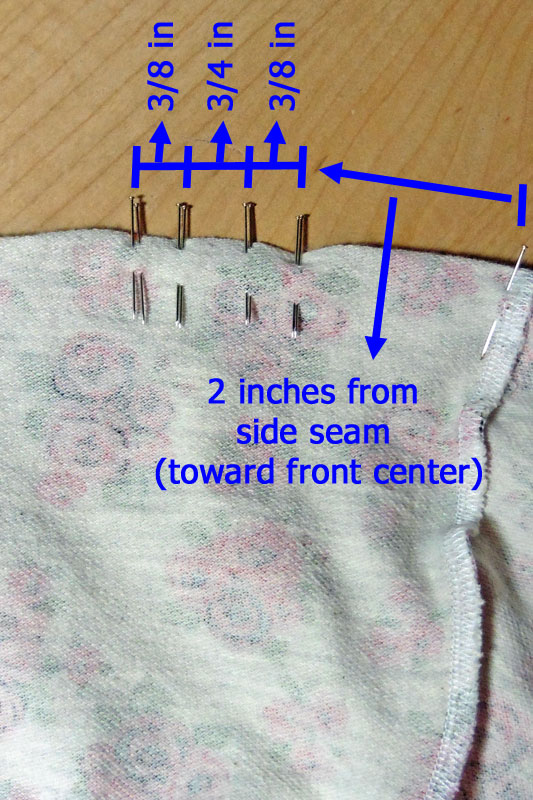
I wanted my ties off to each side (to avoid looking like a pregnant belly bow, haha), so I placed them on the front bodice 2 inches away from each side seam. As you can see in the above left photo, I measured from the side seam 2 inches and put pins (putting 2 pins together is always how I remind myself to stop sewing and leave a gap, so that’s why I double-pinned each measurement). I then measured 3/8 inch more and pinned, measured 3/4 inches more and pinned, and measured a final 3/8 inches and pinned. Whew! Then I repeated the measuring and pinning in front of the other side seam.**
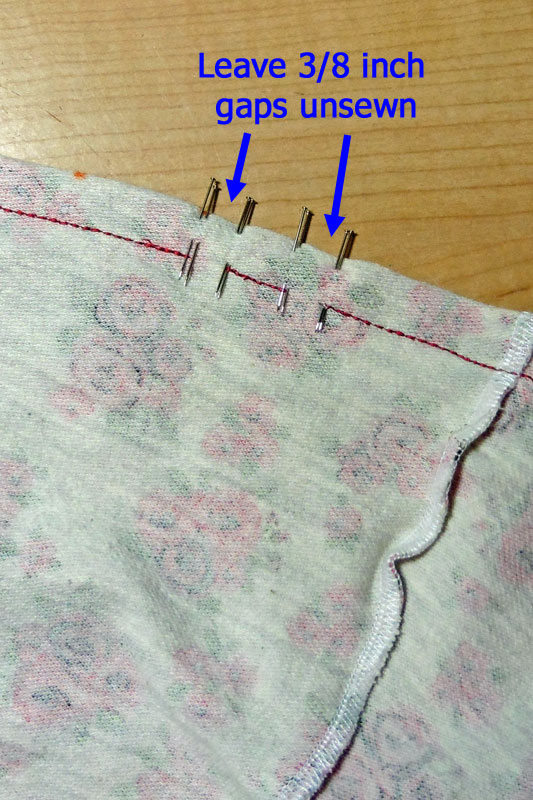
I picked out a narrow 1/4 wide satin ribbon, so for each tie I left two 3/8″ gaps unsewn. If using a wider ribbon or thicker cording for your drawstring ties, you’ll want to leave gaps unsewn slightly wider than your ribbon/cord.
I started by sewing across the 3/4 inch measurement, making sure to backstitch at each end. Then, starting at the outer edge of one 3/8 inch measurement, I sewed the casing until I reached another set of pins (marking a stopping point for another gap). Leaving all four of my 3/8 inch measurement gaps (two for each tie) unsewn, I continued to sew the rest of the casing, making sure to backstitch at every start and stop. I hope I’m explaining this part well. You can refer to my above right photo to see how I left two gaps for each of my drawstring ties.**
** If you want to turn the elastic waistline into a full drawstring waist, you should only do one “set” of gaps. Then you’ll skip the elastic and thread your drawstring into the right gap and go around the waistline until it comes out the left gap, so you can tie them together when you wear your California.
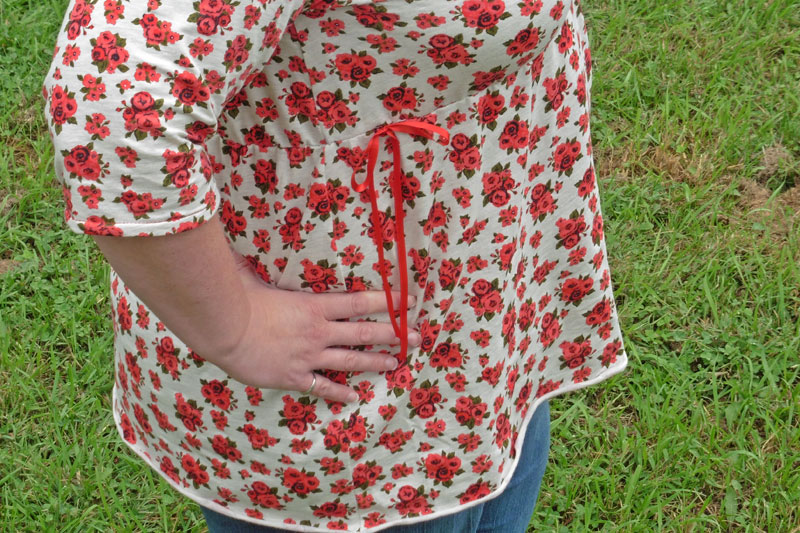
For my faux drawstring ties, I first threaded my elastic into the casing through one of the gaps just as in the pattern. I then threaded my ribbon into one left gap and out the right gap, tying it around the 3/4 inch sewn portion and repeated for the tie on the other side.
I used approximately 30 inches of ribbon for each of my ties. Once I had the bows just as I wanted them, I put a few stitches through the middle of the bow to keep it tied and I used a lighter to heat seal the ribbon ends (by carefully melting them just a bit).

I’m happy to report that my ties looked cute and stayed put while wearing all day and came out of the washer and dryer looking just as good as when I first tied them!
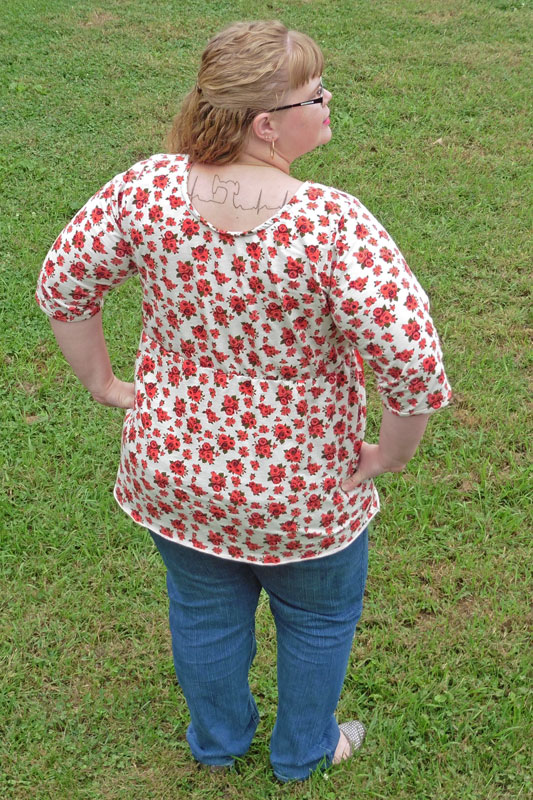
I’m excited to wear my new top as the weather cools off this fall. It was feeling quite fall-ish last week, with night temperatures falling into the 40 degree range, but tonight the low is supposed to stay up around 70*F. I’m ready for to it cool off again!
Happy Sewing!! ~ Joelle
Leave a Reply