Like many of my friends with more then one little girl the love to dress them coordinating (similar but still different) at times. It is often easier when they at in baby and toddler sizes, but gets harder when the move on to the bigger sizes.
For this reason I often get snails about converting or upcycling them to fit the bigger or smaller sister. The 2 most common requests are to turn big girl shirts into little girl dresses and then turning little girl dresses into bigger girl skirts!
The dresses to skirts are super simple often taking under 1 hour and reuses the original hem & the side seams which is why I wanted to share it with you today. This is also a great way to extend the wear out of dresses that the bodices have gotten to small as well as save dresses that have gotten the tops ruined but the skirt is still in great shape!
First off you need to measure from the armpit or bodice line (which ever is closest to the hem) to make sure you have a long enough dress to make an appropriate length skirt. Don’t forget that you will need to add 3/4″-1″ for the elastic casing. Also make sure it is wide enough to go over the hips of the older girl you are making it for. If these measurements are good you are ready to get started!
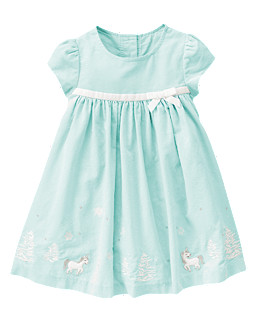
This is the Gymboree dress in a size 5t that I will be turning into a 5/6 skirt for my friends daughter that wears a size 6 because of her height.
SUPPLIES:
Dress to be converted/upcycled
Coordinating thread
1/2″ elastic cut to the waist measurement of the older girl
Stick pins
2 safety pins
Iron (I often don’t need this if I pin well)
STEP 1:
Carefully cut the bottom of the dress off the bodice. You will end up with a bodice like this as well as the bottom of the dress that looks like a wide skirt now (sorry I wasn’t good at taking pictures today)

STEP 2:
Clean up your cut edge and create a 5/8″ elastic casing. You can do this 2 ways…
A.) If you have a server just serge the raw edge and fold it inside 3/4″ all the way around (pin or press) and sew 5/8″ from the edge almost all the way around leaving a 1″ opening in the center back.
B.) First fold your raw edge 1/4″ down and press, then follow the rest of step A starting with folding it down again, this time 3/4″.
I forgot to take pictures of this but there are great photo tutorials HERE & HERE.
STEP: 3
Attach 1 safety pin to each end of your elastic… pin one end just below the opening in the waistband. Then use the pin on the other end to insert it in the casing all the way back to the opening. Again you can find some pictures of this if you can’t picture it in your head HERE.
STEP 4:
Pull both the elastic ends out a bunch air you can overlap them 1/2″ and then stitch together like pictured. Then evenly distribute it around pulling the elastic entirely inside the casing. This will leave you with a finished waist approx. 1/2″ smaller then the actual waist which is what you want for a good fit.

STEP 5:
If you are going to reuse the tag or insert your own (I did both) this is the time to so! Pin it over or under the casing opening and sew it on while closing the opening at the same time.
If you don’t just pin the opening closed and sew it shut.
For the best results remember to pull the elastic making the fabric flat while sewing closed.

5 SIMPLE STEPS AND YOU ARE DONE!

8 Responses
Pam Pike
A clever way to reuse. Looks great.
April @ sewing novice
Thanks for linking to my site! I’m glad you found my tutorial helpful enough to tell others about it!
Rachel Sue
This is such a great idea! I would love to feature it on Reduce, Reuse, Upcycle. Feel free to stop by and grab a featured button. Thanks!
Kymy
I would love to be featured on your blog! Just let me know what you need from me & when the post is made live I will add the button to my blog linking it back :).
pam d
Thanks for the great idea. Here’s how mine turned out – http://one-little-woman.blogspot.com/2011/11/refashion-dress-to-skirt.html
Kymy
That turned out great!!!
Steph of Sew Knitty Shop
The pictures aren’t working for me!
Kymy
It looks like they got deleted or moved in my photo hosting account. I will try & find them or take new pictures in the next month (my computer died recently & hubby hasn’t had time to get my pictures off it yet)