I have to say I love .pdf patterns in the sense that you can get them right away & get to work. That being said because of it anyone can design & put there work out there to share, but it also means that you are more likely to run into sizing & fit issues. One of my current favorite patterns from Olabelhe that I used to make the twins Easter dresses. I have used her patterns in the past & really do love them because they are cute & simple. One issue I have run into though is with the shorter style (more empire-ish) bodices the final fit is great based on the measurements I used (I picked a size 1″ larger finished bodice then the twins chest measurement) that they just don’t open wide enough to get on & off the girls easily. This is why with dresses you buy in store they normally have a placket (a slit below the button holes) in the back. SO I decided that is what I would do!
Because of the way this pattern is set up with one solid back skirt piece I did a little reading & decided a continuous bound placket would be my best bet (similar to the cuff’s of long sleeve dress shirts). The only problem I ran into is I could only find one decent tutorial & it was done in all one solid dark color fabric with matching thread so it is hard to see at times. I gave it a go using a print fabric with a solid color bias tape & a contrasting thread so you can easily see.
I assembled the lined bodice as the instructions stated with the exception of I did not baste the over lapping back pieces in place. For the placket you need your scissors, thread, iron, pins & 9″ long piece of 1/2″ or 3/4″ (I used 1/4″ but you need 1/2″ or 3/4″… what ever the over lap of your button placket is) double fold bias tape.
For 3/4″ tape, if you are making your out of matching fabric you want to cut a strip 9″ X 3″ (9″ X 2″ for 1/2″) & fold it using the method shown here. Honestly since I am not sewing it on a curve I wouldn’t worry about cutting it on the fabric bias, though if you have enough fabric left over you can!
If you want to do bigger then 4″ slit just double that number +1″ and that is how much length of tape you need.
STEP 1: Cut a 4″ slit in the back middle of your fabric…

STEP 2: Open your double fold bias tape & pin (the more the better) it to your slit right sides together. Start at the top of one side working your way down to the point. You want to pull the slit open until it looks like a straight line & continue pinning so it looks like this…
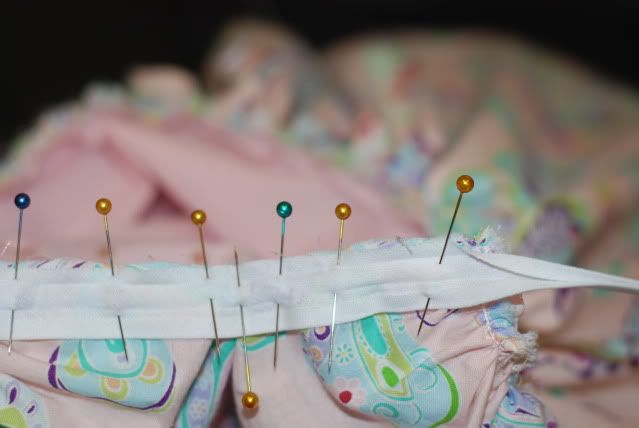
STEP 3: Sew on your top crease closest to the raw edge & check the other side to make sure you got all the fabric before removing pins!
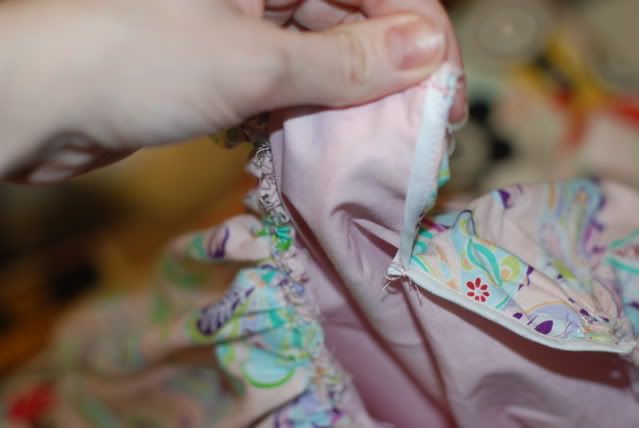
STEP 4: Flip the tape over the seam, pin & sew it down. There is a great video tutorial on how to attache double fold bias tape HERE (we don’t have to fold the end in because it is going in a seam).

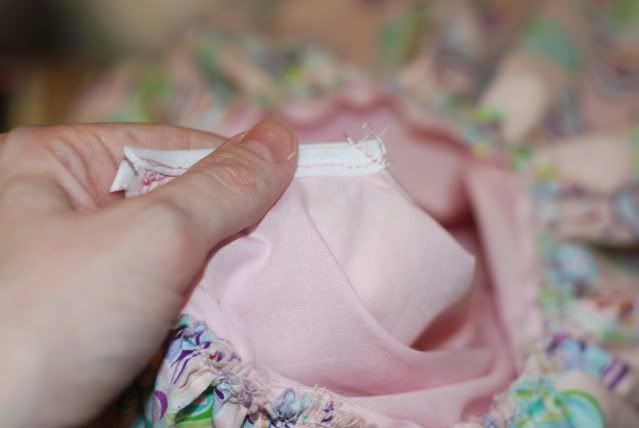
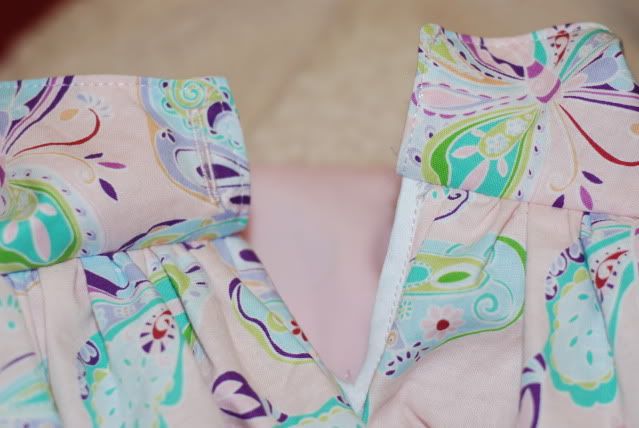
STEP 5: At the bottom corner of the bias tape on the inside of your skirt sew a small line at a 45 degree angle starting at the lowest point up & away like in this picture. It is very small but helps it sit better when closed.
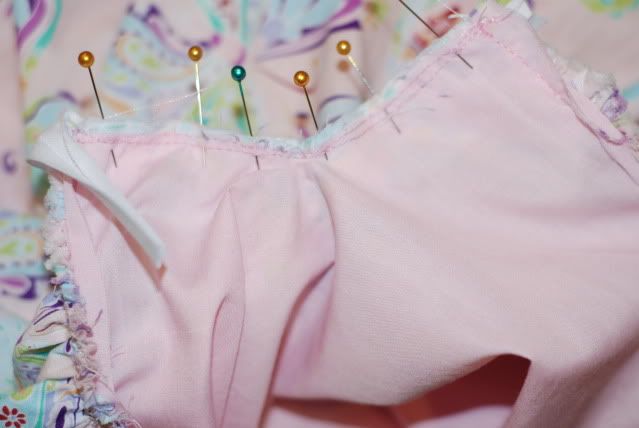
STEP 6: On the side with the BUTTON HOLE you want to fold the bias tape inside & tack down at the very top in the seam allowance with a basting stitch.

STEP 7: Match up the new opening edges with the edge of the bodice pieces attach as usual.

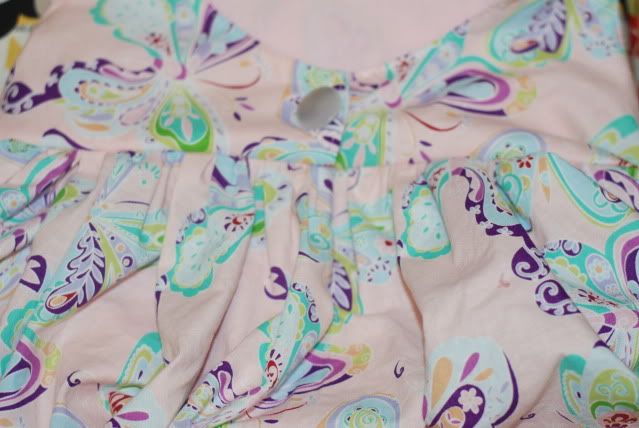
Here is a look at the finished product (I know I put my buttons on the wrong side, but they work fine & look cute, but it gives you an idea).

6 Responses
norma
thanks, i hate to do placket.
Ashley
Awesome tut, but it looks like a lot of work, lol
SAIDEE NICHOLS
Thanks, Kymy, This will be a big help.
Emilie Crea
Thank you so much. Great tutorial. I own ‘Natalie dress’ and several others from same designer. They are all ‘sew’ beautiful. My great-niece is almost 4 and won’t let anyone help her get dressed since she started to walk, so the placket will definitely help.
bernadette
thanks that will help on my granddaughter cause sometimes they are hard to get over her head
Heather
Thank you so much for this tutorial!! I really appreciate it and will be using it often!!