A few EYMM projects involve bias tape, though not many because I know lots of people are intimidated by the application. One of the biggest reasons is the ‘pin and pray’ method of just setting the bias tape over the raw edge and pinning and sewing in place. Here is a quick overview of a better and easier way to apply bias tape!
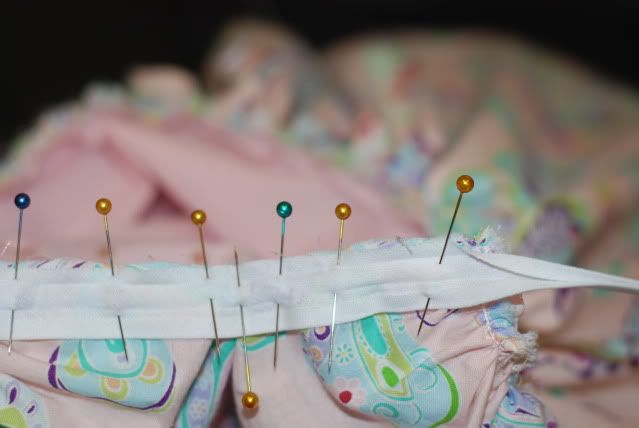
STEP 1: Open your double fold bias tape & pin (the more the better) it to your raw edge, right sides together. Start at the top of one side working across to the other. You will find depending on the shape, that you will need to slightly stretch or ease the tape to get a good fit.
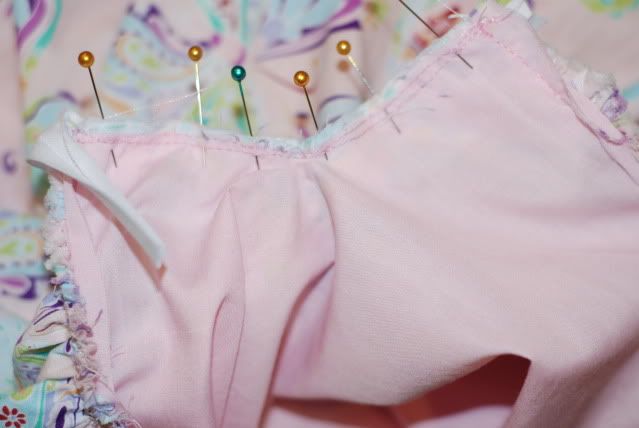
STEP 2: Sew on the top crease, closest to the raw edge & check the other side to make sure you got all the fabric before removing pins!
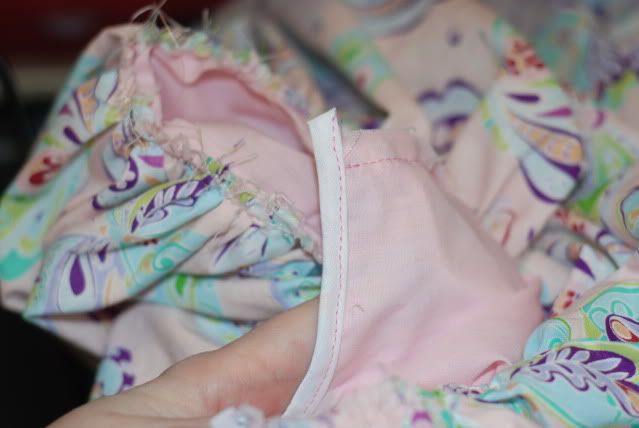
STEP 3: Flip the tape, which is still partially folded, over the seam, pin & sew it down. There is a great video tutorial on how to attache double fold bias tape HERE..
Leave a Reply